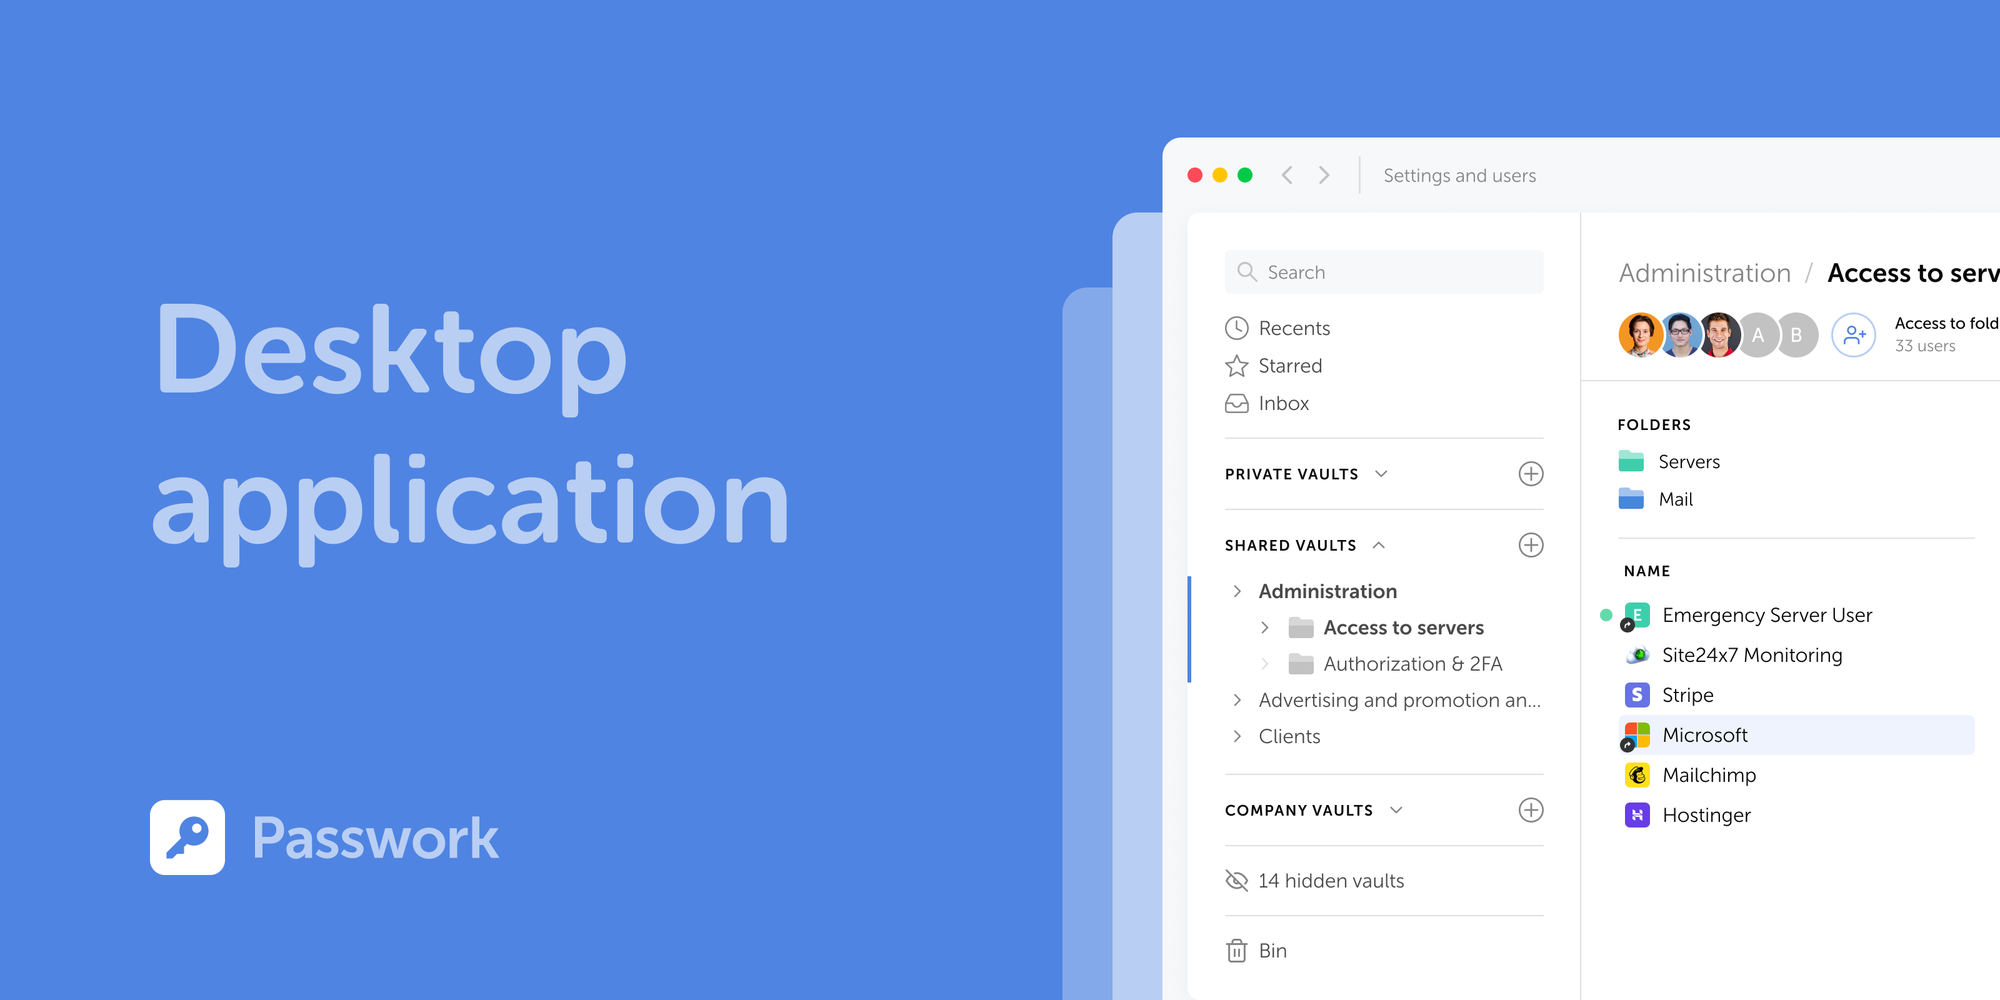
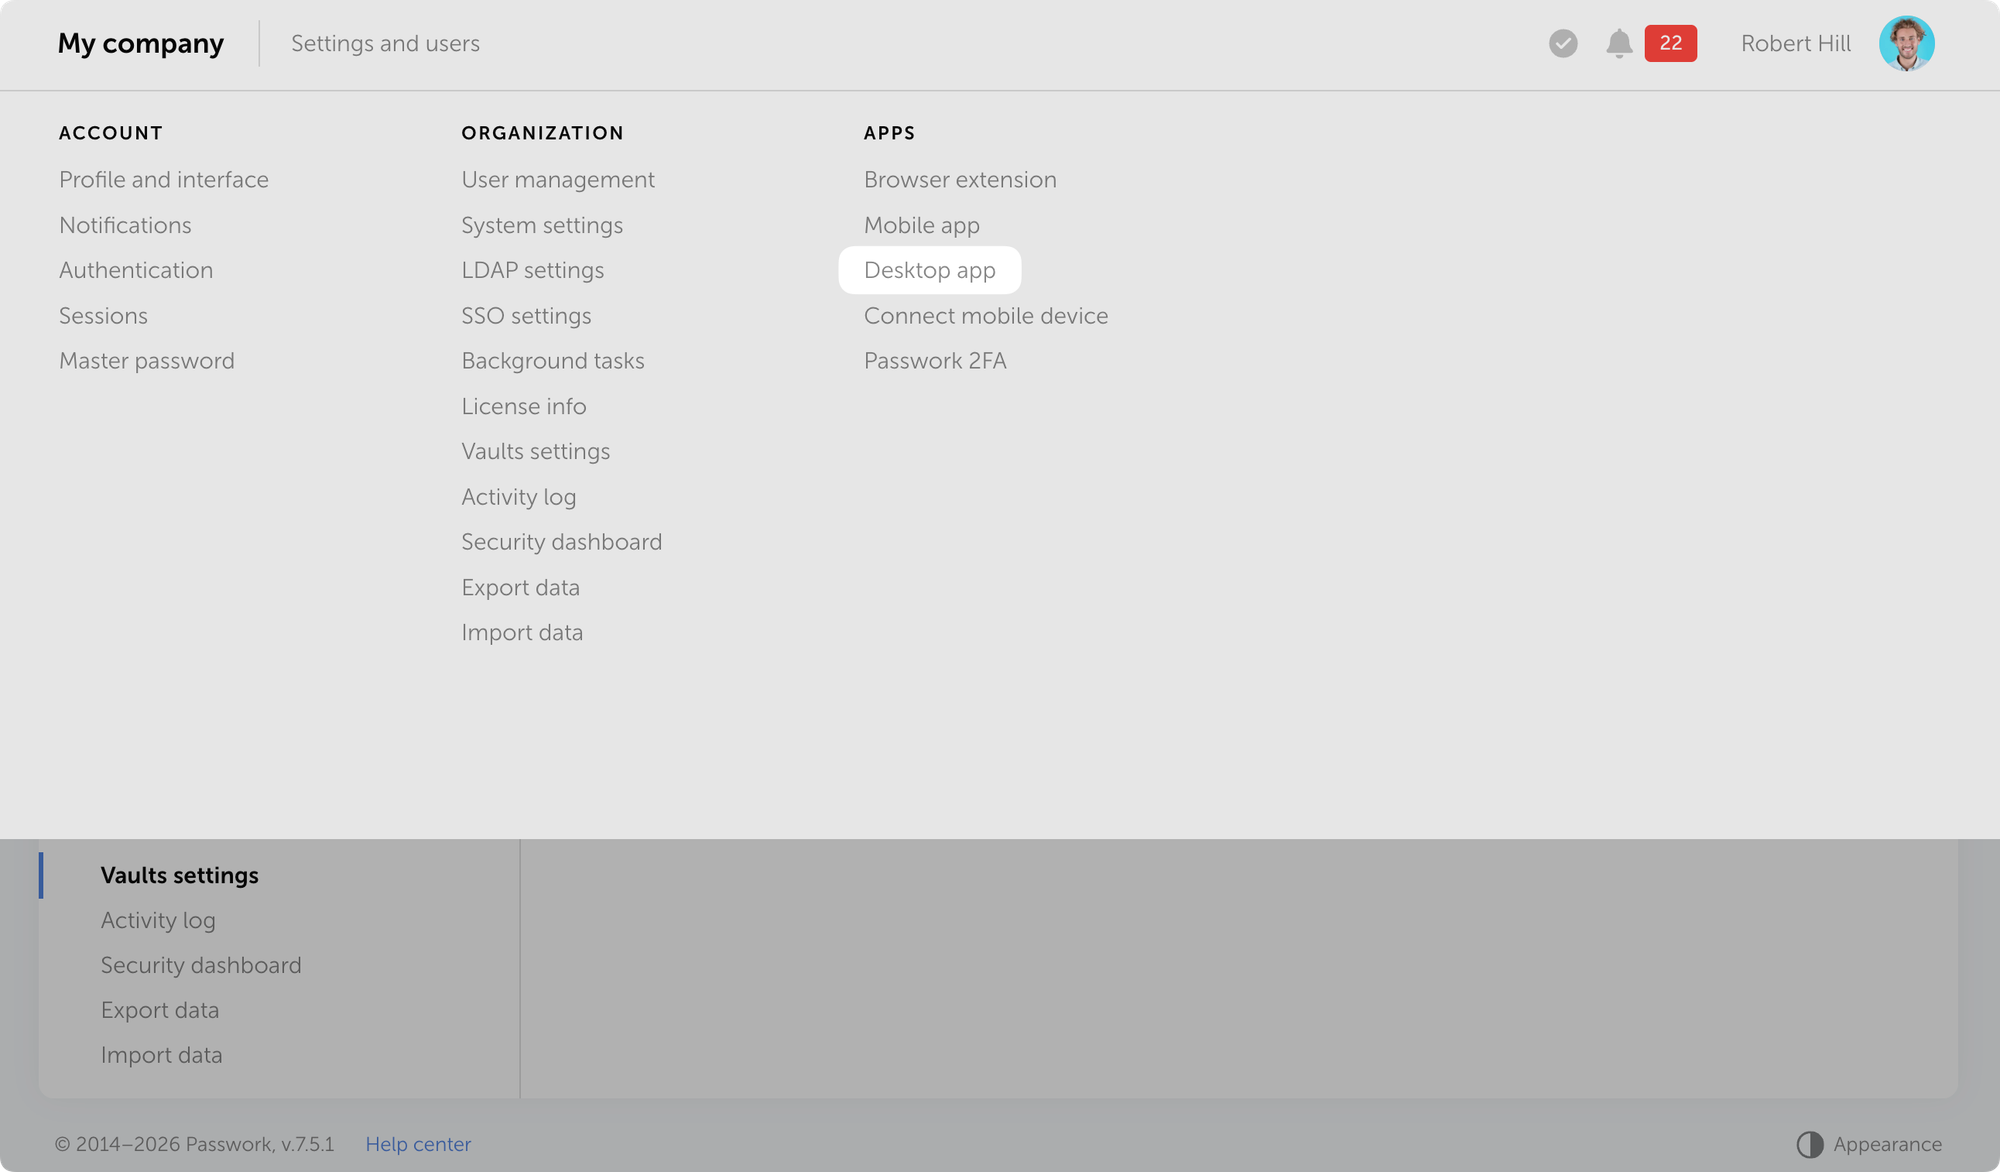
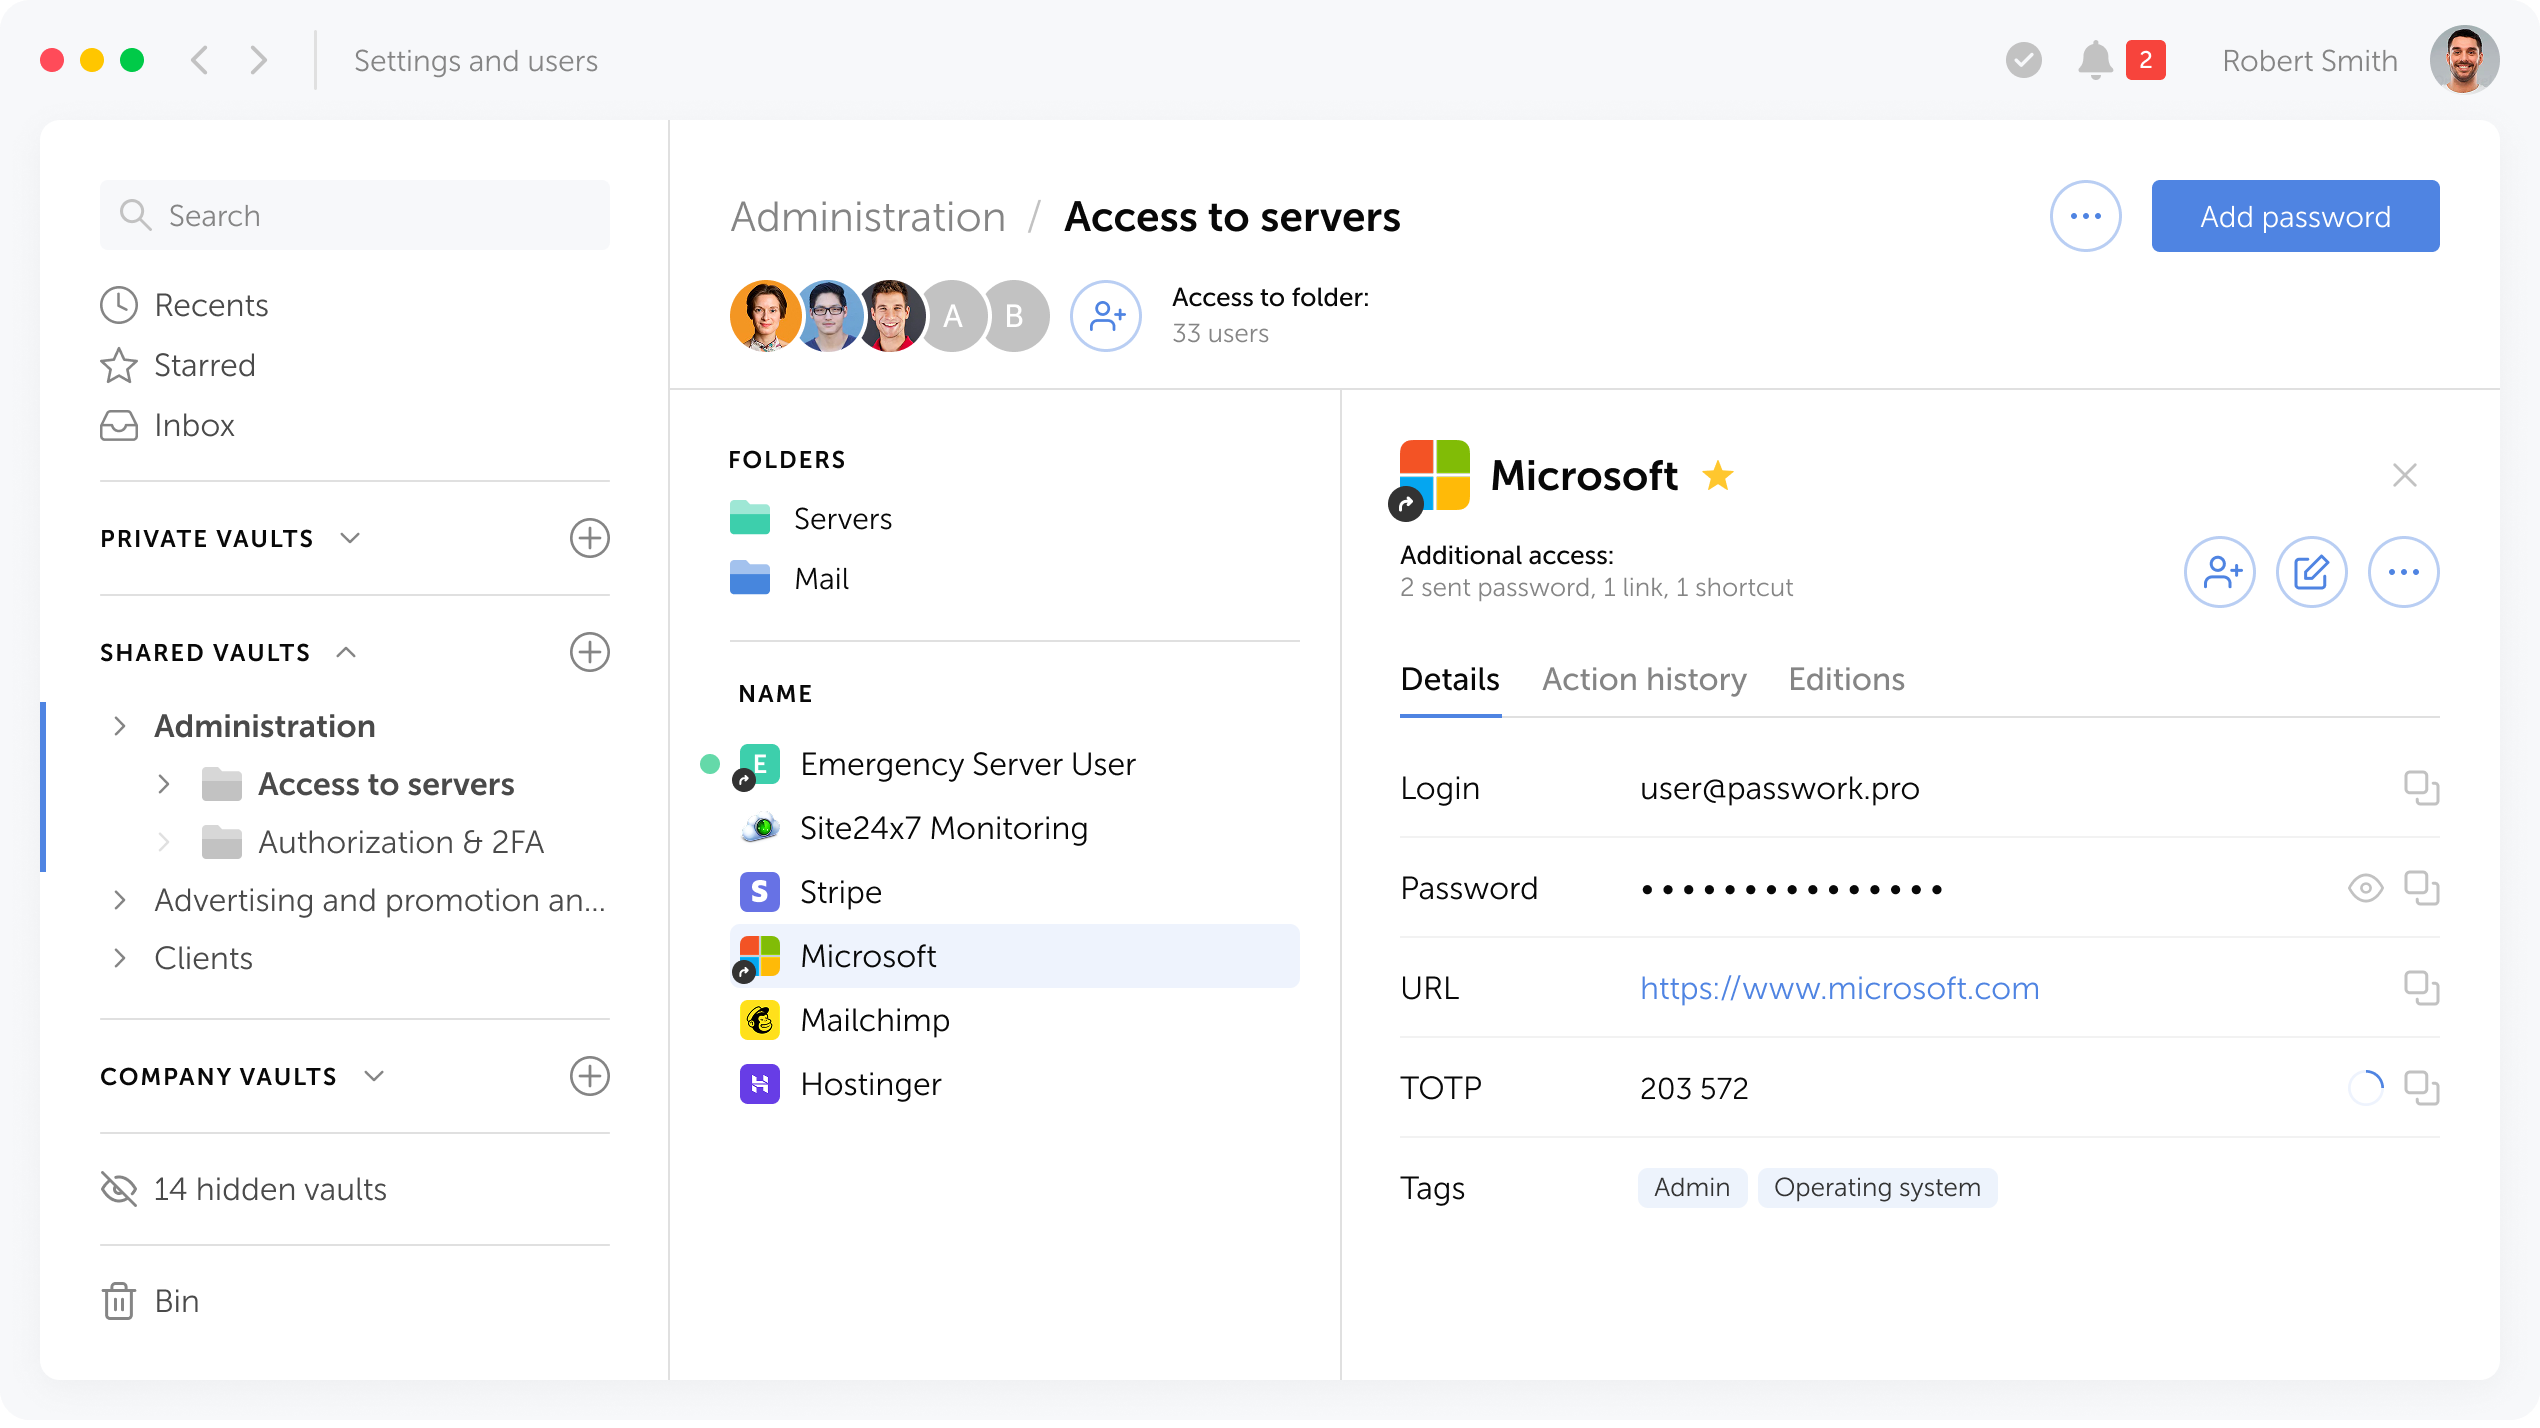
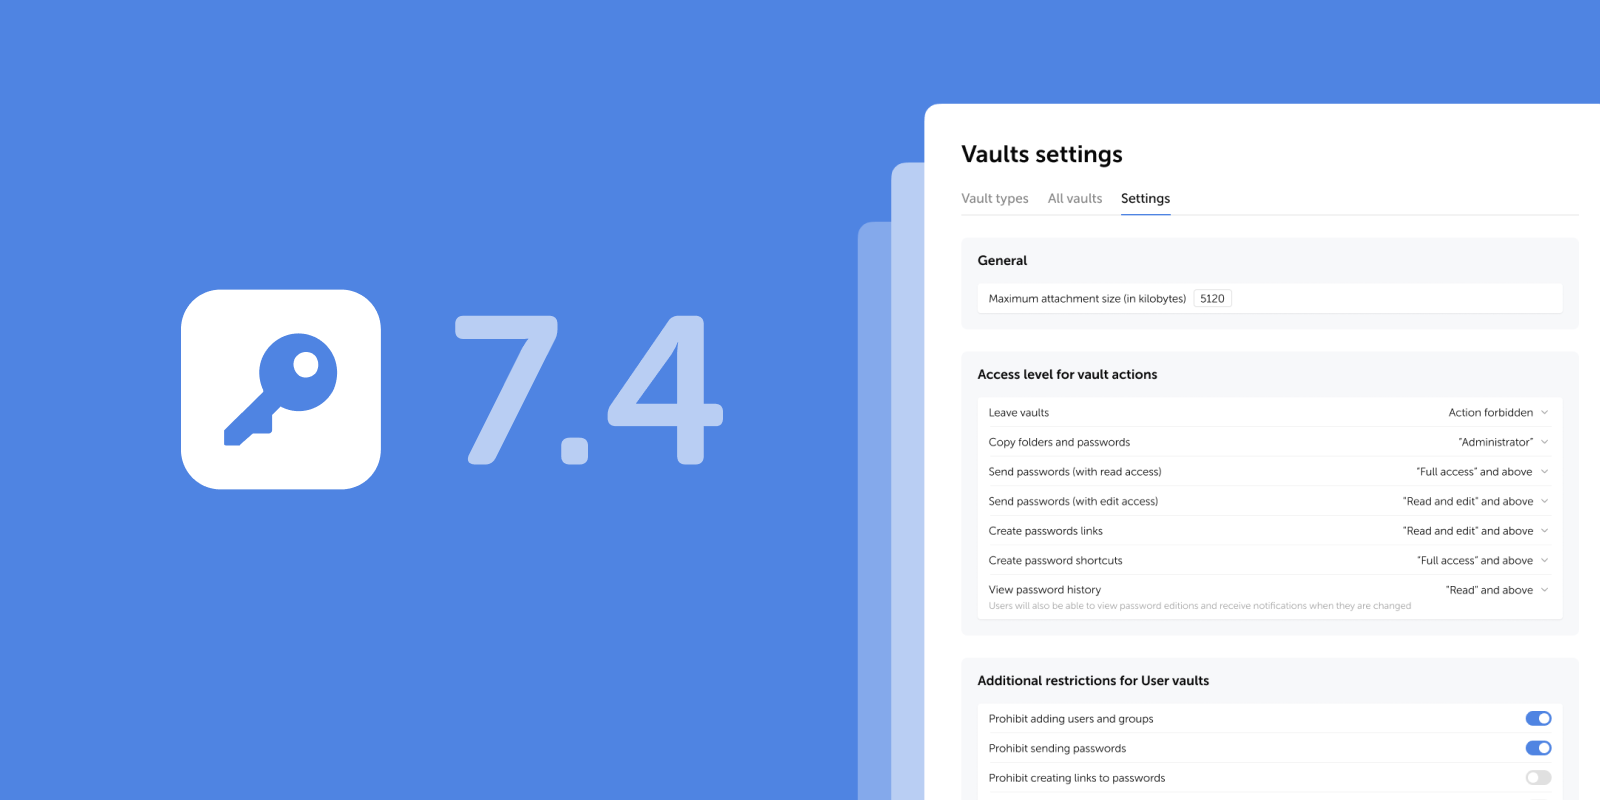
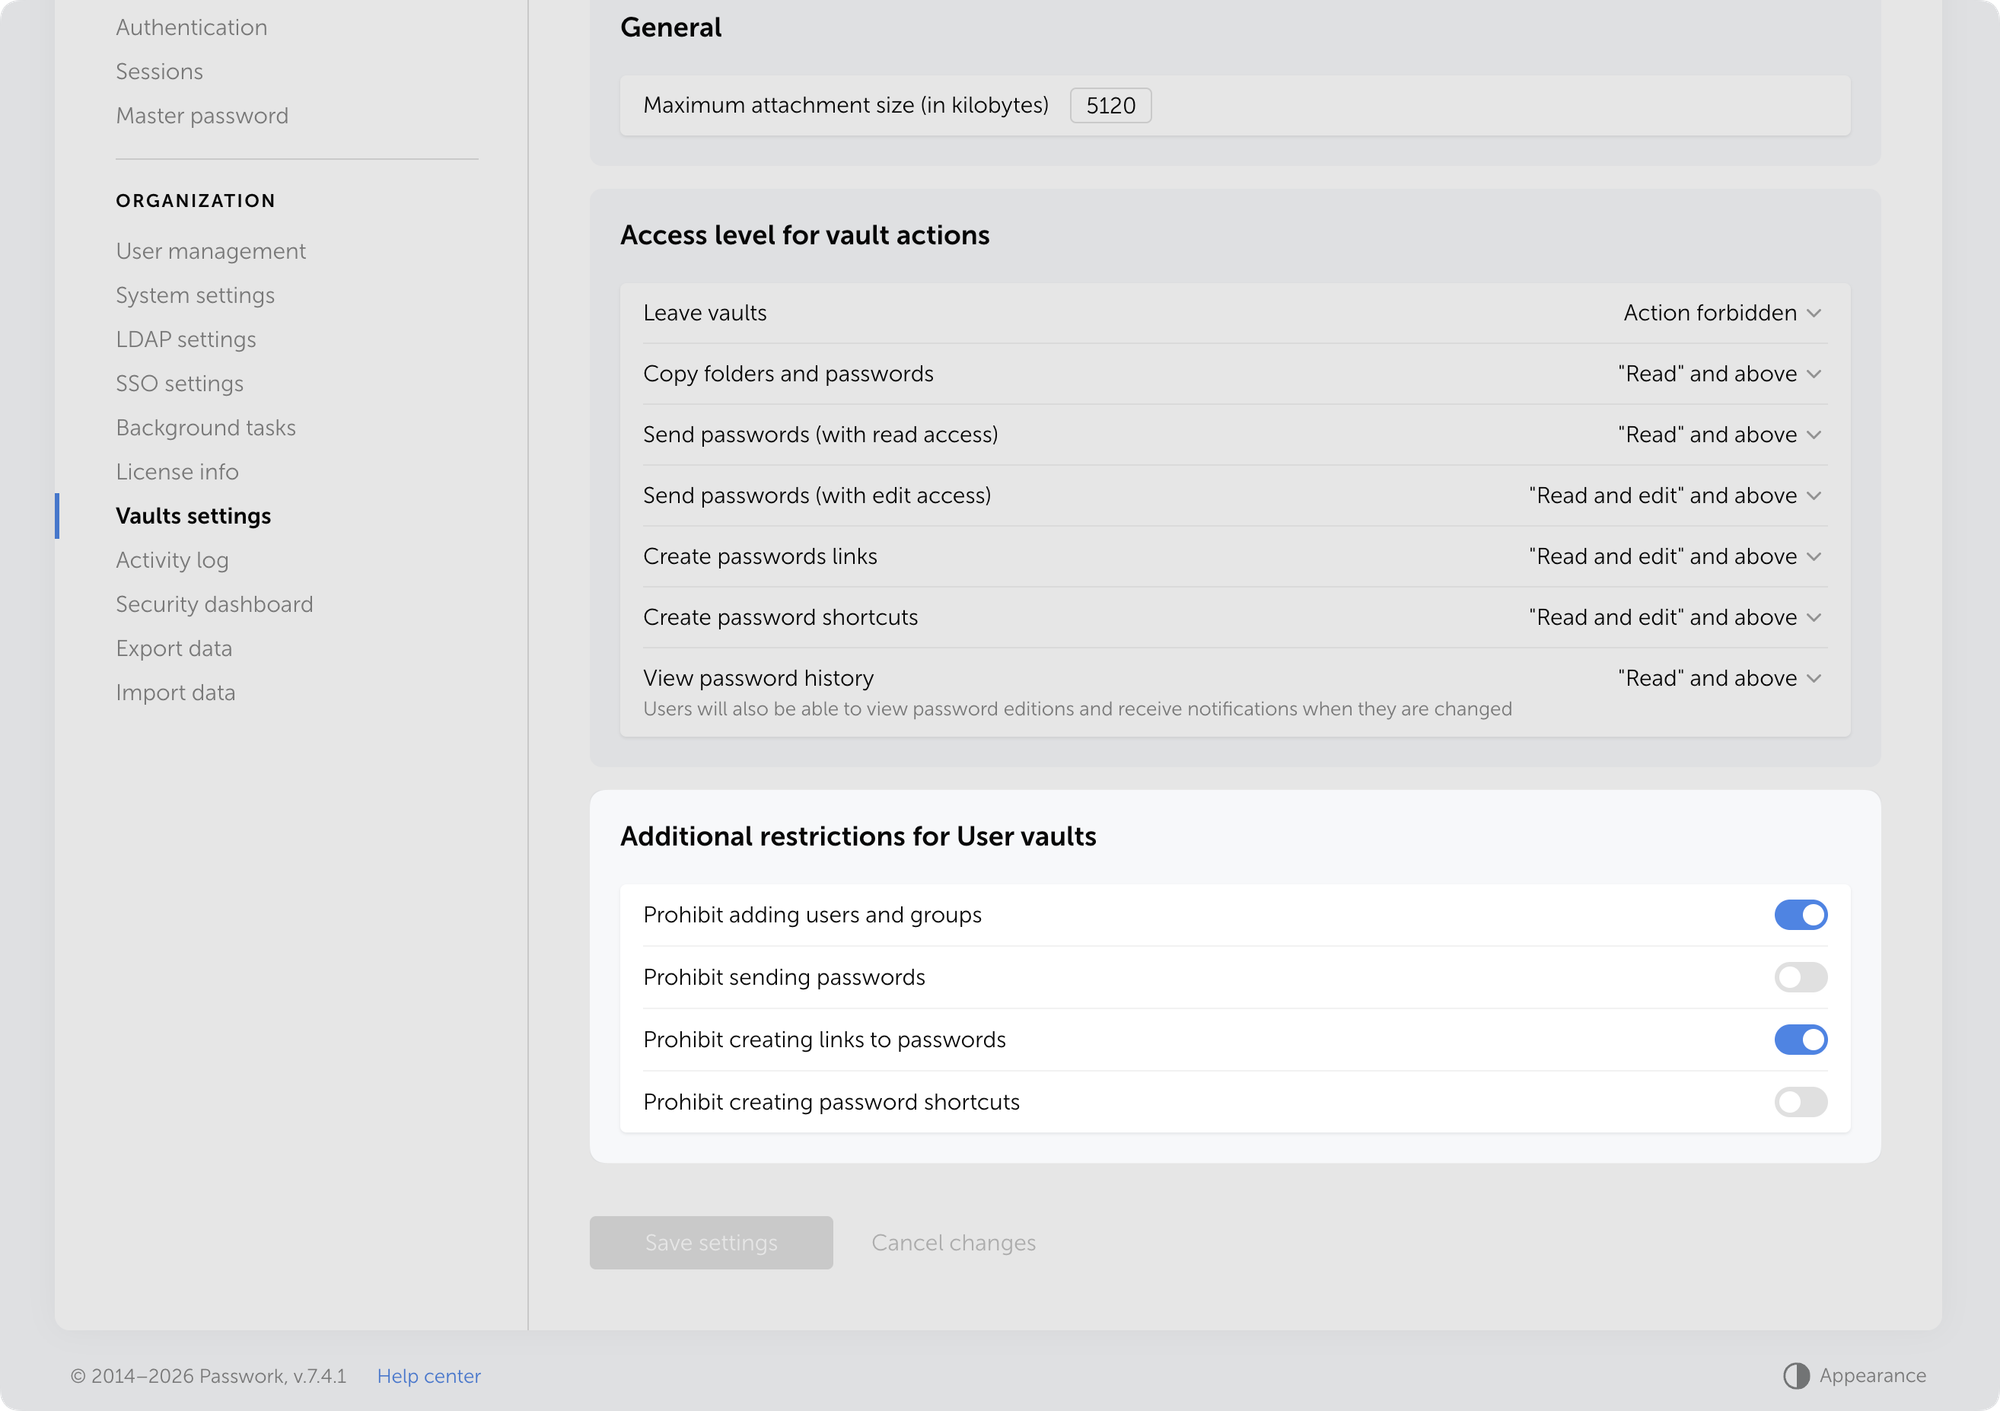
In the new version, we’ve improved TOTP autofill and added error logging to the browser extension. You can now export logs directly from the service worker console and share them with our team — significantly speeding up troubleshooting.
Improved TOTP autofill performance in the browser extension
Added the capability to download error logs through the service worker console using the downloadErrors() command
Fixed an issue where TOTP autofill did not work for items from the Inbox
Fixed an issue where the extension could incorrectly prompt to save or autofill data in some forms not related to authentication
Fixed an issue that could block extension functionality after connecting it
Fixed an issue where notification dates could display incorrectly
Fixed an issue preventing the extension from working in Firefox Incognito mode
Minor bug fixes and performance improvements
⚠️ We updated the extension manifest permissions to enable log downloads. As a result, you may need to re-enable the Passwork extension in Chrome, Firefox, and Edge.
In the new version, we’ve improved TOTP autofill and added error logging to the browser extension. You can now export logs directly from the service worker console and share them with our team — significantly speeding up troubleshooting.
Bring Your Own Device (BYOD) hat sich von einem Arbeitsplatztrend zu einer geschäftlichen Notwendigkeit entwickelt. Bis 2026 werden über 82 % der Unternehmen formelle BYOD-Richtlinien eingeführt haben, wobei mehr als 80 % diesen Ansatz aktiv fördern. Dies spiegelt eine grundlegende Veränderung wider, wie Organisationen Arbeitsplatzflexibilität und Produktivität angehen.
Die Vorteile liegen auf der Hand: Mitarbeiter arbeiten auf Geräten, die sie kennen, IT-Abteilungen reduzieren Hardwarekosten, und Unternehmen gewinnen Talente, die Flexibilität suchen. Doch dieser Komfort bringt Sicherheitsherausforderungen mit sich, die sensible Daten offenlegen, Netzwerke kompromittieren und Compliance-Probleme verursachen können.
Dieser Leitfaden führt Sie durch die Sicherheitslandschaft von BYOD — vom Verständnis der Kernrisiken bis zur Implementierung von Frameworks, die Ihre Organisation schützen, ohne die Autonomie der Mitarbeiter zu opfern.
BYOD verstehen und seine Sicherheitsimplikationen
BYOD ermöglicht es Mitarbeitern, persönliche Smartphones, Tablets und Laptops für Arbeitsaufgaben zu nutzen. Diese Geräte greifen auf Unternehmens-E-Mails, Cloud-Anwendungen, interne Netzwerke und sensible Daten zu — und befinden sich dabei außerhalb der traditionellen IT-Kontrolle.
Der aktuelle Stand von BYOD in modernen Arbeitsumgebungen
Organisationen stehen nun vor der Realität, dass persönliche Geräte integraler Bestandteil des täglichen Betriebs sind und keine Ausnahmen von der Richtlinie darstellen.
Mitarbeiter erwarten nahtlose Übergänge zwischen Zuhause und Büro und nutzen Geräte, die zu ihren Arbeitsabläufen passen. IT-Abteilungen haben sich angepasst, indem sie Sicherheitsarchitekturen aufgebaut haben, die diese Flexibilität ermöglichen, anstatt sie zu blockieren.
Warum Organisationen BYOD einführen
Kostensenkung treibt viele BYOD-Programme an. Unternehmen sparen bei der Hardwarebeschaffung, Wartung und Austauschzyklen. Mitarbeiter tragen die anfänglichen Gerätekosten, während Organisationen in Sicherheitsinfrastruktur und Management-Tools investieren.
Die Mitarbeiterzufriedenheit verbessert sich, wenn Mitarbeiter vertraute Geräte nutzen. Lernkurven entfallen, die Produktivität steigt und die Arbeitszufriedenheit nimmt zu. Dies ist wichtig in wettbewerbsintensiven Arbeitsmärkten, wo Arbeitsplatzflexibilität Einstellungsentscheidungen beeinflusst.
Die betriebliche Agilität steigt, da Mitarbeiter von überall auf Arbeitsressourcen zugreifen können. Die Geschäftskontinuität verbessert sich, weil Mitarbeiter nicht an unternehmenseigene Geräte gebunden sind. Bei Störungen läuft der Betrieb mit minimaler Unterbrechung weiter.
Hauptsicherheitsherausforderungen bei BYOD
Mangelnde Standardisierung. Persönliche Geräte unterscheiden sich in Betriebssystemen, Sicherheitspatch-Levels und Konfigurationen, was zu inkonsistenten Sicherheitslagen führt.
Sichtbarkeitslücken. IT-Teams haben Schwierigkeiten, den Gerätezustand, installierte Apps und Sicherheitseinstellungen zu überwachen, wodurch blinde Flecken in der Sicherheitslandschaft entstehen.
Herausforderungen bei der Richtliniendurchsetzung. Die Balance zwischen Sicherheitsanforderungen und Mitarbeiterprivatsphäre kann zu Widerstand oder Schwachstellen führen.
Probleme beim Lebenszyklus-Management. Die Verwaltung der Sicherheit, wenn Mitarbeiter Geräte upgraden, Plattformen wechseln oder die Organisation verlassen, erfordert sorgfältige Planung und technische Fähigkeiten.
Wichtige BYOD-Sicherheitsrisiken und Schwachstellen
Datenverlust und -abfluss in BYOD-Umgebungen
Unternehmensdaten befinden sich neben persönlichen Informationen auf BYOD-Geräten. Mitarbeiter könnten unbeabsichtigt vertrauliche Dateien über persönlichen Cloud-Speicher, Messaging-Apps oder E-Mail-Konten teilen. Die Grenze zwischen beruflicher und privater Nutzung verschwimmt und schafft Möglichkeiten für Daten, der Unternehmenskontrolle zu entgleiten.
Verlorene oder gestohlene Geräte stellen unmittelbare Sicherheitsvorfälle dar. Ohne angemessene Schutzmaßnahmen erhält jeder, der auf das Gerät zugreift, Zugang zu Unternehmensressourcen. Das Risiko verstärkt sich, wenn Geräte grundlegende Schutzmaßnahmen wie Bildschirmsperren oder Verschlüsselung nicht haben.
Malware- und Phishing-Bedrohungen, die auf persönliche Geräte abzielen
Persönliche Geräte haben oft schwächere Sicherheit als Unternehmensgeräte. Mitarbeiter könnten Sicherheitsfunktionen aus Bequemlichkeit deaktivieren, Apps aus nicht vertrauenswürdigen Quellen installieren oder Software-Updates ignorieren. Diese Verhaltensweisen schaffen Einfallstore für Malware.
Phishing-Angriffe nutzen die persönliche Natur von BYOD aus. Angreifer senden überzeugende Nachrichten an persönliche E-Mail- oder Messaging-Apps, wohlwissend, dass Mitarbeiter dasselbe Gerät für die Arbeit nutzen. Einmal kompromittiert, bietet das Gerät Zugang zu Unternehmensnetzwerken und -daten.
Veraltete Geräte und ungepatchte Schwachstellen
Mitarbeiter kontrollieren die Update-Zeitpläne auf persönlichen Geräten. Kritische Sicherheitspatches könnten Tage oder Wochen warten, während Benutzer Updates aus Bequemlichkeit verzögern. Während dieses Zeitfensters bleiben bekannte Schwachstellen ausnutzbar.
Ältere Geräte stellen zusätzliche Herausforderungen dar. Hersteller stellen irgendwann die Unterstützung von Geräten mit Sicherheitsupdates ein, wodurch diese dauerhaft anfällig bleiben. Wenn Mitarbeiter diese Geräte weiterhin für die Arbeit nutzen, führen sie ungepatchte Risiken in Ihre Umgebung ein.
Schatten-IT und nicht genehmigte Anwendungen
Mitarbeiter installieren Anwendungen, die unmittelbare Probleme lösen, ohne Sicherheitsimplikationen zu berücksichtigen. Dateifreigabedienste, Kollaborationstools und Produktivitäts-Apps könnten IT-Genehmigungsprozesse vollständig umgehen.
Diese nicht genehmigten Anwendungen verfügen oft nicht über angemessene Sicherheitskontrollen, Compliance-Zertifizierungen oder Integration mit Unternehmenssicherheitssystemen. Daten fließen durch Dienste, die Ihr Sicherheitsteam weder überwacht noch schützt.
Vermischung von privater und geschäftlicher Nutzung
Eine der häufigsten Schwachstellen in BYOD-Umgebungen ist das unsachgemäße Management von Anmeldedaten. Mitarbeiter speichern häufig Unternehmenspasswörter aus Bequemlichkeit in persönlichen Browser-Schlüsselbunden oder unverschlüsselten Notizen. Währenddessen existiert ein Unternehmens-Passwort-Manager separat auf ihrem Gerät, mit eigener Verschlüsselung, Zugangskontrolle und biometrischem Schutz. Mit Passwork greifen Mitarbeiter über eine mobile App auf Unternehmenstresore zu und halten Arbeitsanmeldedaten vollständig von persönlichen Daten getrennt.
Ein effektives BYOD-Sicherheitsframework aufbauen
Eine umfassende BYOD-Sicherheitsrichtlinie erstellen
Ihre BYOD-Richtlinie definiert akzeptable Nutzung, Sicherheitsanforderungen und Verantwortlichkeiten. Sie sollte die Geräteberechtigung, erforderliche Sicherheitsmaßnahmen, zulässige Anwendungen und Datenverarbeitungsverfahren behandeln.
Abschnitte zu Umfang und Berechtigung klären, welche Geräte für BYOD-Programme qualifiziert sind und welche Rollen teilnehmen können. Nicht jede Position erfordert BYOD-Zugang, und nicht jedes Gerät erfüllt die Mindestsicherheitsstandards.
Sicherheitsanforderungen müssen spezifisch und durchsetzbar sein. Definieren Sie obligatorische Funktionen wie Verschlüsselung, Bildschirmsperren, biometrische Authentifizierung und automatische Updates. Spezifizieren Sie verbotene Aktivitäten wie Jailbreaking oder Rooten von Geräten.
Die Datenklassifizierung leitet Mitarbeiter beim Umgang mit verschiedenen Informationstypen an. Unterscheiden Sie klar zwischen öffentlichen, internen, vertraulichen und eingeschränkten Daten. Definieren Sie, welche Datentypen über BYOD zugänglich sind und welche unternehmenseigene Geräte erfordern.
Incident-Response-Verfahren beschreiben die Schritte, die Mitarbeiter unternehmen müssen, wenn Geräte verloren gehen, gestohlen werden oder kompromittiert sind. Fügen Sie Meldefristen, Kontaktinformationen und Erwartungen zur Zusammenarbeit bei Untersuchungen hinzu.
Geräte- und Softwareanforderungen definieren
Betriebssystemanforderungen. Nur Geräte mit aktiv unterstützten Betriebssystemen sollten in BYOD-Programmen zugelassen werden. Veraltete Systeme müssen ausgeschlossen werden.
Obligatorische Sicherheitsfunktionen. Geräte müssen Verschlüsselung, Secure Boot und hardwaregestützte Anmeldedatenspeicherung beinhalten. Stellen Sie sicher, dass diese Funktionen durch Richtlinien durchgesetzt werden.
Genehmigte Anwendungen. Stellen Sie Mitarbeitern eine Liste sicherer, genehmigter Apps und Alternativen zu nicht genehmigten Tools zur Verfügung, um die Compliance zu fördern.
Technische Lösungen für BYOD-Sicherheit
Lösung
Beschreibung
Mobile Device Management (MDM)
Setzt Sicherheitsrichtlinien durch, verwaltet Anwendungen und bietet Remote-Funktionen einschließlich Gerätelöschung
Mobile Application Management (MAM)
Konzentriert sich auf den Schutz spezifischer Anwendungen statt ganzer Geräte und adressiert damit Datenschutzbedenken
Unified Endpoint Management (UEM)
Erweitert den Schutz auf alle Gerätetypen mit konsistenter Richtliniendurchsetzung
Netzwerkzugang sichern und Compliance gewährleisten
Persönliche Geräte sollten nicht denselben Netzwerkzugang wie Unternehmensgeräte haben. Implementieren Sie Netzwerksegmentierung und strenge Zugriffskontrollen, damit BYOD-Benutzer nur auf die notwendigen Ressourcen zugreifen können. Fordern Sie ein VPN für den Fernzugriff, um den Datenverkehr zu verschlüsseln und Einstiegspunkte zu kontrollieren. Kontinuierliche Netzwerküberwachung sollte ungewöhnliche Aktivitäten erkennen und Warnmeldungen auslösen.
Diese Kontrollen helfen Organisationen auch, regulatorische Anforderungen wie HIPAA, DSGVO und andere zu erfüllen. Eine robuste Netzwerkstrategie unterstützt Datenresidenzregeln und gewährleistet ordnungsgemäße Protokollierung und Berichterstattung für Audits, einschließlich Zugriffsaufzeichnungen und Vorfallsverfolgung.
Best Practices für die Implementierung von BYOD-Sicherheit
Sicherheitsrichtlinien scheitern ohne die Zustimmung der Mitarbeiter. Konzentrieren Sie Schulungen auf praktische Compliance und reale Bedrohungen:
Onboarding zuerst: Führen Sie BYOD-Richtlinien, Datenschutzgrenzen und Vorfallsmeldungen ein, bevor Mitarbeiter Geräte anmelden.
Kontinuierliche Sensibilisierung: Teilen Sie regelmäßig relevante Bedrohungsinformationen und heben Sie aktuelle Vorfälle hervor, um Sicherheit präsent zu halten.
Szenariobasiertes Lernen: Schulen Sie Mitarbeiter mit branchenspezifischen Beispielen — wie gezielte Phishing-Versuche oder gängige Social-Engineering-Taktiken.
BYOD-Sicherheitsrisiken überwachen und verwalten
Proaktive Überwachung verhindert, dass kleine Probleme zu Sicherheitsverletzungen eskalieren:
Kontinuierliche Verfolgung: Überwachen Sie die Geräte-Compliance, markieren Sie veraltete Software und identifizieren Sie verdächtige Aktivitäten in Echtzeit.
Sichtbarkeits-Dashboards: Verfolgen Sie wichtige Kennzahlen wie Anmelderaten, Richtlinien-Compliance und Betriebssystemversionen in Ihrer gesamten Umgebung.
Automatische Behebung: Konfigurieren Sie Systeme so, dass sie automatisch den Zugriff einschränken oder Benutzer benachrichtigen, wenn Geräte nicht mehr compliant sind.
Regelmäßige Audits: Überprüfen Sie Zugriffsprotokolle und testen Sie Remote-Löschfunktionen, um sicherzustellen, dass technische Kontrollen sich an sich entwickelnde Bedrohungen anpassen.
Sicherheit und Mitarbeiterprivatsphäre in Einklang bringen
Erfolgreiche BYOD-Programme schützen Unternehmensdaten und respektieren gleichzeitig die persönliche Privatsphäre:
Containerisierung: Isolieren Sie Unternehmensdaten in verwalteten Containern — halten Sie persönliche Informationen vollständig außerhalb der IT-Sichtbarkeit.
Transparente Richtlinien: Dokumentieren Sie explizit, auf welche Daten die IT zugreifen kann, und stellen Sie klar, dass die Überwachung sich strikt auf Unternehmensressourcen konzentriert.
Informierte Einwilligung: Fordern Sie, dass Mitarbeiter die Überwachungsfunktionen und Remote-Löschszenarien vor der Geräteanmeldung bestätigen.
Zero-Trust-Architektur für BYOD-Umgebungen
Zero-Trust-Prinzipien gehen davon aus, dass kein Gerät oder Benutzer von Natur aus vertrauenswürdig ist. Jede Zugriffsanfrage erfordert eine Überprüfung, unabhängig vom Netzwerkstandort oder früherer Authentifizierung.
Multi-Faktor-Authentifizierung (MFA) ist nicht mehr optional. Sie ist die Grundlage. Biometrie, Hardware-Token und Authentifizierungs-Apps sollten als mehrschichtiger Schutz zusammenwirken.
In BYOD-Umgebungen benötigen Mitarbeiter sicheren Zugang zu Unternehmensanmeldedaten auf ihren persönlichen Geräten. Die mobilen Apps von Passwork für iOS und Android bieten biometrische Entsperrung mit Face ID und Touch ID, sodass Benutzer sich einmal authentifizieren und dann sicher auf gemeinsame Unternehmenstresore zugreifen können, ohne Unterbrechung. Dies spiegelt einen Zero-Trust-Ansatz in der Praxis wider: Die Identität wird auf Geräteebene verifiziert, während die Benutzererfahrung nahtlos bleibt.
Kontinuierliche Authentifizierung überwacht das Benutzerverhalten und den Gerätezustand während der gesamten Sitzung. Anomalien lösen eine erneute Authentifizierung oder Zugriffsbeschränkungen aus. Wenn ein Gerät während einer Sitzung weniger sicher wird, wird der Zugriff automatisch angepasst.
Least-Privilege-Zugang begrenzt, worauf BYOD-Benutzer basierend auf Rolle und Notwendigkeit zugreifen können. Mitarbeiter erhalten Zugang zu Ressourcen, die für ihre Arbeit erforderlich sind, nicht mehr. Dies minimiert potenzielle Schäden durch kompromittierte Geräte.
Mobile Threat Defense und Endpoint Security
Mobile Threat Defense (MTD)-Lösungen schützen BYOD-Geräte vor Bedrohungen, die spezifisch für mobile Umgebungen sind. Diese Plattformen erkennen und reagieren auf Bedrohungen, die traditionelle Sicherheitstools übersehen.
Die Bedrohungserkennung identifiziert bösartige Apps, Netzwerkangriffe und Gerätekompromittierungen. MTD-Lösungen analysieren Anwendungsverhalten, Netzwerkverbindungen und Gerätekonfigurationen, um Indikatoren für Kompromittierungen zu erkennen.
Der Phishing-Schutz erstreckt sich auf mobile Browser und Messaging-Anwendungen. MTD-Plattformen erkennen und blockieren den Zugang zu bekannten Phishing-Websites, warnen Benutzer vor verdächtigen Links und verhindern Anmeldedatendiebstahl.
Die Netzwerksicherheit bewertet Wi-Fi- und Mobilfunkverbindungen auf Risiken. MTD-Lösungen identifizieren Man-in-the-Middle-Angriffe, bösartige Zugangspunkte und unsichere Netzwerkkonfigurationen, die Daten offenlegen könnten.
Datenschutzstrategien für BYOD
Stellen Sie sich Containerisierung als einen sicheren Tresor im Smartphone Ihres Mitarbeiters vor. Arbeits-Apps und -Daten bleiben in ihrem eigenen Bereich gesperrt — vollständig getrennt von persönlichen Fotos, Nachrichten und Apps.
Application Wrapping fügt bestehenden Anwendungen Sicherheitskontrollen hinzu, ohne den Quellcode zu ändern. Gewrappte Anwendungen erzwingen Verschlüsselung, verhindern Datenlecks und integrieren sich in Authentifizierungssysteme.
Data Loss Prevention (DLP) innerhalb geschützter Bereiche verhindert unbefugte Datenübertragungen. Benutzer können keine Unternehmensdaten in persönliche Anwendungen kopieren, Dateien zu nicht genehmigten Cloud-Diensten hochladen oder Informationen über nicht verwaltete Kanäle teilen.
Remote-Löschung und Datenwiederherstellung
Funktion
Beschreibung
Remote-Löschfunktionen
Schützen Daten, wenn Geräte verloren gehen, gestohlen werden oder wenn Mitarbeiter die Organisation verlassen. Selektives Löschen entfernt nur Unternehmensdaten und bewahrt persönliche Informationen.
Offline-Funktionalität
Remote-Löschung sollte auch funktionieren, wenn Geräte offline sind, und Befehle ausführen, sobald Geräte sich wieder mit Netzwerken verbinden.
Backup-Strategien
Gewährleisten Datenwiederherstellung nach Geräteverlust oder -ausfall. Unternehmensdaten sollten mit sicherem Cloud-Speicher synchronisiert werden, um Geschäftskontinuität unabhängig von der Geräteverfügbarkeit zu ermöglichen.
Die Zukunft der BYOD-Sicherheit: Aufkommende Trends und Technologien
KI-gestützte Bedrohungserkennung wird die BYOD-Sicherheit verbessern, indem sie subtile Verhaltensanomalien und Zero-Day-Bedrohungen identifiziert. Maschinelle Lernmodelle werden sich schneller an sich entwickelnde Angriffsmuster anpassen als signaturbasierte Ansätze.
Passwortlose Authentifizierung mit Biometrie und Hardware-Token wird traditionelle Passwörter ersetzen. Diese Umstellung reduziert Phishing-Risiken und verbessert die Benutzererfahrung auf persönlichen Geräten.
Edge Computing wird Sicherheitsentscheidungen in Echtzeit ermöglichen, ohne den gesamten Datenverkehr durch zentralisierte Systeme zu leiten. Geräte werden lokale Sicherheitsbewertungen durchführen, was die Leistung verbessert und gleichzeitig den Schutz aufrechterhält.
Die Integration mit SASE (Secure Access Service Edge)-Architekturen wird umfassende Sicherheit für BYOD-Benutzer unabhängig vom Standort bieten. Cloud-basierte Sicherheitsdienste werden Geräte schützen, die von überall auf Ressourcen zugreifen.
Fazit: Eine ausgewogene BYOD-Sicherheitsstrategie aufbauen
Effektive BYOD-Sicherheit erfordert ein Gleichgewicht zwischen Schutz und Benutzerfreundlichkeit. Übermäßig restriktive Ansätze führen zu Nichteinhaltung, und unzureichende Sicherheit setzt Ihre Organisation inakzeptablen Risiken aus.
Beginnen Sie mit klaren Richtlinien, die Mitarbeiter verstehen und akzeptieren. Implementieren Sie technische Kontrollen, die Daten schützen, ohne unnötig in die Privatsphäre einzugreifen. Bieten Sie Schulungen an, die Mitarbeiter befähigen, Bedrohungen zu erkennen und darauf zu reagieren.
Überwachen Sie Ihre BYOD-Umgebung kontinuierlich und passen Sie sich an neue Bedrohungen und sich ändernde Geschäftsanforderungen an. Regelmäßige Bewertungen stellen sicher, dass Ihre Sicherheitsmaßnahmen wirksam bleiben, während sich Technologie und Angriffsmethoden weiterentwickeln.
Richtig umgesetztes BYOD liefert Flexibilität, Kosteneinsparungen und Mitarbeiterzufriedenheit, ohne die Sicherheit zu gefährden. Der Schlüssel ist, BYOD-Sicherheit als fortlaufendes Programm zu behandeln, nicht als einmalige Implementierung.
Häufig gestellte Fragen
Was ist BYOD-Sicherheit?
BYOD-Sicherheit umfasst Richtlinien, Technologien und Praktiken, die Unternehmensdaten und -ressourcen schützen, auf die über mitarbeitereigene Geräte zugegriffen wird. Sie adressiert Risiken durch Gerätevielfalt, die Vermischung von privater und geschäftlicher Nutzung sowie reduzierte IT-Kontrolle.
Was sind die hauptsächlichen Sicherheitsrisiken von BYOD?
Zu den primären Risiken gehören Datenlecks durch verlorene oder gestohlene Geräte, Malware-Infektionen durch private Nutzung, ungepatchte Schwachstellen auf veralteten Geräten, Schatten-IT, die nicht genehmigte Anwendungen einführt, und Compliance-Verstöße durch unzureichende Kontrollen.
Wie implementiert man eine BYOD-Sicherheitsrichtlinie?
Beginnen Sie mit einer Risikobewertung, bei der kritische Daten und akzeptable Zugriffsszenarien identifiziert werden. Entwickeln Sie umfassende Richtlinien, die Geräteanforderungen, Sicherheitsmaßnahmen und akzeptable Nutzung abdecken. Implementieren Sie technische Kontrollen wie MDM, MFA und Containerisierung. Schulen Sie Mitarbeiter zu Sicherheitsanforderungen und Datenschutzgrenzen.
Wie sollten Mitarbeiter Unternehmenspasswörter auf persönlichen Geräten verwalten?
Organisationen müssen vermeiden, dass Mitarbeiter Arbeitsanmeldedaten in persönlichen Browser-Schlüsselbunden oder unverschlüsselten Apps speichern. Der effektivste Ansatz ist die Bereitstellung eines Unternehmens-Passwort-Managers mit dedizierten mobilen Anwendungen. Passwork ermöglicht es Mitarbeitern, sicher auf gemeinsame Unternehmenstresore auf ihren Smartphones zuzugreifen. Funktionen wie biometrische Entsperrung und sicheres Autofill stellen sicher, dass Anmeldedaten geschützt bleiben und niemals dem nicht verwalteten Ökosystem des Geräts ausgesetzt sind.
Was ist der Unterschied zwischen MDM und MAM?
MDM (Mobile Device Management) kontrolliert ganze Geräte und setzt Sicherheitsrichtlinien über alle Gerätefunktionen hinweg durch. MAM (Mobile Application Management) konzentriert sich auf den Schutz spezifischer Anwendungen und ihrer Daten und lässt persönliche Gerätebereiche unverwaltet. MAM adressiert Datenschutzbedenken, indem es die IT-Kontrolle auf arbeitsbezogene Apps beschränkt.
Kann BYOD für regulierte Branchen sicher genug sein?
Ja, mit geeigneten Kontrollen. Regulierte Branchen implementieren BYOD erfolgreich mit Containerisierung, starker Authentifizierung, Verschlüsselung, Netzwerksegmentierung und umfassender Überwachung. Der Schlüssel ist, Sicherheitskontrollen an regulatorische Anforderungen und Datensensibilitätsstufen anzupassen.
Wie handhabt man BYOD-Geräte, wenn Mitarbeiter das Unternehmen verlassen?
Implementieren Sie Remote-Löschfunktionen, die Unternehmensdaten entfernen und persönliche Informationen bewahren. Widerrufen Sie Zugangsdaten sofort bei Beendigung des Arbeitsverhältnisses. Pflegen Sie Backups von Unternehmensdaten unabhängig von den Geräten. Dokumentieren Sie Offboarding-Verfahren und überprüfen Sie den Abschluss bei jedem Austritt.
Was sollte eine BYOD-Richtlinie beinhalten?
Wesentliche Elemente umfassen Umfang und Berechtigungskriterien, Geräte- und Softwareanforderungen, Sicherheitsmaßnahmen und -kontrollen, Richtlinien zur akzeptablen Nutzung, Datenklassifizierungs- und -handhabungsverfahren, Datenschutzgrenzen und Offenlegungen zur Überwachung, Incident-Response-Verfahren und Offboarding-Prozesse.
Wie wird Zero-Trust-Architektur auf BYOD angewendet?
Der Zero-Trust-Ansatz betrachtet alle Geräte als potenziell kompromittiert und erfordert kontinuierliche Verifizierung. BYOD-Implementierungen verwenden MFA für jede Zugriffsanfrage, überwachen den Gerätezustand kontinuierlich, setzen Least-Privilege-Zugang durch und segmentieren Netzwerke, um den Schadensradius kompromittierter Geräte zu begrenzen.
Bereit, die Unternehmenssicherheit auf die nächste Stufe zu heben? Entdecken Sie, wie Passwork Ihnen hilft, Ihre Unternehmensdaten mit sicherem Passwort-Management und nahtloser Zugriffskontrolle zu schützen.
Bring Your Own Device (BYOD) ha pasado de ser una tendencia laboral a convertirse en una necesidad empresarial. Para 2026, más del 82% de las empresas habrán adoptado políticas formales de BYOD, y más del 80% promoverán activamente este enfoque. Esto refleja un cambio fundamental en cómo las organizaciones abordan la flexibilidad y productividad en el lugar de trabajo.
El atractivo es evidente: los empleados trabajan en dispositivos que conocen, los departamentos de TI reducen costos de hardware y las empresas atraen talento que busca flexibilidad. Sin embargo, esta comodidad introduce desafíos de seguridad que pueden exponer datos sensibles, comprometer redes y crear problemas de cumplimiento normativo.
Esta guía le orienta a través del panorama de seguridad de BYOD — desde comprender los riesgos principales hasta implementar marcos que protejan su organización sin sacrificar la autonomía de los empleados.
Comprensión de BYOD y sus implicaciones de seguridad
BYOD permite a los empleados utilizar smartphones, tablets y laptops personales para tareas laborales. Estos dispositivos acceden al correo corporativo, aplicaciones en la nube, redes internas y datos sensibles — todo mientras permanecen fuera del control tradicional de TI.
El estado actual de BYOD en los lugares de trabajo modernos
Las organizaciones ahora enfrentan una realidad donde los dispositivos personales son parte integral de las operaciones diarias, no excepciones a la política.
Los empleados esperan transiciones fluidas entre el hogar y la oficina, utilizando dispositivos que se adapten a sus flujos de trabajo. Los departamentos de TI se han adaptado construyendo arquitecturas de seguridad que acomodan esta flexibilidad en lugar de resistirse a ella.
Por qué las organizaciones están adoptando BYOD
La reducción de costos impulsa muchos programas BYOD. Las empresas ahorran en adquisición de hardware, mantenimiento y ciclos de reemplazo. Los empleados asumen el costo inicial del dispositivo, mientras que las organizaciones invierten en infraestructura de seguridad y herramientas de gestión.
La satisfacción de los empleados mejora cuando los trabajadores utilizan dispositivos familiares. Las curvas de aprendizaje desaparecen, la productividad aumenta y la satisfacción laboral crece. Esto importa en mercados laborales competitivos donde la flexibilidad en el lugar de trabajo influye en las decisiones de contratación.
La agilidad operativa aumenta cuando los empleados acceden a recursos laborales desde cualquier lugar. La continuidad del negocio mejora porque los trabajadores no dependen de equipos propiedad de la empresa. Durante interrupciones, las operaciones continúan con mínima interrupción.
Principales desafíos de seguridad BYOD
Falta de estandarización. Los dispositivos personales varían en sistemas operativos, niveles de parches de seguridad y configuraciones, lo que genera posturas de seguridad inconsistentes.
Brechas de visibilidad. Los equipos de TI tienen dificultades para monitorear el estado del dispositivo, las aplicaciones instaladas y la configuración de seguridad, dejando puntos ciegos en el panorama de seguridad.
Desafíos en la aplicación de políticas. Equilibrar los requisitos de seguridad con la privacidad de los empleados puede generar resistencia o vulnerabilidades.
Problemas de gestión del ciclo de vida. Gestionar la seguridad cuando los empleados actualizan dispositivos, cambian de plataformas o abandonan la organización requiere una planificación cuidadosa y capacidades técnicas.
Principales riesgos y vulnerabilidades de seguridad BYOD
Fuga y pérdida de datos en entornos BYOD
Los datos corporativos conviven con la información personal en los dispositivos BYOD. Los empleados podrían compartir involuntariamente archivos confidenciales a través de almacenamiento personal en la nube, aplicaciones de mensajería o cuentas de correo electrónico. El límite entre el uso laboral y personal se difumina, creando oportunidades para que los datos escapen de los controles corporativos.
Los dispositivos perdidos o robados representan incidentes de seguridad inmediatos. Sin las protecciones adecuadas, cualquier persona que acceda al dispositivo obtiene entrada a los recursos corporativos. El riesgo se intensifica cuando los dispositivos carecen de protecciones básicas, como bloqueos de pantalla o cifrado.
Amenazas de malware y phishing dirigidas a dispositivos personales
Los dispositivos personales a menudo tienen una seguridad más débil que los equipos corporativos. Los empleados podrían desactivar funciones de seguridad por comodidad, instalar aplicaciones de fuentes no confiables o ignorar las actualizaciones de software. Estos comportamientos crean puntos de entrada para el malware.
Los ataques de phishing explotan la naturaleza personal de BYOD. Los atacantes envían mensajes convincentes al correo electrónico personal o aplicaciones de mensajería, sabiendo que los empleados utilizan el mismo dispositivo para trabajar. Una vez comprometido, el dispositivo proporciona acceso a redes y datos corporativos.
Dispositivos obsoletos y vulnerabilidades sin parches
Los empleados controlan los programas de actualización en dispositivos personales. Los parches de seguridad críticos podrían esperar días o semanas mientras los usuarios retrasan las actualizaciones por comodidad. Durante esta ventana, las vulnerabilidades conocidas permanecen explotables.
Los dispositivos más antiguos presentan desafíos adicionales. Los fabricantes eventualmente dejan de soportar los dispositivos con actualizaciones de seguridad, dejándolos permanentemente vulnerables. Cuando los empleados continúan utilizando estos dispositivos para trabajar, introducen riesgos sin parches en su entorno.
Shadow IT y aplicaciones no autorizadas
Los empleados instalan aplicaciones que resuelven problemas inmediatos sin considerar las implicaciones de seguridad. Los servicios de intercambio de archivos, herramientas de colaboración y aplicaciones de productividad podrían eludir completamente los procesos de aprobación de TI.
Estas aplicaciones no autorizadas a menudo carecen de controles de seguridad adecuados, certificaciones de cumplimiento o integración con los sistemas de seguridad corporativos. Los datos fluyen a través de servicios que su equipo de seguridad no monitorea ni protege.
Mezcla de uso personal y empresarial
Una de las vulnerabilidades más comunes en entornos BYOD es la mala gestión de credenciales. Los empleados frecuentemente guardan contraseñas corporativas en llaveros de navegadores personales o notas sin cifrar por comodidad. Mientras tanto, un gestor de contraseñas corporativo reside por separado en su dispositivo, con su propio cifrado, control de acceso y protección biométrica. Con Passwork, los empleados acceden a las bóvedas de la empresa a través de una aplicación móvil, manteniendo las credenciales de trabajo completamente separadas de los datos personales.
Construcción de un marco de seguridad BYOD efectivo
Creación de una política de seguridad BYOD integral
Su política BYOD define el uso aceptable, los requisitos de seguridad y las responsabilidades. Debe abordar la elegibilidad de dispositivos, las medidas de seguridad requeridas, las aplicaciones aceptables y los procedimientos de manejo de datos.
Las secciones de alcance y elegibilidad aclaran qué dispositivos califican para los programas BYOD y qué roles pueden participar. No todas las posiciones requieren acceso BYOD, y no todos los dispositivos cumplen con los estándares mínimos de seguridad.
Los requisitos de seguridad deben ser específicos y aplicables. Defina características obligatorias como cifrado, bloqueos de pantalla, autenticación biométrica y actualizaciones automáticas. Especifique actividades prohibidas como hacer jailbreak o rootear dispositivos.
La clasificación de datos guía a los empleados en el manejo de diferentes tipos de información. Distinga claramente entre datos públicos, internos, confidenciales y restringidos. Defina qué tipos de datos son accesibles mediante BYOD y cuáles requieren dispositivos propiedad de la empresa.
Los procedimientos de respuesta a incidentes describen los pasos que los empleados deben seguir cuando los dispositivos se pierden, son robados o están comprometidos. Incluya plazos de notificación, información de contacto y expectativas de cooperación durante las investigaciones.
Definición de requisitos de dispositivos y software
Requisitos del sistema operativo. Solo los dispositivos con sistemas operativos activamente soportados deben permitirse en los programas BYOD. Los sistemas obsoletos deben excluirse.
Características de seguridad obligatorias. Los dispositivos deben incluir cifrado, arranque seguro y almacenamiento de credenciales respaldado por hardware. Asegúrese de que estas características se apliquen mediante política.
Aplicaciones aprobadas. Proporcione a los empleados una lista de aplicaciones seguras y aprobadas, así como alternativas a herramientas no autorizadas para fomentar el cumplimiento.
Soluciones técnicas para la seguridad BYOD
Solución
Descripción
Mobile Device Management (MDM)
Aplica políticas de seguridad, gestiona aplicaciones y proporciona capacidades remotas, incluyendo el borrado del dispositivo
Mobile Application Management (MAM)
Se enfoca en proteger aplicaciones específicas en lugar de dispositivos completos, abordando preocupaciones de privacidad
Unified Endpoint Management (UEM)
Extiende la protección a todos los tipos de dispositivos con aplicación de políticas consistente
Protección del acceso a la red y garantía de cumplimiento
Los dispositivos personales no deberían tener el mismo acceso a la red que los equipos corporativos. Implemente segmentación de red y controles de acceso estrictos para que los usuarios BYOD solo puedan acceder a los recursos necesarios. Requiera una VPN para el acceso remoto con el fin de cifrar el tráfico y controlar los puntos de entrada. El monitoreo continuo de la red debe detectar actividad inusual y activar alertas.
Estos controles también ayudan a las organizaciones a cumplir con los requisitos regulatorios, como HIPAA, GDPR y otros. Una estrategia de red robusta apoya las reglas de residencia de datos y garantiza el registro y los informes adecuados para auditorías, incluyendo registros de acceso y seguimiento de incidentes.
Mejores prácticas para la implementación de seguridad BYOD
Las políticas de seguridad fracasan sin la aceptación de los empleados. Enfoque la capacitación en el cumplimiento práctico y las amenazas del mundo real:
Incorporación primero: Presente las políticas BYOD, los límites de privacidad y los informes de incidentes antes de que los empleados registren dispositivos.
Concienciación continua: Comparta inteligencia de amenazas relevante y destaque incidentes recientes regularmente para mantener la seguridad presente.
Aprendizaje basado en escenarios: Capacite a los empleados utilizando ejemplos específicos de la industria — como intentos de phishing dirigidos o tácticas comunes de ingeniería social.
Monitoreo y gestión de riesgos de seguridad BYOD
El monitoreo proactivo evita que problemas menores escalen a brechas:
Seguimiento continuo: Monitoree el cumplimiento del dispositivo, marque software desactualizado e identifique actividades sospechosas en tiempo real.
Paneles de visibilidad: Rastree métricas clave como tasas de registro, cumplimiento de políticas y versiones de sistemas operativos en todo su entorno.
Remediación automatizada: Configure sistemas para restringir automáticamente el acceso o notificar a los usuarios cuando los dispositivos dejen de cumplir.
Auditorías regulares: Revise los registros de acceso y pruebe las capacidades de borrado remoto para asegurar que los controles técnicos se adapten a las amenazas en evolución.
Equilibrio entre seguridad y privacidad del empleado
Los programas BYOD exitosos protegen los datos corporativos mientras respetan la privacidad personal:
Contenedorización: Aísle los datos corporativos dentro de contenedores gestionados — manteniendo la información personal completamente fuera de la visibilidad de TI.
Políticas transparentes: Documente explícitamente a qué datos puede acceder TI, aclarando que el monitoreo se enfoca estrictamente en recursos corporativos.
Consentimiento informado: Requiera que los empleados reconozcan las capacidades de monitoreo y los escenarios de borrado remoto antes del registro del dispositivo.
Arquitectura de confianza cero para entornos BYOD
Los principios de confianza cero asumen que ningún dispositivo o usuario es inherentemente confiable. Cada solicitud de acceso requiere verificación independientemente de la ubicación en la red o autenticación previa.
La autenticación multifactor (MFA) ya no es opcional. Es la línea base. La biometría, los tokens de hardware y las aplicaciones de autenticación deben trabajar juntos como protección en capas.
En entornos BYOD, los empleados necesitan acceso seguro a credenciales corporativas en sus dispositivos personales. Las aplicaciones móviles de Passwork para iOS y Android proporcionan desbloqueo biométrico con Face ID y Touch ID, permitiendo a los usuarios autenticarse una vez y luego acceder de forma segura a las bóvedas compartidas de la empresa sin interrupciones. Esto refleja un enfoque de confianza cero en la práctica: la identidad se verifica a nivel del dispositivo mientras la experiencia del usuario permanece fluida.
La autenticación continua monitorea el comportamiento del usuario y la postura del dispositivo durante las sesiones. Las anomalías activan la reautenticación o restricciones de acceso. Si un dispositivo se vuelve menos seguro durante una sesión, el acceso se ajusta automáticamente.
El acceso de privilegio mínimo limita lo que los usuarios BYOD pueden acceder según su rol y necesidad. Los empleados reciben acceso a los recursos requeridos para sus trabajos, nada más. Esto minimiza el daño potencial de dispositivos comprometidos.
Defensa contra amenazas móviles y seguridad de endpoints
Las soluciones de Mobile Threat Defense (MTD) protegen los dispositivos BYOD de amenazas específicas de entornos móviles. Estas plataformas detectan y responden a amenazas que las herramientas de seguridad tradicionales pasan por alto.
La detección de amenazas identifica aplicaciones maliciosas, ataques de red y compromisos de dispositivos. Las soluciones MTD analizan el comportamiento de las aplicaciones, las conexiones de red y las configuraciones de dispositivos para detectar indicadores de compromiso.
La protección contra phishing se extiende a navegadores móviles y aplicaciones de mensajería. Las plataformas MTD detectan y bloquean el acceso a sitios de phishing conocidos, advierten a los usuarios sobre enlaces sospechosos y previenen el robo de credenciales.
La seguridad de red evalúa las conexiones Wi-Fi y celulares en busca de riesgos. Las soluciones MTD identifican ataques de intermediario, puntos de acceso no autorizados y configuraciones de red inseguras que podrían exponer datos.
Estrategias de protección de datos para BYOD
Piense en la contenedorización como una bóveda segura dentro del teléfono de su empleado. Las aplicaciones y datos de trabajo permanecen bloqueados en su propio espacio — completamente separados de fotos personales, mensajes y aplicaciones.
El wrapping de aplicaciones agrega controles de seguridad a aplicaciones existentes sin modificar el código fuente. Las aplicaciones envueltas aplican cifrado, previenen la fuga de datos e integran con sistemas de autenticación.
La Prevención de Pérdida de Datos (DLP) dentro de espacios protegidos previene transferencias de datos no autorizadas. Los usuarios no pueden copiar datos corporativos a aplicaciones personales, subir archivos a servicios en la nube no autorizados o compartir información a través de canales no gestionados.
Borrado remoto y recuperación de datos
Característica
Descripción
Capacidades de borrado remoto
Protegen los datos cuando los dispositivos se pierden, son robados o cuando los empleados abandonan la organización. El borrado selectivo elimina solo datos corporativos, preservando la información personal.
Funcionalidad sin conexión
El borrado remoto debe funcionar incluso cuando los dispositivos están sin conexión, ejecutando comandos una vez que los dispositivos se reconectan a las redes.
Estrategias de respaldo
Garantizan la recuperación de datos después de la pérdida o fallo del dispositivo. Los datos corporativos deben sincronizarse con almacenamiento seguro en la nube, permitiendo la continuidad del negocio independientemente de la disponibilidad del dispositivo.
El futuro de la seguridad BYOD: Tendencias y tecnologías emergentes
La detección de amenazas impulsada por IA mejorará la seguridad BYOD al identificar anomalías conductuales sutiles y amenazas de día cero. Los modelos de aprendizaje automático se adaptarán a los patrones de ataque en evolución más rápido que los enfoques basados en firmas.
La autenticación sin contraseña utilizando biometría y tokens de hardware reemplazará las contraseñas tradicionales. Este cambio reduce los riesgos de phishing y mejora la experiencia del usuario en dispositivos personales.
La computación en el borde permitirá decisiones de seguridad en tiempo real sin enrutar todo el tráfico a través de sistemas centralizados. Los dispositivos realizarán evaluaciones de seguridad locales, mejorando el rendimiento mientras mantienen la protección.
La integración con arquitecturas SASE (Secure Access Service Edge) proporcionará seguridad integral para usuarios BYOD independientemente de su ubicación. Los servicios de seguridad entregados desde la nube protegerán los dispositivos que acceden a recursos desde cualquier lugar.
Conclusión: Construcción de una estrategia de seguridad BYOD equilibrada
La seguridad BYOD efectiva requiere equilibrar la protección con la usabilidad. Los enfoques excesivamente restrictivos impulsan el incumplimiento, y la seguridad insuficiente expone a su organización a riesgos inaceptables.
Comience con políticas claras que los empleados entiendan y acepten. Implemente controles técnicos que protejan los datos sin invadir innecesariamente la privacidad. Proporcione capacitación que empodere a los empleados para reconocer y responder a las amenazas.
Monitoree su entorno BYOD continuamente, adaptándose a nuevas amenazas y necesidades empresariales cambiantes. Las evaluaciones regulares aseguran que sus medidas de seguridad permanezcan efectivas a medida que la tecnología y los métodos de ataque evolucionan.
BYOD bien implementado ofrece flexibilidad, ahorro de costos y satisfacción de los empleados sin comprometer la seguridad. La clave es tratar la seguridad BYOD como un programa continuo, no como una implementación única.
Preguntas frecuentes
¿Qué es la seguridad BYOD?
La seguridad BYOD abarca políticas, tecnologías y prácticas que protegen los datos y recursos corporativos accedidos a través de dispositivos propiedad de los empleados. Aborda los riesgos derivados de la diversidad de dispositivos, la mezcla de uso personal con actividades empresariales y el control reducido de TI.
¿Cuáles son los principales riesgos de seguridad de BYOD?
Los riesgos principales incluyen la fuga de datos por dispositivos perdidos o robados, infecciones de malware por uso personal, vulnerabilidades sin parches en dispositivos obsoletos, shadow IT que introduce aplicaciones no autorizadas y violaciones de cumplimiento por controles inadecuados.
¿Cómo se implementa una política de seguridad BYOD?
Comience con una evaluación de riesgos, identificando datos críticos y escenarios de acceso aceptables. Desarrolle políticas integrales que cubran requisitos de dispositivos, medidas de seguridad y uso aceptable. Despliegue controles técnicos incluyendo MDM, MFA y contenedorización. Capacite a los empleados sobre requisitos de seguridad y límites de privacidad.
¿Cómo deben gestionar los empleados las contraseñas corporativas en dispositivos personales?
Las organizaciones deben evitar que los empleados almacenen credenciales de trabajo en llaveros de navegadores personales o aplicaciones sin cifrar. El enfoque más efectivo es implementar un gestor de contraseñas corporativo con aplicaciones móviles dedicadas. Passwork permite a los empleados acceder de forma segura a las bóvedas compartidas de la empresa en sus smartphones. Características como el desbloqueo biométrico y el autocompletado seguro aseguran que las credenciales permanezcan protegidas y nunca se expongan al ecosistema no gestionado del dispositivo.
¿Cuál es la diferencia entre MDM y MAM?
MDM (Mobile Device Management) controla dispositivos completos, aplicando políticas de seguridad en todas las funciones del dispositivo. MAM (Mobile Application Management) se enfoca en proteger aplicaciones específicas y sus datos, dejando las áreas personales del dispositivo sin gestionar. MAM aborda las preocupaciones de privacidad al limitar el control de TI a las aplicaciones relacionadas con el trabajo.
¿Puede BYOD ser lo suficientemente seguro para industrias reguladas?
Sí, con los controles adecuados. Las industrias reguladas implementan BYOD exitosamente utilizando contenedorización, autenticación fuerte, cifrado, segmentación de red y monitoreo integral. La clave es hacer coincidir los controles de seguridad con los requisitos regulatorios y los niveles de sensibilidad de los datos.
¿Cómo se gestionan los dispositivos BYOD cuando los empleados se van?
Implemente capacidades de borrado remoto que eliminen datos corporativos mientras preservan la información personal. Revoque las credenciales de acceso inmediatamente tras la terminación. Mantenga copias de seguridad de datos corporativos independientes de los dispositivos. Documente los procedimientos de desvinculación y verifique su cumplimiento para cada salida.
¿Qué debe incluir una política BYOD?
Los elementos esenciales incluyen criterios de alcance y elegibilidad, requisitos de dispositivos y software, medidas y controles de seguridad, directrices de uso aceptable, procedimientos de clasificación y manejo de datos, límites de privacidad y divulgaciones de monitoreo, procedimientos de respuesta a incidentes y procesos de desvinculación.
¿Cómo se aplica la arquitectura de confianza cero a BYOD?
El enfoque de confianza cero considera que todos los dispositivos están potencialmente comprometidos y requiere verificación continua. Las implementaciones BYOD utilizan MFA para cada solicitud de acceso, monitorean la postura del dispositivo continuamente, aplican acceso de privilegio mínimo y segmentan redes para limitar el radio de explosión de dispositivos comprometidos.
¿Listo para llevar la seguridad corporativa al siguiente nivel? Descubra cómo Passwork le ayuda a proteger sus datos corporativos con gestión segura de contraseñas y control de acceso sin interrupciones.
Bring Your Own Device (BYOD) has transformed from a workplace trend into a business necessity. By 2026, over 82% of companies will have adopted formal BYOD policies, with more than 80% actively promoting this approach. This reflects a fundamental change in how organizations approach workplace flexibility and productivity.
The appeal is clear: employees work on devices they know, IT departments reduce hardware costs, and companies attract talent seeking flexibility. But this convenience introduces security challenges that can expose sensitive data, compromise networks, and create compliance headaches.
This guide walks you through the security landscape of BYOD — from understanding core risks to implementing frameworks that protect your organization without sacrificing employee autonomy.
Understanding BYOD and its security implications
BYOD allows employees to use personal smartphones, tablets, and laptops for work tasks. These devices access corporate email, cloud applications, internal networks, and sensitive data — all while living outside traditional IT control.
The current state of BYOD in modern workplaces
Organizations now face a reality where personal devices are integral to daily operations, not exceptions to policy.
Employees expect seamless transitions between home and office, using devices that fit their workflows. IT departments adapted by building security architectures that accommodate this flexibility rather than resist it.
Why organizations are adopting BYOD
Cost reduction drives many BYOD programs. Companies save on hardware procurement, maintenance, and replacement cycles. Employees bear the initial device cost, while organizations invest in security infrastructure and management tools.
Employee satisfaction improves when workers use familiar devices. Learning curves disappear, productivity increases, and job satisfaction rises. This matters in competitive talent markets where workplace flexibility influences hiring decisions.
Operational agility increases as employees access work resources from anywhere. Business continuity improves because workers aren't tied to corporate-owned equipment. During disruptions, operations continue with minimal interruption.
Main BYOD security challenges
Lack of standardization. Personal devices vary in operating systems, security patch levels, and configurations, leading to inconsistent security postures.
Visibility gaps. IT teams have difficulties monitoring device health, installed apps, and security settings, leaving blind spots in the security landscape.
Policy enforcement challenges. Balancing security requirements with employee privacy can lead to resistance or vulnerabilities.
Lifecycle management issues. Managing security when employees upgrade devices, switch platforms, or leave the organization requires careful planning and technical capabilities.
Key BYOD security risks and vulnerabilities
Data leakage and loss in BYOD environments
Corporate data lives alongside personal information on BYOD devices. Employees might unintentionally share confidential files through personal cloud storage, messaging apps, or email accounts. The boundary between work and personal use blurs, creating opportunities for data to escape corporate controls.
Lost or stolen devices represent immediate security incidents. Without proper safeguards, anyone accessing the device gains entry to corporate resources. The risk intensifies when devices lack basic protections for example screen locks or encryption.
Malware and phishing threats targeting personal devices
Personal devices often have weaker security than corporate equipment. Employees might disable security features for convenience, install apps from untrusted sources, or ignore software updates. These behaviors create entry points for malware.
Phishing attacks exploit the personal nature of BYOD. Attackers send convincing messages to personal email or messaging apps, knowing employees use the same device for work. Once compromised, the device provides access to corporate networks and data.
Out-of-date devices and unpatched vulnerabilities
Employees control update schedules on personal devices. Critical security patches might wait days or weeks while users delay updates for convenience. During this window, known vulnerabilities remain exploitable.
Older devices present additional challenges. Manufacturers eventually stop supporting devices with security updates, leaving them permanently vulnerable. When employees continue using these devices for work, they introduce unpatched risks into your environment.
Shadow IT and unsanctioned applications
Employees install applications that solve immediate problems without considering security implications. File-sharing services, collaboration tools, and productivity apps might bypass IT approval processes entirely.
These unsanctioned applications often lack proper security controls, compliance certifications, or integration with corporate security systems. Data flows through services your security team doesn't monitor or protect.
Mixing personal and business use
One of the most common vulnerabilities in BYOD environments is credential mismanagement. Employees frequently save corporate passwords in personal browser keychains or unencrypted notes for convenience. Meanwhile, a corporate password manager lives separately on their device, featuring its own encryption, access control, and biometric protection. With Passwork, employees access company vaults through a mobile app, keeping work credentials completely separate from personal data.
Building an effective BYOD security framework
Creating a comprehensive BYOD security policy
Your BYOD policy defines acceptable use, security requirements, and responsibilities. It should address device eligibility, required security measures, acceptable applications, and data handling procedures.
Scope and eligibility sections clarify which devices qualify for BYOD programs and which roles can participate. Not every position requires BYOD access, and not every device meets minimum security standards.
Security requirements must be specific and enforceable. Define mandatory features such as encryption, screen locks, biometric authentication, and automatic updates. Specify prohibited activities such as jailbreaking or rooting devices.
Data classification guides employees in handling different information types. Clearly distinguish between public, internal, confidential, and restricted data. Define which data types are accessible via BYOD and which require corporate-owned devices.
Incident response procedures outline steps employees must take when devices are lost, stolen, or compromised. Include reporting timelines, contact information, and expectations for cooperation during investigations.
Defining device and software requirements
Operating system requirements. Only devices with actively supported operating systems should be allowed in BYOD programs. Outdated systems must be excluded.
Mandatory security features. Devices must include encryption, secure boot, and hardware-backed credential storage. Ensure these features are enforced by policy.
Approved applications. Provide employees with a list of secure, approved apps and alternatives to unsanctioned tools to encourage compliance.
Technical solutions for BYOD security
Solution
Description
Mobile Device Management (MDM)
Enforces security policies, manages applications, and provides remote capabilities including device wiping
Mobile Application Management (MAM)
Focuses on protecting specific applications rather than entire devices, addressing privacy concerns
Unified Endpoint Management (UEM)
Extends protection across all device types with consistent policy enforcement
Securing Network Access and Ensuring Compliance
Personal devices should not have the same network access as corporate equipment. Implement network segmentation and strict access controls so that BYOD users can only access the necessary resources. Require a VPN for remote access in order to encrypt traffic and control entry points. Continuous network monitoring should detect unusual activity and trigger alerts.
These controls also help organizations meet regulatory requirements, such as HIPAA, GDPR, and others. A robust network strategy supports data residency rules and ensures proper logging and reporting for audits, including access records and incident tracking.
Best practices for BYOD security implementation
Security policies fail without employee buy-in. Focus training on practical compliance and real-world threats:
Onboarding first: Introduce BYOD policies, privacy boundaries, and incident reporting before employees enroll devices.
Continuous awareness: Share relevant threat intelligence and highlight recent incidents regularly to keep security top-of-mind.
Scenario-based learning: Train employees using industry-specific examples — like targeted phishing attempts or common social engineering tactics.
Monitoring and managing BYOD security risks
Proactive monitoring prevents minor issues from escalating into breaches:
Continuous tracking: Monitor device compliance, flag outdated software, and identify suspicious activities in real time.
Visibility dashboards: Track key metrics like enrollment rates, policy compliance, and OS versions across your environment.
Automated remediation: Configure systems to automatically restrict access or notify users when devices fall out of compliance.
Regular audits: Review access logs and test remote wipe capabilities to ensure technical controls adapt to evolving threats.
Balancing security with employee privacy
Successful BYOD programs protect corporate data while respecting personal privacy:
Containerization: Isolate corporate data within managed containers — keeping personal information entirely outside IT visibility.
Transparent policies: Explicitly document what data IT can access, clarifying that monitoring focuses strictly on corporate resources.
Informed consent: Require employees to acknowledge monitoring capabilities and remote wipe scenarios before device enrollment.
Zero-trust architecture for BYOD environments
Zero-trust principles assume no device or user is inherently trustworthy. Every access request requires verification regardless of network location or previous authentication.
Multi-factor authentication (MFA) is no longer optional. It is the baseline. Biometrics, hardware tokens, and authenticator apps should work together as layered protection.
In BYOD environments, employees need secure access to corporate credentials on their personal devices. Passwork mobile apps for iOS and Android provide biometric unlock with Face ID and Touch ID, allowing users to authenticate once and then securely access shared company vaults without disruption. This reflects a zero-trust approach in practice: identity is verified at the device level while the user experience remains seamless.
Continuous authentication monitors user behavior and device posture throughout sessions. Anomalies trigger re-authentication or access restrictions. If a device becomes less secure during a session, access is automatically adjusted.
Least privilege access limits what BYOD users can access based on role and necessity. Employees receive access to resources required for their jobs, nothing more. This minimizes potential damage from compromised devices.
Mobile threat defense and endpoint security
Mobile Threat Defense (MTD) solutions protect BYOD devices from threats specific to mobile environments. These platforms detect and respond to threats that traditional security tools miss.
Threat detection identifies malicious apps, network attacks, and device compromises. MTD solutions analyze application behavior, network connections, and device configurations to spot indicators of compromise.
Phishing protection extends to mobile browsers and messaging applications. MTD platforms detect and block access to known phishing sites, warn users about suspicious links, and prevent credential theft.
Network security evaluates Wi-Fi and cellular connections for risks. MTD solutions identify man-in-the-middle attacks, rogue access points, and insecure network configurations that could expose data.
Data protection strategies for BYOD
Think of containerization as a secure vault inside your employee's phone. Work apps and data stay locked in their own space — completely separate from personal photos, messages, and apps.
Application wrapping adds security controls to existing applications without modifying source code. Wrapped applications enforce encryption, prevent data leakage, and integrate with authentication systems.
Data Loss Prevention (DLP) within protected spaces prevents unauthorized data transfers. Users can't copy corporate data to personal applications, upload files to unsanctioned cloud services, or share information through unmanaged channels.
Remote wiping and data recovery
Feature
Description
Remote wipe capabilities
Protect data when devices are lost, stolen, or when employees leave the organization. Selective wiping removes only corporate data, preserving personal information.
Offline functionality
Remote wipe should work even when devices are offline, executing commands once devices reconnect to networks.
Backup strategies
Ensure data recovery after device loss or failure. Corporate data should sync to secure cloud storage, enabling business continuity regardless of device availability.
The future of BYOD security: Emerging trends and technologies
AI-powered threat detection will enhance BYOD security by identifying subtle behavioral anomalies and zero-day threats. Machine learning models will adapt to evolving attack patterns faster than signature-based approaches.
Passwordless authentication using biometrics and hardware tokens will replace traditional passwords. This shift reduces phishing risks and improves user experience on personal devices.
Edge computing will enable real-time security decisions without routing all traffic through centralized systems. Devices will make local security assessments, improving performance while maintaining protection.
Integration with SASE (Secure Access Service Edge) architectures will provide comprehensive security for BYOD users regardless of location. Cloud-delivered security services will protect devices accessing resources from anywhere.
Conclusion: Building a balanced BYOD security strategy
Effective BYOD security requires balancing protection with usability. Overly restrictive approaches drive non-compliance, and insufficient security exposes your organization to unacceptable risks.
Start with clear policies that employees understand and accept. Implement technical controls that protect data without unnecessarily invading privacy. Provide training that empowers employees to recognize and respond to threats.
Monitor your BYOD environment continuously, adapting to new threats and changing business needs. Regular assessments ensure your security measures remain effective as technology and attack methods evolve.
BYOD done right delivers flexibility, cost savings, and employee satisfaction without compromising security. The key is treating BYOD security as an ongoing program, not a one-time implementation.
Frequently Asked Questions
What is BYOD security?
BYOD security encompasses policies, technologies, and practices that protect corporate data and resources accessed through employee-owned devices. It addresses risks from device diversity, personal use mixing with business activities, and reduced IT control.
What are the main security risks of BYOD?
Primary risks include data leakage from lost or stolen devices, malware infections from personal use, unpatched vulnerabilities on outdated devices, shadow IT introducing unsanctioned applications, and compliance violations from inadequate controls.
How do you implement a BYOD security policy?
Start with risk assessment, identifying critical data and acceptable access scenarios. Develop comprehensive policies covering device requirements, security measures, and acceptable use. Deploy technical controls including MDM, MFA, and containerization. Train employees on security requirements and privacy boundaries.
How should employees manage corporate passwords on personal devices?
Organizations must avoid letting employees store work credentials in personal browser keychains or unencrypted apps. The most effective approach is deploying a corporate password manager with dedicated mobile applications. Passwork allows employees to access shared company vaults securely on their smartphones. Features such as biometric unlock and secure autofill ensure credentials remain protected and are never exposed to the device's unmanaged ecosystem.
What is the difference between MDM and MAM?
MDM (Mobile Device Management) controls entire devices, enforcing security policies across all device functions. MAM (Mobile Application Management) focuses on protecting specific applications and their data, leaving personal device areas unmanaged. MAM addresses privacy concerns by limiting IT control to work-related apps.
Can BYOD be secure enough for regulated industries?
Yes, with proper controls. Regulated industries successfully implement BYOD using containerization, strong authentication, encryption, network segmentation, and comprehensive monitoring. The key is matching security controls to regulatory requirements and data sensitivity levels.
How do you handle BYOD devices when employees leave?
Implement remote wipe capabilities that remove corporate data while preserving personal information. Revoke access credentials immediately upon termination. Maintain backups of corporate data independent of devices. Document offboarding procedures and verify completion for each departure.
What should a BYOD policy include?
Essential elements include scope and eligibility criteria, device and software requirements, security measures and controls, acceptable use guidelines, data classification and handling procedures, privacy boundaries and monitoring disclosures, incident response procedures, and offboarding processes.
How does zero-trust architecture apply to BYOD?
The zero-trust approach considers all devices to be potentially compromised and requires continuous verification. BYOD implementations use MFA for every access request, monitor device posture continuously, enforce least privilege access, and segment networks to limit blast radius from compromised devices.
Ready to take corporate security to the next level? Explore how Passwork helps you protect your corporate data with secure password management and seamless access control.
Most data breaches start the same way: with weak or poorly managed credentials. In basic web application attacks alone, the 2025 Verizon DBIR traced 88% of incidents back to stolen passwords. For any organization handling sensitive data, computer security starts with credential control. And password security has shifted beyond a recommendation and become a baseline requirement.
A password manager addresses this risk. For every account, it generates, stores, and auto-fills unique credentials — all protected by one master password. Instead of spreadsheets, sticky notes, and repeated password resets, teams get a controlled and auditable process across the entire workflow.
Main points:
One master password replaces hundreds of weak, reused credentials
AES-256 encryption and zero-knowledge architecture keep your vault unreadable, even to the provider
Setup takes planning, but the payoff is fewer support tickets, stronger compliance, and reduced breach risk
Understanding password managers
A password manager works as an encrypted vault — a digital safe that holds login credentials, secure notes, and other sensitive data. When you sign in somewhere, the manager retrieves the right password and fills the form automatically. Behind that vault stand two technologies: encryption and zero-knowledge architecture.
How password managers protect your digital identity
Before data leaves your device, AES-256 encryption (Advanced Encryption Standard with a 256-bit key) scrambles it into unreadable ciphertext. The same algorithm is used by governments and financial institutions.
Zero-knowledge architecture adds a second layer. Under this model, the provider cannot decrypt your data. Because all cryptographic operations happen locally, even full server access would reveal only encrypted blobs. We publish our cryptography documentation openly so teams can verify exactly how this works.
What password managers can and cannot do
A password manager is a reliable layer of defense, though it does not cover every threat on its own. Knowing its limitations helps you plan additional safeguards.
Can do
Cannot do
Generate unique, complex passwords for every account
Protect you if malware captures keystrokes on your device
Auto-fill credentials on recognized websites
Prevent phishing if you manually enter credentials on a fake site
Encrypt stored data with AES-256
Replace multi-factor authentication (MFA)
Alert you to reused or weak passwords
Stop social engineering attacks targeting your employees
Share credentials securely within a team
Guarantee safety if your master password is compromised
Multi-factor authentication (MFA) adds a second verification step, such as a time-based one-time password (TOTP), and addresses gaps that a password manager alone cannot cover. Together, they form a much stronger defense.
Creating your master password
Your master password is the single credential that unlocks the entire vault — a weak one undermines every other security measure.
Released in August 2025, NIST SP 800-63B-4 sets a minimum length of 15 characters for passwords used as a single-factor authenticator. The same revision states that verifiers shall not impose password composition rules (e.g., requiring uppercase letters, numbers, or symbols) and instead must screen passwords against lists of commonly used or compromised values. A password like "P@ssw0rd123" would fail such screening.
Instead of random character requirements, the passphrase method works better: pick four or five unrelated words and combine them. A password generator can produce random word combinations, but many users prefer manual selection. "correct-horse-battery-staple" is a classic example — high entropy.
Step-by-step master password creation:
Choose 4–5 random, unrelated words (avoid song lyrics or famous quotes)
Add a separator between words (hyphens, dots, or spaces)
Optionally insert one number or symbol at a random position — not at the end
Test: can you type it from memory three times in a row?
Write it down once, store that paper in a physically secure location, then memorize it within a week
Master password best practices
Do:
Memorize it, never store it digitally in plain text
Keep one physical backup in a secure place (a sealed envelope in a safe, for example)
Practice typing it regularly during the first week
Don't:
Reuse your master password for any other account
Share it with anyone, including IT staff
Change it on a fixed schedule without reason: according to NIST SP 800-63B-4, passwords should change only when evidence of compromise exists
Recovery options are limited by design. With a zero-knowledge architecture, the provider cannot reset your master password because they never had access to it.
Choosing the right password manager for your needs
Before committing to any password management software, define what your organization actually requires. Deployment model, encryption standards, and integration with existing infrastructure should all factor into the decision.
Criteria
Questions to ask
Deployment
On-premise, cloud, or both? Who controls the server?
Encryption
AES-256? Zero-knowledge? Where does decryption happen?
Integrations
AD/LDAP support? SSO protocols like SAML or OAuth?
Team features
Role-based access? Shared vaults? Audit logs?
Compliance
GDPR audit trails? Exportable reports?
Scalability
Per-user licensing? Can it grow with the team?
When deployment flexibility and security architecture matter, both on-premise and cloud options should be available. Passwork supports both models, so you can choose where your data lives. The platform features a user-friendly interface that teams can quickly adopt. It combines password management with DevOps secrets management, API keys, tokens, and certificates in one system.
If you're evaluating multiple solutions, see how we perform in a real deployment scenario. Get a demo environment and test alongside other enterprise password managers. No credit card required.
Browser-based vs. dedicated password managers
Browser-built password managers (like the ones in Chrome or Edge) are convenient, but they lack enterprise features. Within a single browser profile, credentials remain isolated — sharing, role-based access, and audit logging are either absent or limited.
With a dedicated password manager, encryption happens independently of the browser, alongside granular access controls and multi-platform sync. Auto-fill and credential capture still run through a browser extension, but the vault sits in a more controlled environment.
Getting started with your password manager
With the master password ready and the solution selected, setup begins. The process follows a predictable path.
Install the core application: desktop client, web interface, or self-hosted instance
Create your account with the master password you prepared
Enable MFA immediately before adding any credentials to the vault
Install browser extensions for Chrome, Firefox, Edge, or Safari
Install mobile apps for iOS and Android if remote access is needed
Configure vault structure: create shared and personal vaults by department, project, or access level
Setting up browser extensions and mobile apps
After installing the extension, adjust a few settings:
Enable auto-lock after inactivity — five minutes is a reasonable default
Turn on PIN or biometric lock for the mobile app
Confirm the extension connects to the correct server URL (required for on-premise deployments)
Disable auto-fill on public or shared devices
A password saved on your laptop appears on your phone within seconds through cross-platform sync. All data travels encrypted, so even an intercepted sync payload is useless without the master password.
Setting up two-factor authentication for your password manager
MFA adds a second lock to your vault through an additional security verification step. Even if someone learns your master password, access still requires that second factor.
Authenticator apps (Google Authenticator, Authy) generate six-digit TOTP codes that refresh every 30 seconds. During setup, scan the QR code, verify the first code, and save the backup recovery codes in a physically secure location. Without those codes, losing your phone could mean losing vault access.
Importing and organizing your existing passwords
Migration from browsers, spreadsheets, or another password manager into your password storage vault usually starts with a CSV (Comma-Separated Values) export. Most managers accept this format and map fields (URL, username, password) automatically.
Before importing, audit what you have. Old accounts, duplicate entries, and credentials reused across services all need attention. The import stage is the ideal time to replace weak passwords with generated ones.
Our admin tools let you configure vault structures that mirror your team's organization. With role-based access, the finance team sees only finance credentials, while IT administrators maintain oversight of everything. This combination with a cost-efficient approach gives you enterprise-grade control without paying for features you do not need.
For teams implementing password management for the first time, setting up the right structure early prevents future access issues. Book a consultation to define your access model, deployment approach, and rollout plan.
Prioritizing your most critical accounts
Not all accounts carry the same risk. Start migration with the credentials that would cause the most damage if compromised:
Primary email accounts (often the recovery method for everything else)
Financial services and payment platforms
Cloud infrastructure and admin panels
Business communication tools (Slack, Teams, email servers)
Social media and public-facing accounts
According to IBM's 2025 Cost of a Data Breach Report, the global average breach cost reached $4.44 million, and the average time to identify and contain an incident was 241 days. Early migration of high-value accounts reduces that exposure window.
Using password health and data breach tools
Once credentials are in the vault, run a password vault health report — a routine computer security check. Built-in data breach monitoring scans your entries against known breach databases, while compromised password detection flags reused or weak credentials. Address critical findings first, especially any accounts where the same password protects multiple services.
Generating and managing strong passwords
For every new account or password replacement, use the built-in password generator. A strong configuration for high-security accounts: 20+ characters, mixed case, numbers, and symbols. Where services impose character limits, adjust — but never go below 15 characters.
A generated password like "g7#Kp!2xVmNqR9bW" has no predictable structure, which makes brute-force attacks impractical. The password manager remembers it, so complexity costs nothing in usability.
Using autofill features securely
Auto-fill speeds up form filling, but it requires awareness. Before letting the extension complete a login, verify these indicators:
The URL in the address bar matches the expected domain exactly
The connection uses HTTPS (look for the padlock icon)
The password manager recognizes the site; if it doesn't offer auto-fill, the domain may be spoofed
No unexpected redirects occurred before the login page loaded
A phishing page at g00gle.com looks convincing, yet the password manager matches exact domains and will not auto-fill on a fake site. On personal and work devices, keep the extension locked when not in active use.
Sharing passwords securely with others
For joint accounts, admin panels, and third-party services, teams need to share credentials. Sending passwords over email, Slack, or text messages is the wrong approach. Through built-in sharing features, encryption stays intact — credentials remain protected in transit.
We designed our role-based access controls to manage department-specific credentials and temporary contractor access. With on-premise deployment, shared secrets never transit through external servers. Learn more about our approach to business password management.
Managing family and team access
Shared password vaults work like shared folders: each vault has its own access permissions. An IT administrator might have full access, while a marketing team member sees only the social media credentials vault. Under GDPR, organizations must both protect personal data from unauthorized access and prove that protection is in place. Granular access controls and audit logs address both requirements at once.
Advanced features worth using
Beyond storing passwords, most enterprise password managers include features that teams often overlook. Secure notes let you store Wi-Fi credentials, server details, software license keys, or recovery codes — all protected by AES-256 encryption.
Through SSO (Single Sign-On) integration, the password manager connects with your identity provider, reducing friction for users who already authenticate through AD or LDAP. Audit logs track every action: who accessed which credential, when, and from which device — this simplifies GDPR and PCI-DSS (Payment Card Industry Data Security Standard) reporting.
Secure notes and document storage
Secure Shell keys (SSH), API tokens, recovery phrases, or internal procedures — all of these belong in secure notes rather than scattered across email threads or shared drives. Encryption protects them identically to passwords, and access controls determine who sees what.
Device syncing and access management
When a team member updates a password on their laptop, every authorized device reflects that change within seconds. Encrypted in transit, the data travels to the server (or your on-premise instance) and arrives at other devices still protected. Decryption happens only locally.
Proper device management requires MFA verification before any new device gains vault access. Without this step, an attacker who clones a session token could silently reach stored credentials.
Troubleshooting common password manager issues
Issue
Solution
Browser extension does not auto-fill
Clear extension cache, check browser compatibility and updates, verify the URL matches the saved entry.
Sync not working across devices
Confirm internet connectivity, check server status (for on-premise: verify the instance is running), log out and back in.
Master password not accepted
Check Caps Lock, verify keyboard language, try typing the password in a visible text field first.
MFA code rejected
Confirm the device clock is synced (TOTP codes depend on accurate time), use a backup recovery code if needed.
Maintaining your password security long-term
Security is not a one-time setup. Quarterly reviews keep your vault in good shape:
Run the vault's security audit to identify weak, reused, or old passwords
Replace any flagged credentials using the built-in password generator
Review shared vault access — remove former employees or contractors
Verify MFA is still active and backup codes are accessible
Check for any accounts in known breach databases and rotate those passwords immediately
What to do if your password manager is compromised
If you suspect your master password has been exposed, immediate damage control is critical for your computer security:
Change the master password immediately from a trusted device
Enable or re-verify MFA on the vault account
Rotate passwords for your highest-priority accounts (email, financial, infrastructure)
Review the vault's audit log for unauthorized access
Notify your security team and begin an incident response according to your organization's protocol
Conclusion: your next steps to password security
A password manager replaces guesswork with structure, a direct upgrade to your organization's digital protection. Instead of hoping employees choose strong passwords, you give them a tool that does it automatically and keeps every credential encrypted, auditable, and under control.
The first step is the simplest: choose a solution, create a strong master password, and start migrating your most critical accounts today.
Frequently Asked Questions
What is a password manager and how to use it?
Inside one encrypted vault, a password manager stores all your credentials – protected by a single master password. For new accounts, it generates strong passwords automatically and auto-fills login forms. We built our platform with AES-256 encryption and zero-knowledge architecture – once client-side encryption is enabled, your data stays unreadable, even to us.
How to use a password manager for the first time?
Create a strong master password (at least 15 characters, following NIST SP 800-63B-4 guidance). Enable MFA, install browser extensions, then import existing passwords from your browser or a CSV file. The process is well-documented and predictable with proper planning.
How do I create a master password?
Use the passphrase method: combine four or five random, unrelated words with separators (e.g., timber-clock-river-frost). Avoid personal details, common phrases, or song lyrics. The goal is high entropy – unpredictable to attackers, memorable for you.
What should I do if I forget my master password?
Under zero-knowledge architecture, the provider cannot recover it. Store a physical backup in a secure location (a sealed envelope in a safe, for example). Some platforms offer emergency access features or recovery keys – configure these during initial setup.
Are password managers safe?
With AES-256 encryption and zero-knowledge architecture, a properly configured password manager is safe by design: decryption happens only on the user's device, so even full server access reveals nothing. The 2025 Verizon DBIR found credential abuse in 22% of breaches – most involving weak or reused passwords. A password manager directly addresses that risk.
Upgrade from your current solution.Passwork provides free migration assistance, enterprise-grade implementation support. Get 20% off your first renewal!
Passwork ist jetzt als vollwertige Desktop-App für Windows, macOS und Linux verfügbar. Die Desktop-App bietet den kompletten Funktionsumfang für die Passwortverwaltung: Zugangsdaten verwalten, auf Tresore zugreifen und mit Ihrem Team zusammenarbeiten — alles mit der nativen Leistung und dem Komfort einer Desktop-Umgebung.
Unterstützte Betriebssysteme
Die Desktop-Anwendung unterstützt Windows 10/11 (64-Bit), macOS 12 (Monterey) und neuer sowie Linux-Distributionen einschließlich Ubuntu 20.04+, Fedora 34+, Debian 11+ und andere (64-Bit).
So laden Sie die App herunter
Sie können die Desktop-App direkt über die Passwork-Oberfläche herunterladen.
Öffnen Sie Passwork → Einstellungen und Benutzer → Desktop-App und laden Sie das Installationsprogramm für Ihr Betriebssystem herunter.
Installation
Die App authentifiziert sich über Ihren Browser. Sie benötigen den Hostnamen Ihrer Passwork-Instanz.
Laden Sie das Installationsprogramm herunter.
Installieren Sie die App für Ihr Betriebssystem und starten Sie sie.
Geben Sie Ihren Passwork-Hostnamen ein und klicken Sie auf Mit Browser anmelden.
Authentifizieren Sie sich im Browser: Geben Sie Ihre Zugangsdaten ein oder melden Sie sich über SSO oder Passkey an.
Erlauben Sie der App, sich mit Ihrer Browser-Sitzung zu verbinden.
Wenn die clientseitige Verschlüsselung in Passwork aktiviert ist, geben Sie Ihr Masterpasswort in der App ein.
Hinweis: Wenn Sie eine aktive Sitzung in der Web-Version haben, werden Sie von Passwork gefragt, ob Sie mit dem aktuellen Benutzer fortfahren oder das Konto wechseln möchten.
So aktualisieren Sie die App
Neue Versionen der Desktop-App werden zusammen mit Passwork-Updates veröffentlicht. Wenn eine neue Version verfügbar ist, werden Sie von der App zur Aktualisierung aufgefordert. Der Vorgang ist automatisch — das Installationsprogramm wird aus dem Repository heruntergeladen und ohne manuellen Eingriff installiert.
Was kommt als Nächstes
Kommende Versionen werden exklusive Desktop-Funktionen einführen, einschließlich eines Offline-Modus. Greifen Sie auf Ihre Passwörter ohne Serververbindung zu und gewährleisten Sie Kontinuität auch bei nicht verfügbarem Netzwerkzugang.
Unter macOS kann das System den ersten Start blockieren, da sich die App noch im Verifizierungsprozess von Apple befindet. Um sie zuzulassen, öffnen Sie Systemeinstellungen → Datenschutz & Sicherheit, suchen Sie die Meldung, dass Passwork blockiert wurde, klicken Sie auf Trotzdem öffnen und authentifizieren Sie sich mit Ihrem Administratorpasswort.
Detaillierte Installationsanleitungen finden Sie im Benutzerhandbuch Alle Informationen zu Passwork-Updates in unseren Release Notes
Passwork ya está disponible como una aplicación de escritorio completa para Windows, macOS y Linux. La aplicación de escritorio ofrece funcionalidad completa de gestión de contraseñas: gestione credenciales, acceda a bóvedas, colabore con su equipo, todo con el rendimiento nativo y la comodidad de un entorno de escritorio.
Sistemas operativos compatibles
La aplicación de escritorio es compatible con Windows 10/11 (64 bits), macOS 12 (Monterey) y versiones posteriores, y distribuciones de Linux incluyendo Ubuntu 20.04+, Fedora 34+, Debian 11+ y otras (64 bits).
Cómo descargar
Puede descargar la aplicación de escritorio directamente desde la interfaz de Passwork.
Abra Passwork → Configuración y usuarios → Aplicación de escritorio y descargue el instalador para su sistema operativo.
Instalación
La aplicación se autentica a través de su navegador. Necesitará el nombre de host de su instancia de Passwork.
Descargue el instalador.
Instale la aplicación para su sistema operativo e iníciela.
Introduzca el nombre de host de Passwork y haga clic en Iniciar sesión con navegador.
Autentíquese en el navegador: introduzca sus credenciales o inicie sesión mediante SSO o passkey.
Permita que la aplicación se conecte a su sesión del navegador.
Si el cifrado del lado del cliente está habilitado en Passwork, introduzca su contraseña maestra en la aplicación.
Nota: Si tiene una sesión activa en la versión web, Passwork le preguntará si desea continuar con el usuario actual o cambiar de cuenta.
Cómo actualizar
Las nuevas versiones de la aplicación de escritorio se publican junto con las actualizaciones de Passwork. Cuando una nueva versión está disponible, la aplicación le solicita que actualice. El proceso es automático — el instalador se descarga del repositorio y se instala sin intervención manual.
Próximas novedades
Las próximas versiones introducirán funciones exclusivas para escritorio, incluyendo el modo sin conexión. Acceda a sus contraseñas sin conexión al servidor, garantizando la continuidad incluso cuando el acceso a la red no esté disponible.
En macOS, el sistema puede bloquear el primer inicio porque la aplicación aún está en proceso de verificación por Apple. Para permitirla, abra Configuración del Sistema → Privacidad y seguridad, busque el mensaje sobre el bloqueo de Passwork, haga clic en Abrir de todos modos y autentíquese con su contraseña de administrador.
Las instrucciones detalladas de instalación están disponibles en la guía del usuario Toda la información sobre las actualizaciones de Passwork en nuestras notas de versión
Passwork is now available as a full-featured desktop app for Windows, macOS, and Linux. The desktop app delivers complete password management functionality: manage credentials, access vaults, collaborate with your team, all with the native performance and convenience of a desktop environment.
Supported operating systems
The desktop application supports Windows 10/11 (64-bit), macOS 12 (Monterey) and later, and Linux distros including Ubuntu 20.04+, Fedora 34+, Debian 11+, and others (64-bit).
How to download
You can download the desktop app directly from the Passwork interface.
Open Passwork → Settings and users → Desktop app and download the installer for your operating system.
Installation
The app authenticates through your browser. You'll need your Passwork instance hostname.
Download the installer
Install the app for your OS and launch it
Enter your Passwork hostname and click Sign in with browser
Authenticate in the browser: enter your credentials or sign in via SSO or passkey
Allow the app to connect to your browser session
If client-side encryption is enabled in Passwork, enter your master password in the app
Note: If you have an active session in the web version, Passwork will prompt you to continue with the current user or switch accounts.
How to update
New desktop app versions are released alongside Passwork updates. When a new version becomes available, the app prompts you to update. The process is automatic — the installer downloads from the repository and installs without manual intervention.
What's next
Upcoming releases will introduce desktop-exclusive features, including offline mode. Access your passwords without a server connection, ensuring continuity even when network access is unavailable.
Detailed installation instructions are available in the user guide All information about Passwork updates in our release notes
Passwork is now available as a full-featured desktop app for Windows, macOS, and Linux. The desktop app delivers complete password management functionality: manage credentials, access vaults, collaborate with your team, all with the native performance and convenience of a desktop environment.
Die neuen Releases führen die Unterstützung der Passwork Desktop-App ein und bringen mehrere Verbesserungen sowie Fehlerbehebungen für die Authentifizierungseinstellungen.
Änderungen
Unterstützung für die Desktop-App hinzugefügt: Sie kann jetzt über die Einstellungen und das Benutzermenü heruntergeladen werden
Option zum manuellen Sperren der Authentifizierungseinstellungen hinzugefügt, um unbefugte Änderungen zu verhindern
Entsperrmethode für das Modal „Mobilgerät verbinden" geändert: Jetzt ist bei jedem Öffnen des Fensters eine Verifizierung per Passwort, Passkey oder SSO erforderlich
Problem behoben, bei dem das Entsperren der Authentifizierungseinstellungen über SSO nicht funktionierte, wenn der SSO-Server und Passwork unterschiedliche Domains hatten
Problem behoben, bei dem Benutzer mit LDAP-Authentifizierung das Passwortfeld beim Entsperren der Authentifizierungseinstellungen nicht sehen konnten
Alle Informationen zu Passwork-Updates finden Sie in unseren Release Notes
Die neuen Releases führen die Unterstützung für die Passwork Desktop-App ein und beinhalten mehrere Verbesserungen sowie Fehlerbehebungen in den Authentifizierungseinstellungen.
Las nuevas versiones introducen compatibilidad con la aplicación de escritorio de Passwork y añaden varias mejoras y correcciones de errores en la configuración de autenticación.
Cambios
Se añadió compatibilidad con la aplicación de escritorio: ahora se puede descargar desde el menú de Configuración y usuarios.
Se añadió la opción de bloquear manualmente la configuración de autenticación para evitar cambios no autorizados.
Se modificó el método de desbloqueo del modal «Conectar dispositivo móvil»: ahora requiere verificación mediante contraseña, passkey o SSO cada vez que se abre la ventana.
Se corrigió un problema en el que el desbloqueo de la configuración de autenticación mediante SSO no funcionaba cuando el servidor SSO y Passwork tenían dominios diferentes.
Se corrigió un problema en el que los usuarios con autenticación LDAP no podían ver el campo de contraseña al desbloquear la configuración de autenticación.
Puede encontrar toda la información sobre las actualizaciones de Passwork en nuestras notas de la versión
Las nuevas versiones introducen soporte para la aplicación de escritorio Passwork y añaden varias mejoras y correcciones de errores en la configuración de autenticación.
Password security stands as your first line of defense against cyber threats. A comprehensive approach combines strong password creation, encrypted storage through password managers, and multi-factor authentication to counter increasingly sophisticated attacks targeting your digital identity.
The true cost of weak passwords
Data breaches cost organizations an average of $4.35 million per incident, according to IBM's Cost of Data Breach Report. According to the Verizon DBIR 2025 Report, compromised credentials are the leading cause of security incidents: 22% of hacking-related breaches leverage stolen or weak passwords.
Beyond financial losses, organizations face regulatory penalties, operational disruption, and reputational damage. Identity theft affects millions annually, with attackers exploiting weak passwords to access banking systems, healthcare records, and corporate networks. The cascading effects extend far beyond the initial breach — customer trust erodes, legal liabilities mount, and recovery efforts consume months of resources.
Companies struggle daily with password-related security incidents, where basic credential weaknesses lead to significant business disruption. Passwork's Zero-knowledge encryption architecture and transparent cryptography documentation help organizations understand exactly how their passwords are protected, eliminating the guesswork that often leads to security compromises.
Common password vulnerabilities and attack methods
Credential stuffing exploits password reuse across multiple accounts. Attackers obtain credentials from one breach and systematically test them against other services, succeeding when users recycle passwords. Dictionary attacks rapidly test common passwords and predictable patterns against target accounts.
Phishing remains devastatingly effective. Hackers craft convincing emails that trick users into revealing credentials directly. Brute force attacks test character combinations, with weak passwords falling within minutes. Password cracking tools leverage GPU processing to test billions of combinations per second.
The most exploited vulnerabilities stem from human behavior: using "password123" or "qwerty," incorporating easily discoverable personal information such as birthdays, and reusing the same password for years. Have I Been Pwned documents over 12 billion compromised accounts, demonstrating the scale of credential exposure. Password checkers reveal that most user-created passwords would crack in under an hour using standard tools.
Creating secure passwords and management strategies
Password strength fundamentally depends on length rather than complexity. NIST guidelines recommend a minimum 12-character password, with each additional character exponentially increasing crack time. A 16-character passphrase like "correct-horse-battery-staple" provides superior security compared to "P@ssw0rd!" while remaining more memorable.
Combining uppercase, lowercase, numbers, and symbols creates complexity, but a 20-character phrase of random words defeats attackers more effectively than an 8-character jumble of special characters. The mathematics of password entropy clearly favors length.
Longer passphrases provide better security than complex character combinations. Passwork's built-in password generator follows NIST guidelines, while our dual capability combines enterprise-grade password management with secrets management for DevOps teams — something most traditional password managers can't offer. Learn more about Passwork's enterprise deployment options.
Secure storage becomes essential when managing dozens of unique passwords. Writing passwords on paper creates physical security risks. Storing them in unencrypted documents or browser storage exposes credentials to malware. Password managers solve this problem by providing encrypted vaults that are protected by a single master password. This allows you to create and maintain unique and complex passwords for each of your accounts without having to remember them all.
Password manager selection and setup guide
Enterprise password management requires evaluating deployment models, security architecture, and operational capabilities. 1Password emphasizes business sharing features and cross-platform accessibility. KeePass provides open-source flexibility with local database control. LastPass offers cloud convenience but has faced security incidents that raise deployment concerns.
Password manager feature comparison chart:
Feature
Passwork
1Password
KeePass
LastPass
Deployment Model
On-premise/Cloud
Cloud
Local/Self-hosted
Cloud
Secrets Management
✓
✗
✗
✗
Zero-Knowledge Architecture
✓
✓
✓
✓
Role-Based Access Control
Advanced
Standard
Limited
Standard
LDAP/SSO Integration
✓
✓
Limited
✓
Audit Logging
Comprehensive
Standard
Basic
Standard
DevOps Integration
Native
Limited
Manual
Limited
Transparent Cryptography Docs
✓
Partial
✓
Partial
While 1Password offers strong business features and KeePass provides open-source flexibility, businesses need both password management and secrets management in one platform. Modern infrastructure includes not only human passwords, but also API keys, tokens, certificates. Passwork provides on-premises deployment, whereas Bitwarden is cloud-based. For companies, cost-efficiency without feature bloat is important.
Setup begins with master password creation. This single credential protects your entire vault, requiring maximum strength — minimum 16 characters combining random words or a memorable phrase with added complexity. Enable encryption at rest and verify that the password manager uses AES-256 or equivalent encryption standards.
Migration requires a systematic approach: inventory existing credentials, prioritize critical accounts, and gradually transfer passwords while updating weak credentials. Configure browser extensions for autofill convenience, but verify they require authentication before populating credentials. Establish backup procedures for encrypted vault data, ensuring recovery options if master password access is lost.
Evaluating enterprise password managers?Get a demo environment to test Passwork alongside other solutions.
Multi-factor authentication and future security
Multi-factor authentication (MFA) transforms password security from single-point failure to layered defense. Even when attackers obtain passwords through phishing or breaches, MFA blocks unauthorized access by requiring additional verification. This secondary defense layer reduces account compromise risk by 99.9%, according to Microsoft security research.
MFA combines something you know (password), something you have (phone or security key), and something you are (biometric data). This approach ensures that credential theft alone proves insufficient for account access. Organizations implementing MFA across critical systems dramatically reduce successful breach attempts, as attackers rarely possess multiple authentication factors.
The authentication landscape evolves toward passwordless systems. Biometrics leverage fingerprints, facial recognition, or behavioral patterns for verification. Passkeys, built on WebAuthn standards, enable cryptographic authentication without traditional passwords. These technologies promise enhanced security while reducing user friction.
Passwork integrates seamlessly with existing MFA systems through SSO and LDAP connections, ensuring that it becomes part of your existing security infrastructure rather than creating another authentication silo. This integration approach reduces user friction while maintaining the security benefits of multi-layered authentication.
MFA methods and emerging authentication technologies
Authenticator apps like Google Authenticator or Microsoft Authenticator generate time-based codes, providing strong security without SMS vulnerabilities. Hardware security keys offer maximum protection against phishing through cryptographic challenge-response protocols. SMS-based codes remain common but face interception risks through SIM swapping attacks.
Biometric authentication delivers convenience and security when properly implemented. Fingerprint sensors and facial recognition systems verify identity without memorization requirements. However, biometrics cannot be changed if compromised, requiring careful implementation with fallback options.
Passkeys represent the authentication future. WebAuthn enables public-key cryptography where private keys never leave your device. Passkeys prevent phishing by using cryptographic verification instead of shared secrets for authentication. Major platforms now support passkey implementation, with adoption accelerating across consumer and enterprise environments. Biometric hardware works seamlessly with WebAuthn, combining the security of cryptographic keys with the convenience of fingerprint or face verification.
Conclusion
Effective password security balances protection with usability. Implement unique, lengthy passwords for every account. Store credentials in encrypted password managers rather than memory or insecure documents. Enable multi-factor authentication on critical systems. Monitor for credential exposure through breach notification services.
Passwork is designed to be both enterprise-grade secure and genuinely usable — the best security system is the one people actually use consistently.
Frequently Asked Questions
What makes a strong password?
Strong passwords combine length and unpredictability. Use a minimum of 16 characters, combining random words or mixed character types. Avoid personal information, dictionary words, or predictable patterns. Each additional character exponentially increases crack time — a 16-character password resists brute force attacks for years, while 8-character passwords crack in hours. NIST guidelines emphasize length over complexity rules that create memorable but weak passwords like "Password1!". Password managers eliminate memorization burden, enabling truly random credentials.
Why should I use a password manager?
Password managers solve the fundamental conflict between security and usability. Humans cannot remember dozens of unique, complex passwords, leading to dangerous reuse patterns. Passwork has Zero-knowledge encryption where your master password never reaches our servers, ensuring only you can decrypt credentials. On-premise deployment options provide additional control for regulated industries. Password managers also generate cryptographically random passwords, store API keys and certificates for DevOps workflows, and provide audit trails for compliance requirements. The security improvement dramatically outweighs the minimal learning curve.
How does multi-factor authentication improve my security?
MFA creates layered defense requiring multiple verification methods. Even when attackers steal passwords through phishing or breaches, they cannot access accounts without the second factor. It's better to use authenticator apps or hardware keys over SMS codes, which face interception risks. MFA integration with password managers through SSO and LDAP ensures seamless workflows while maintaining security. Organizations implementing MFA reduce successful account compromises by over 99%, according to security research. The additional seconds required for authentication provide exponentially greater protection against credential-based attacks.
What should I do if I suspect my password has been compromised?
Immediately change the compromised password and any accounts sharing that credential. Check HaveIBeenPwned to verify if your email appears in known breaches. Enable MFA on affected accounts if not already active. Review account activity logs for unauthorized access. Conduct a comprehensive password audit using your password manager to identify and update reused credentials. Monitor financial accounts and credit reports for fraudulent activity. Consider freezing credit if personal information was exposed. Document the incident timeline and affected systems for potential regulatory reporting requirements.
Ready to take control of your credentials? Start your free Passwork trial and explore practical ways to protect your business.
Security password guide: Expert methods to protect your digital identity
Password security stands as your first line of defense against cyber threats. A comprehensive approach combines strong password creation, encrypted storage through password managers, and multi-factor authentication to counter increasingly sophisticated attacks targeting your digital identity.
Wir freuen uns mitzuteilen, dass der Kundensupport von Passwork von Software Advice als der beste in der Kategorie Passwort-Manager ausgezeichnet wurde. Diese Auszeichnung basiert auf echten Kundenbewertungen und dient als objektiver Indikator für unsere Produkt- und Servicequalität — wir beantworten nicht nur Fragen, sondern helfen Kunden, ihre Herausforderungen effektiv zu lösen.
Was Kunden über uns sagen
Es gibt viele Bewertungen auf verschiedenen Plattformen, und hier sind einige davon.
„Kunden heben unsere Reaktionsschnelligkeit, tiefgreifende Expertise und Bereitschaft hervor, auch in nicht-standardmäßigen Situationen zu helfen. Hervorragende Unterstützung während der Test- und Implementierungsphase sowie sehr reaktionsschnelle Manager, die schnell und flexibel bei der Lösung aller organisatorischen Fragen geholfen haben." — Informationssicherheitsbeauftragter
Passwork hat die interne Sicherheit bei der Stadtverwaltung Melle verbessert, indem ein zuverlässiges System für die Passwortverwaltung geschaffen wurde:
„Nach der Migration zu Passwork 7 hatte ich einige kleinere Schwierigkeiten, aber das Support-Team hat mich buchstäblich durch den gesamten Prozess begleitet. Innerhalb von höchstens einem Tag erhielt ich Antworten auf alle meine Fragen. Perfekt. Keine Probleme. Ich bin sehr zufrieden." — Systemadministrator
Durch sorgfältige Evaluierung und eine sicherheitsorientierte Implementierungsstrategie verlief die Bereitstellung reibungslos. Ein maßgeschneiderter Onboarding-Ansatz führte zu einer hohen Benutzerakzeptanz.
Über die Plattform
Software Advice ist eine internationale Plattform zum Entdecken und Vergleichen von IT-Lösungen für Unternehmen. Sie gehört zu Gartner Digital Markets, zusammen mit GetApp und Capterra, die Passwork mit der Auszeichnung Best Ease of Use 2025 in der Kategorie Passwortverwaltung von Capterra, einer führenden Software-Bewertungsplattform, ausgezeichnet haben.
Bei Passwork sind wir überzeugt, dass sich Cybersicherheit handhabbar anfühlen sollte, nicht überwältigend. Unser erfahrenes Support-Team und unsere Manager arbeiten eng mit Ihnen zusammen und bieten schnelle Antworten, praktische Anleitungen und persönliche Unterstützung, wann immer Sie sie benötigen.
Das Vertrauen der Kunden und ehrliches Feedback spielen eine Schlüsselrolle bei der Verbesserung und Weiterentwicklung von Passwork.
Machen auch Sie den ersten Schritt! Starten Sie Ihre kostenlose Passwork-Testversion und erleben Sie, wie einfach sichere Passwortverwaltung sein kann.
Passwork gana el premio Mejor Soporte al Cliente 2026 de Software Advice
Nos complace compartir que el soporte al cliente de Passwork ha sido reconocido como el mejor en la categoría de Gestores de Contraseñas por Software Advice. Este premio se basa en reseñas reales de clientes y sirve como un indicador objetivo de la calidad de nuestro producto y servicio — no solo respondemos preguntas, ayudamos a los clientes a resolver sus desafíos de manera efectiva.
Lo que dicen nuestros clientes
Hay muchas reseñas disponibles en múltiples plataformas, y aquí presentamos algunas de ellas.
«Los clientes destacan nuestra capacidad de respuesta, profunda experiencia y disposición para ayudar incluso en situaciones no estándar. Excelente soporte durante la fase de pruebas e implementación, así como gestores muy receptivos que ayudaron a resolver todos los problemas organizativos de manera rápida y flexible.» — Oficial de seguridad de la información
Passwork ha mejorado la seguridad interna en la administración de la ciudad de Melle creando un sistema confiable para la gestión de contraseñas:
«Tuve algunas dificultades menores después de migrar a Passwork 7, pero el equipo de soporte literalmente me guió a través de todo el proceso. En un día como máximo, recibí respuestas a todas mis preguntas. Perfecto. Sin problemas. Estoy muy satisfecho.» — Administrador de sistemas
A través de una evaluación cuidadosa y una estrategia de implementación centrada en la seguridad, el despliegue se realizó sin problemas. Un enfoque de incorporación personalizado impulsó una alta adopción por parte de los usuarios.
Acerca de la plataforma
Software Advice es una plataforma internacional para descubrir y comparar soluciones de TI para empresas. Es parte de Gartner Digital Markets, junto con GetApp y Capterra, que reconoció a Passwork con el premio Best Ease of Use 2025 en la categoría de gestión de contraseñas por Capterra, una plataforma líder de reseñas de software.
En Passwork, creemos que la ciberseguridad debe sentirse manejable, no abrumadora. Nuestro equipo experto de soporte y gestores trabaja estrechamente con usted, ofreciendo respuestas rápidas, orientación práctica y asistencia personalizada cuando la necesite.
La confianza de los clientes y los comentarios honestos desempeñan un papel clave en cómo mejoramos y desarrollamos Passwork.
¡Dé el primer paso usted también! Comience su prueba gratuita de Passwork y descubra lo fácil que puede ser la gestión segura de contraseñas.
Passwork gana el premio Mejor Soporte al Cliente 2026 de Software Advice
Nos complace compartir que el soporte al cliente de Passwork ha sido reconocido como el mejor en la categoría de gestores de contraseñas por Software Advice.
We're excited to share that Passwork's customer support has been recognized as the best in the Password Managers category by Software Advice. This award is based on real customer reviews and serves as an objective indicator of our product and service quality — we don't just answer questions, we help clients solve their challenges effectively.
What customers say about us
There are many reviews available across multiple platforms, and here are some of them.
"Clients highlight our responsiveness, deep expertise, and willingness to help even in non-standard situations. Excellent support during the testing and implementation phase, as well as very responsive managers who quickly and flexibly helped resolve all organizational issues." — Information security officer
Passwork has improved the internal security at the Melle city administration by creating a reliable system for password management:
"I ran into some minor difficulties after migrating to Passwork 7, but the support team literally walked me through the entire process. Within a day at most, I received answers to all my questions. Perfect. No issues. I'm very satisfied." — System administrator
Through careful evaluation and a security-focused implementation strategy, the deployment proceeded smoothly. A tailored onboarding approach drove high user adoption.
About the platform
Software Advice is an international platform for discovering and comparing IT solutions for businesses. It's part of Gartner Digital Markets, alongside GetApp and Capterra, which recognized Passwork with the Best Ease of Use 2025 award in the password management category by Capterra, a leading software review platform.
At Passwork, we believe cybersecurity should feel manageable, not overwhelming. Our expert support team and managers work closely with you, offering fast responses, practical guidance, and personal assistance whenever you need it.
Customer trust and honest feedback play a key role in how we improve and develop Passwork.
Take the first step too! Start your free Passwork trial and see how easy secure password management can be.
Die neuen Releases führen restriktive Einstellungen für Benutzer-Tresore ein (einschließlich der Option, das Hinzufügen neuer Benutzer und Gruppen zu blockieren), einen sanften Wechsel der Darstellung sowie weitere Verbesserungen und Fehlerbehebungen.
Einschränkungen für Benutzer-Tresore
In den Tresor-Einstellungen wurde ein neuer Block mit zusätzlichen restriktiven Einstellungen für Benutzer-Tresore hinzugefügt. Dieser ermöglicht es Administratoren, die folgenden Aktionen für alle Benutzer-Tresore (privat und geteilt) zentral zu erlauben oder einzuschränken:
Hinzufügen von Benutzern und Gruppen
Senden von Passwörtern
Erstellen von Passwort-Links
Erstellen von Passwort-Shortcuts
Die Einschränkungen gelten nicht für Firmen-Tresore und werden automatisch auf alle bestehenden und neuen Benutzer-Tresore angewendet.
Zusätzliche Einschränkungseinstellungen für Benutzer-Tresore befinden sich unter Einstellungen und Benutzer → Tresor-Einstellungen → Reiter Einstellungen.
Die neuen Einschränkungen lösen drei Sicherheitsprobleme:
Geringeres Risiko von Sicherheitsverletzungen — Das Blockieren der Link-Erstellung und des Passwortversands aus Benutzer-Tresoren verhindert versehentliche oder absichtliche Datenlecks außerhalb der Organisation.
Zentralisierte Richtlinienverwaltung — Administratoren steuern Aktionen auf Plattformebene, anstatt sich auf die Disziplin der Mitarbeiter zu verlassen.
Stärkere Kontrolle über die Datenverteilung — Unkontrollierte Passwortfreigabe über persönliche Tresore wird verhindert. Dies ist entscheidend für Organisationen mit strengen Sicherheitsanforderungen.
Anwendungsfälle
Drei häufige Fälle, in denen zusätzliche Einschränkungen für Benutzer-Tresore spezifische Sicherheitsherausforderungen lösen:
Verbot der Passwortfreigabe aus persönlichen Tresoren
Problem: Mitarbeiter speichern Unternehmenspasswörter in persönlichen Tresoren und teilen sie direkt mit Kollegen, wobei sie Firmen-Tresore umgehen.
Lösung: Aktivieren Sie alle vier Einschränkungen. Mitarbeiter können Passwörter in persönlichen Tresoren speichern, aber nicht teilen — das Teilen erfordert Firmen-Tresore mit kontrolliertem Zugriff.
Verbot der Link-Erstellung für externe Auftragnehmer
Problem: Mitarbeiter erstellen temporäre Passwort-Links aus persönlichen Tresoren und senden diese an externe Auftragnehmer, wodurch Risiken für Datenlecks entstehen.
Lösung: Aktivieren Sie „Erstellen von Passwort-Links verbieten". Links können nur aus Firmen-Tresoren erstellt werden, wo Administratoren Ablaufzeit und Zugriffsrechte kontrollieren.
Verhinderung von Unternehmenspasswort-Duplikaten
Problem: Mitarbeiter kopieren Passwörter aus Firmen-Tresoren in ihre persönlichen, erstellen Shortcuts und teilen diese dann mit Kollegen. Dadurch werden dieselben Anmeldedaten an mehreren Orten gespeichert. Wenn ein Passwort im Firmen-Tresor geändert wird, bleiben veraltete Kopien im persönlichen Speicher erhalten.
Lösung: Aktivieren Sie die Einschränkungen „Erstellen von Passwort-Shortcuts verbieten" und „Hinzufügen von Benutzern und Gruppen verbieten". Dies zwingt Mitarbeiter, direkt mit Firmen-Tresoren zu arbeiten, wo Passwörter immer aktuell sind und der Administrator deren Lebenszyklus und Änderungshistorie kontrolliert.
Weitere Änderungen
Visuelle Indikatoren hinzugefügt, die Benutzer über die obligatorische E-Mail-Bestätigung informieren, um Benachrichtigungen zu erhalten
Dynamisches Laden der Liste für den Benutzerfilter im Sicherheits-Dashboard hinzugefügt
Sanfter Übergang beim Wechseln der Darstellung hinzugefügt
Automatische Einstellung des Wertes „Lesen" im Zugangsfeld beim Senden eines Passworts an einen anderen Benutzer hinzugefügt
Problem behoben, bei dem Benutzer ihre E-Mail-Adressen nicht bestätigen konnten, wenn das Masterpasswort nicht im Browser gespeichert war
Problem behoben, bei dem nach dem Zurücksetzen des Zugriffs in der Benutzerverwaltung ein falsches Zugangslevel angezeigt wurde, bis die Seite neu geladen wurde
Problem behoben, bei dem die Liste der Posteingangs-Passwörter nicht korrekt angezeigt wurde, nachdem das Kontrollkästchen „Nur im Posteingang suchen" bei einer leeren Suchanfrage aktiviert wurde
Problem behoben, bei dem XML-Dateien aus KeePass nicht importiert werden konnten, wenn sie Ordner mit Namen enthielten, die nur aus Ziffern bestanden
Kleinere UI- und Lokalisierungsverbesserungen vorgenommen
Alle Informationen zu Passwork-Updates finden Sie in unseren Release Notes
Die neue Version führt restriktive Einstellungen für Benutzertresore ein, einschließlich der Option, das Hinzufügen neuer Benutzer und Gruppen zu blockieren, bietet einen fließenden Wechsel des Erscheinungsbilds sowie weitere Verbesserungen und Fehlerbehebungen.
Las nuevas versiones introducen configuraciones restrictivas para las bóvedas de usuario (incluyendo la opción de bloquear la adición de nuevos usuarios y grupos), cambio fluido de apariencia, y otras mejoras y correcciones.
Restricciones para bóvedas de usuario
Se ha añadido un nuevo bloque de configuraciones restrictivas adicionales para las bóvedas de usuario en la Configuración de bóvedas, permitiendo a los administradores autorizar o restringir de forma centralizada las siguientes acciones para todas las bóvedas de usuario (privadas y compartidas):
Añadir usuarios y grupos
Enviar contraseñas
Crear enlaces de contraseñas
Crear accesos directos de contraseñas
Las restricciones no se aplican a las bóvedas de empresa y se aplican automáticamente en todas las bóvedas de usuario existentes y nuevas.
Las configuraciones de restricción adicionales para las bóvedas de usuario se encuentran en Configuración y usuarios → Configuración de bóvedas → pestaña Configuración.
Las nuevas restricciones resuelven tres problemas de seguridad:
Menor riesgo de filtración — Bloquear la creación de enlaces y el envío de contraseñas desde las bóvedas de usuario previene fugas de datos accidentales o intencionales fuera de la organización.
Gestión centralizada de políticas — Los administradores controlan las acciones a nivel de plataforma en lugar de depender de la disciplina de los empleados.
Mayor control sobre la distribución de datos — Previene el intercambio no supervisado de contraseñas a través de bóvedas personales. Crítico para organizaciones con requisitos de seguridad estrictos.
Casos de uso
Tres casos comunes donde las restricciones adicionales para bóvedas de usuario resuelven desafíos de seguridad específicos:
Prohibir compartir contraseñas desde bóvedas personales
Problema: Los empleados almacenan contraseñas corporativas en bóvedas personales y las comparten directamente con colegas, evitando las bóvedas de empresa.
Solución: Active las cuatro restricciones. Los empleados pueden almacenar contraseñas en bóvedas personales pero no pueden compartirlas — compartir requiere bóvedas de empresa con acceso controlado.
Prohibir la creación de enlaces para contratistas externos
Problema: Los empleados crean enlaces temporales de contraseñas desde bóvedas personales y los envían a contratistas externos, creando riesgos de filtración.
Solución: Active «Prohibir crear enlaces de contraseñas». Los enlaces solo pueden crearse desde bóvedas de empresa, donde los administradores controlan el tiempo de expiración y los derechos de acceso.
Prevenir la duplicación de contraseñas corporativas
Problema: Los empleados copian contraseñas de las bóvedas de empresa a sus bóvedas personales, crean accesos directos y luego las comparten con colegas. Como resultado, las mismas credenciales se almacenan en múltiples ubicaciones, y cuando se cambia una contraseña en la bóveda de empresa, las copias obsoletas permanecen en el almacenamiento personal.
Solución: Active las restricciones «Prohibir crear accesos directos de contraseñas» y «Prohibir añadir usuarios y grupos». Esto obligará a los empleados a trabajar directamente con las bóvedas de empresa, donde las contraseñas siempre están actualizadas y el administrador controla su ciclo de vida e historial de cambios.
Otros cambios
Se añadieron indicadores visuales que informan a los usuarios sobre la confirmación obligatoria del correo electrónico para recibir notificaciones
Se añadió carga dinámica de listas para el filtro de usuarios en el panel de seguridad
Se añadió transición fluida al cambiar la apariencia
Se añadió la configuración automática del valor Lectura en el campo Acceso al enviar una contraseña a otro usuario
Se corrigió un problema donde los usuarios no podían confirmar sus direcciones de correo electrónico cuando la contraseña maestra no estaba guardada en el navegador
Se corrigió un problema donde, después de restablecer el acceso en Gestión de usuarios, se mostraba un nivel de acceso incorrecto hasta que se recargaba la página
Se corrigió un problema donde la lista de contraseñas de la bandeja de entrada no se mostraba correctamente después de activar la casilla «Buscar solo en Bandeja de entrada» con una consulta de búsqueda vacía
Se corrigió un problema donde los archivos XML de KeePass no podían importarse si contenían carpetas con nombres que consistían solo en dígitos
Se realizaron mejoras menores de interfaz y localización
Puede encontrar toda la información sobre las actualizaciones de Passwork en nuestras notas de versión
La nueva versión introduce configuraciones restrictivas para las bóvedas de usuario, incluyendo la opción de bloquear la adición de nuevos usuarios y grupos, transiciones suaves de apariencia, y otras mejoras y correcciones.
The new releases introduce restrictive settings for User vaults (including the option to block adding new users and groups), smooth appearance switching, and other improvements and fixes.
Restrictions for User vaults
We've added a new block of additional restrictive settings for User vaults in the Vaults settings, allowing administrators to centrally permit or restrict the following actions for all user vaults (private and shared):
Adding users and groups
Sending passwords
Creating password links
Creating password shortcuts
The restrictions do not apply to Company vaults and are automatically enforced on all existing and new User vaults.
Additional restriction settings for user vaults are located in Settings and users → Vaults settings → Settings tab.
New restrictions solve three security problems:
Lower breach risk — Blocking link creation and password sending from User vaults prevents accidental or intentional data leaks outside the organization.
Centralized policy management — Administrators control actions at the platform level rather than relying on employee discipline.
Stronger control over data distribution — Prevent unmonitored password sharing through personal vaults. Critical for organizations with strict security requirements.
Use cases
Three common cases where additional restrictions for User vaults resolve specific security challenges:
Prohibiting password sharing from Personal vaults
Problem: Employees store corporate passwords in personal vaults and share them directly with colleagues, bypassing company vaults.
Solution: Enable all four restrictions. Employees can store passwords in personal vaults but cannot share them — sharing requires Company vaults with controlled access.
Prohibiting link creation for external contractors
Problem: Employees create temporary password links from personal vaults and send them to external contractors, creating leak risks.
Solution: Enable "Prohibit creating password links." Links can only be created from Company vaults, where administrators control expiration time and access rights.
Preventing corporate password duplication
Problem: Employees copy passwords from Company vaults to their personal ones, create shortcuts, and then share them with colleagues. As a result, the same credentials are stored in multiple locations, and when a password is changed in the Company vault, outdated copies remain in personal storage.
Solution: Enable the restrictions "Prohibit creating password shortcuts" and "Prohibit adding users and groups." This will force employees to work directly with Company vaults, where passwords are always up to date, and the administrator controls their lifecycle and change history.
Other changes
Added visual indicators informing users about the mandatory email confirmation in order to receive notifications
Added dynamic list loading for the user filter in the Security dashboard
Added smooth transition when switching appearance
Added automatic setting of the Read value in the Access field when sending a password to another user
Fixed an issue where users couldn't confirm their email addresses when the master password wasn't saved in the browser
Fixed an issue where, after resetting access in User management, an incorrect access level was displayed until the page was reloaded
Fixed an issue where the list of inbox passwords wasn't displayed correctly after enabling the "Search only in Inbox" checkbox with an empty search query
Fixed an issue where XML files from KeePass could not be imported if they contained folders with names consisting only of digits
Made minor UI and localization improvements
You can find all information about Passwork updates in our release notes
The new version introduces restrictive settings for User vaults, including the option which blocks adding new users and groups, adds smooth appearance switching, and other improvements and fixes.

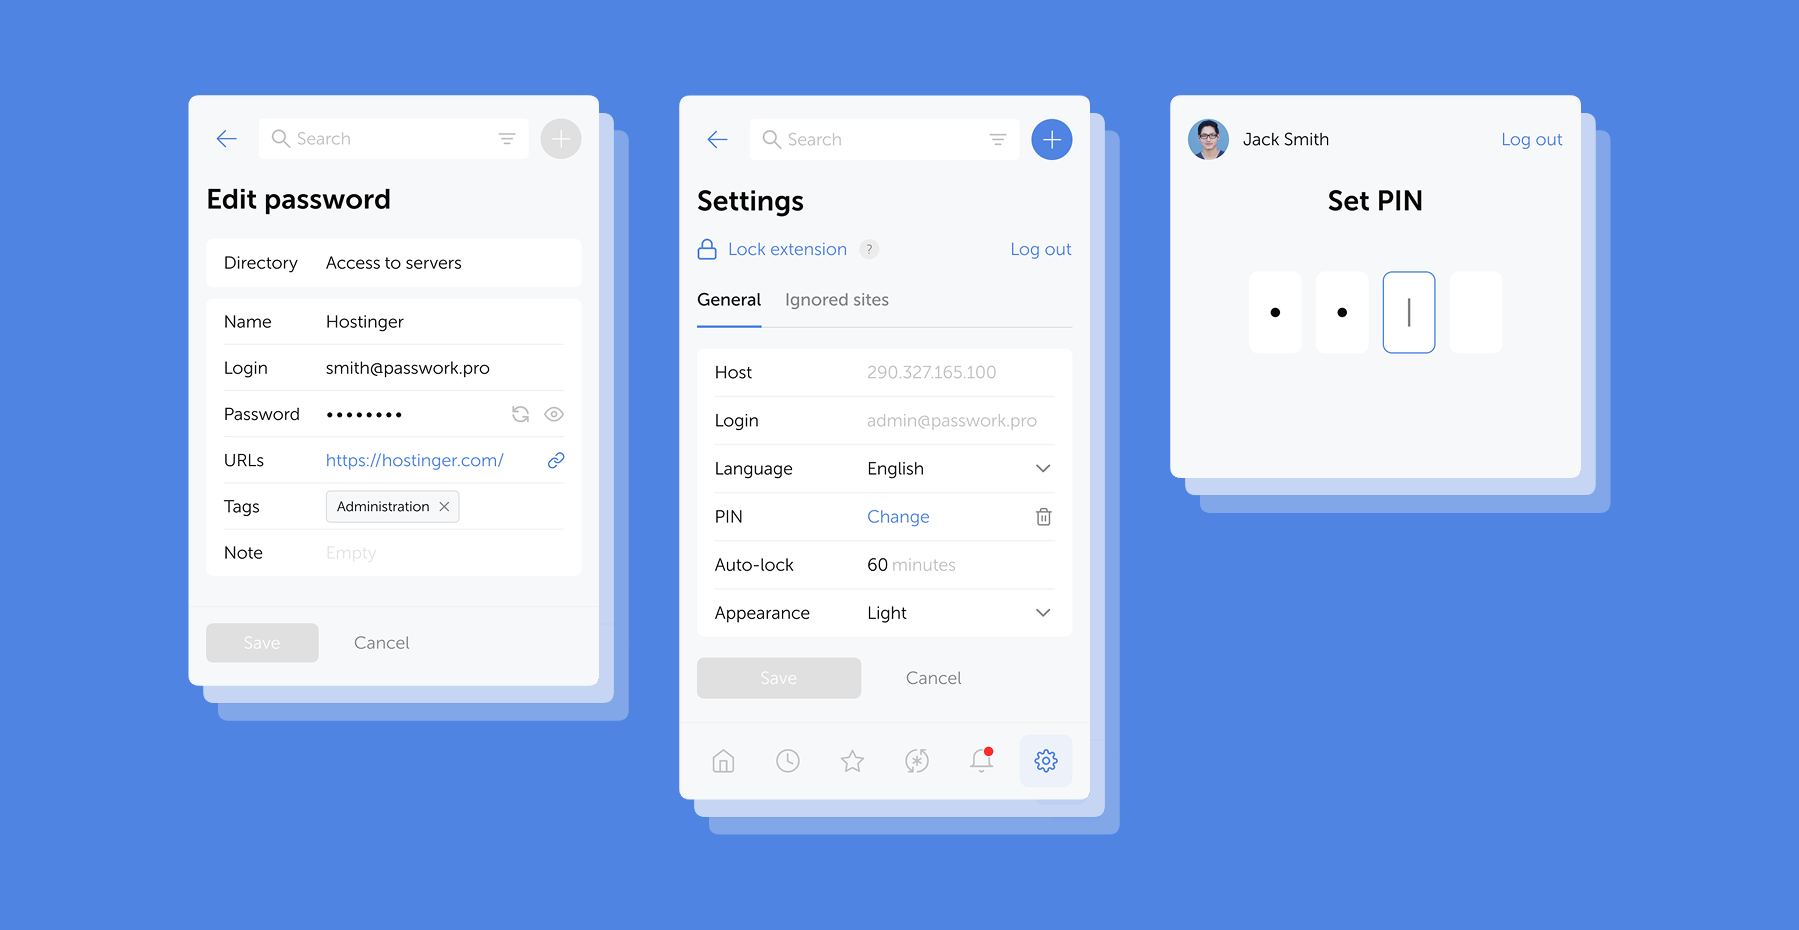
 Eirik Salmi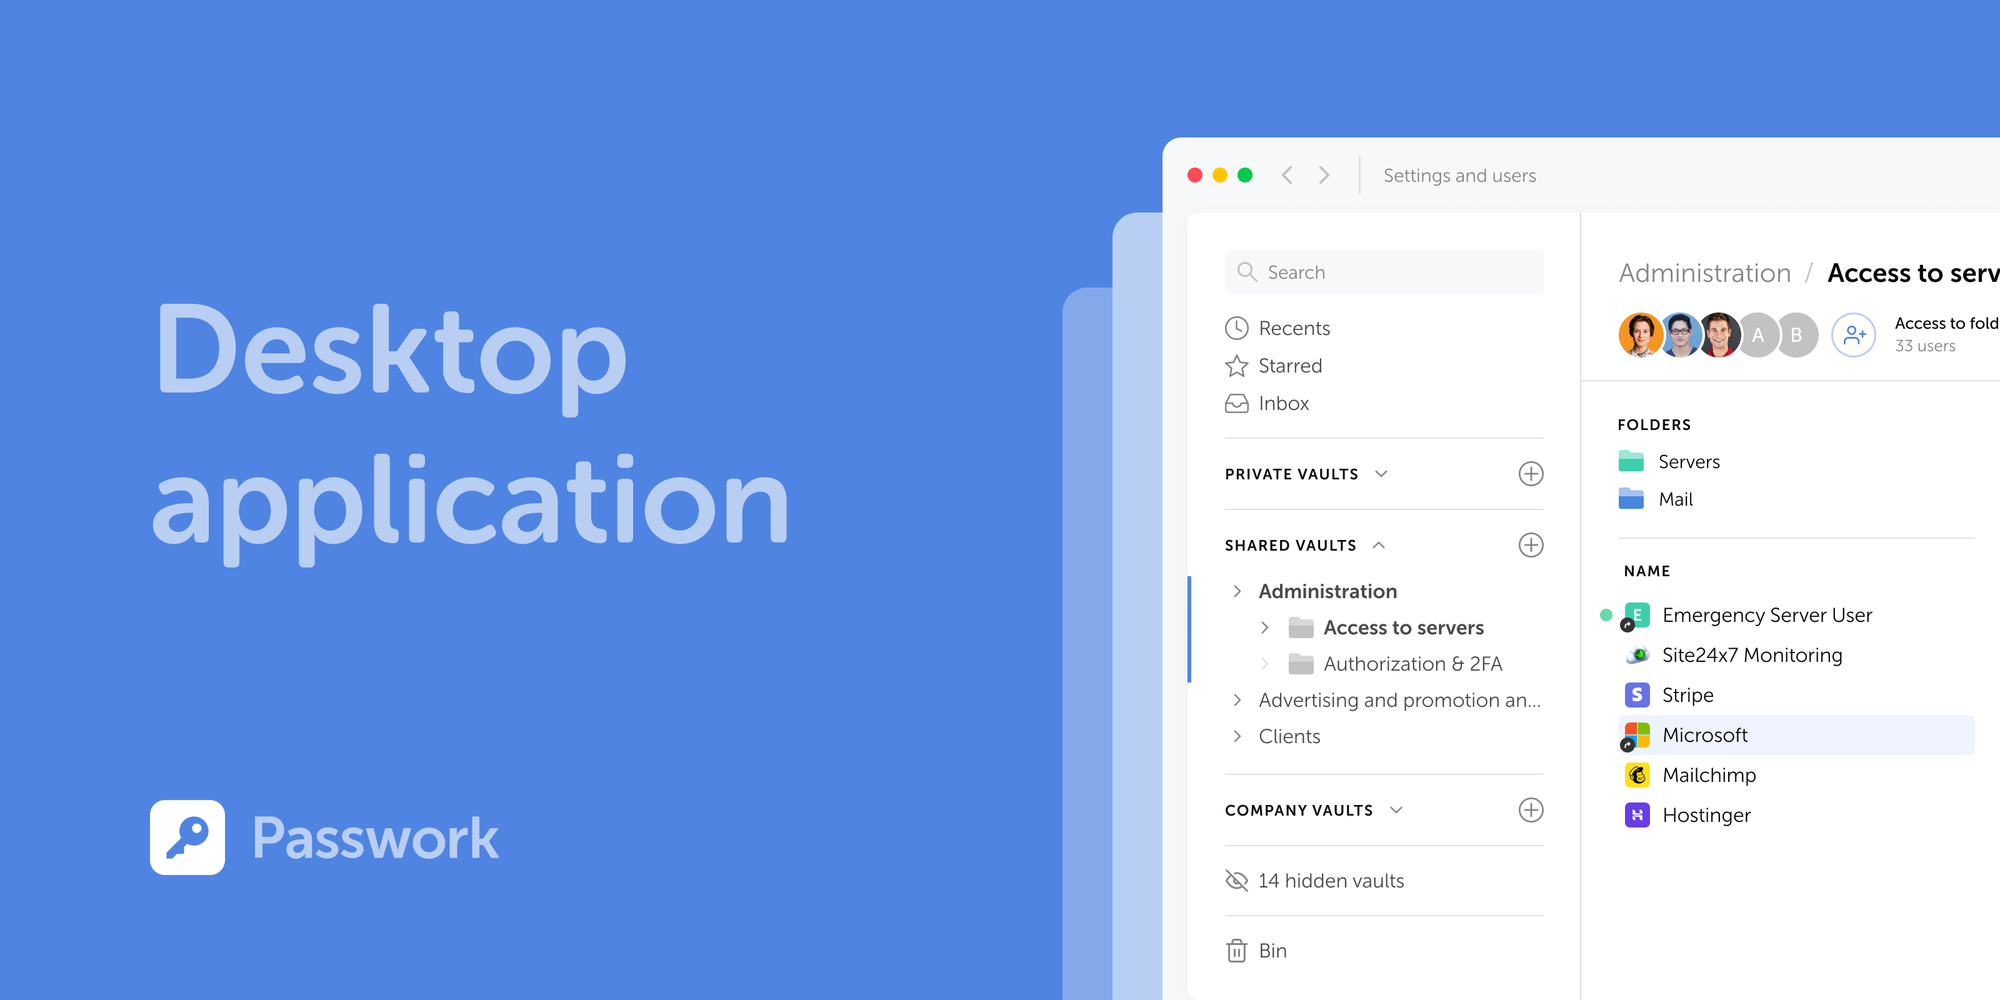
 Mike Shikun
 Mike Shikun