Das durchschnittliche Unternehmen betreibt Dutzende von Sicherheitskontrollen. Firewalls, EDR-Plattformen, SIEMs, Threat-Intelligence-Feeds — doch der häufigste Weg, wie Angreifer eindringen, ist immer noch die Eingabe eines korrekten Benutzernamens und Passworts. Kein Exploit, kein Zero-Day, keine ausgeklügelte Malware. Nur Anmeldedaten, die schwach, wiederverwendet oder bereits geleakt waren.
KI-Tools können inzwischen 85,6 % der gängigen Passwörter in unter 10 Sekunden knacken. Im Jahr 2025 waren kompromittierte Anmeldedaten der bestätigte initiale Angriffsvektor bei 22 % aller Datenschutzverletzungen. In Unternehmensumgebungen bleibt die Passworthygiene uneinheitlich — geregelt durch veraltete Richtlinien, verwaltet über browserbasierte Tools und durchgesetzt durch jährliche Sicherheitsschulungen, die die meisten Mitarbeiter bis zum nächsten Montag vergessen haben.
Dieser Leitfaden behandelt Best Practices für die Passwortverwaltung in Unternehmen mit 100 oder mehr Mitarbeitern. Er befasst sich mit Richtlinien, Technologie, Prozessen und Compliance — und basiert auf dem bedeutendsten Update des Passwortstandards seit Jahren: NIST SP 800-63B Rev. 4, veröffentlicht im August 2025. Wenn Ihre aktuellen Richtlinien noch 90-Tage-Rotationen und Mindestlängen von acht Zeichen vorschreiben, sind sie bereits veraltet.
Warum Passwortverwaltung in Unternehmen ein kritischer Sicherheitsimperativ ist
Im Jahr 2025 hatten 46 % der Unternehmensumgebungen mindestens einen geknackten Passwort-Hash — gegenüber 25 % im Vorjahr. Die durchschnittlichen globalen Kosten einer Datenschutzverletzung erreichten 4,44 Millionen US-Dollar. Und die Gefährdung geht tiefer, als die Anzahl der Verstöße vermuten lässt: Allein 2025 wurden 16 Milliarden Passwörter über verschiedene Datensätze geleakt, wobei 94 % als Duplikate erschienen — dieselben Anmeldedaten tauchten bei mehreren Vorfällen auf. Passwortwiederverwendung ist ein organisatorisches Kontrollversagen, kein Problem des Benutzerverhaltens.
Consumer-Tools skalieren nicht für Unternehmensanforderungen. Browserbasiertes Speichern von Passwörtern schafft Endpoint-Zugriffs-Wildwuchs ohne zentrale Governance — keine Audit-Trails, keine Kontrollen für privilegierte Konten, kein automatisiertes Offboarding, keine Transparenz darüber, wer Zugriff auf was hat. Wenn ein Mitarbeiter das Unternehmen verlässt oder kompromittiert wird, ist der Schadensradius ohne zentrale Anmeldedatenverwaltung nicht einzudämmen.
Die KI-Bedrohung macht dies noch dringlicher. PassGAN-ähnliche Tools finden 51–73 % mehr Passwörter als herkömmliche Cracking-Methoden. Brute-Force-Angriffe, die früher Wochen dauerten, werden jetzt in Sekunden abgeschlossen. Passwortlänge und Einzigartigkeit sind die primären Verteidigungsmaßnahmen — und beide erfordern organisatorische Durchsetzung, nicht individuelle Disziplin.
Was sich im NIST SP 800-63B Rev. 4 Framework geändert hat (August 2025)
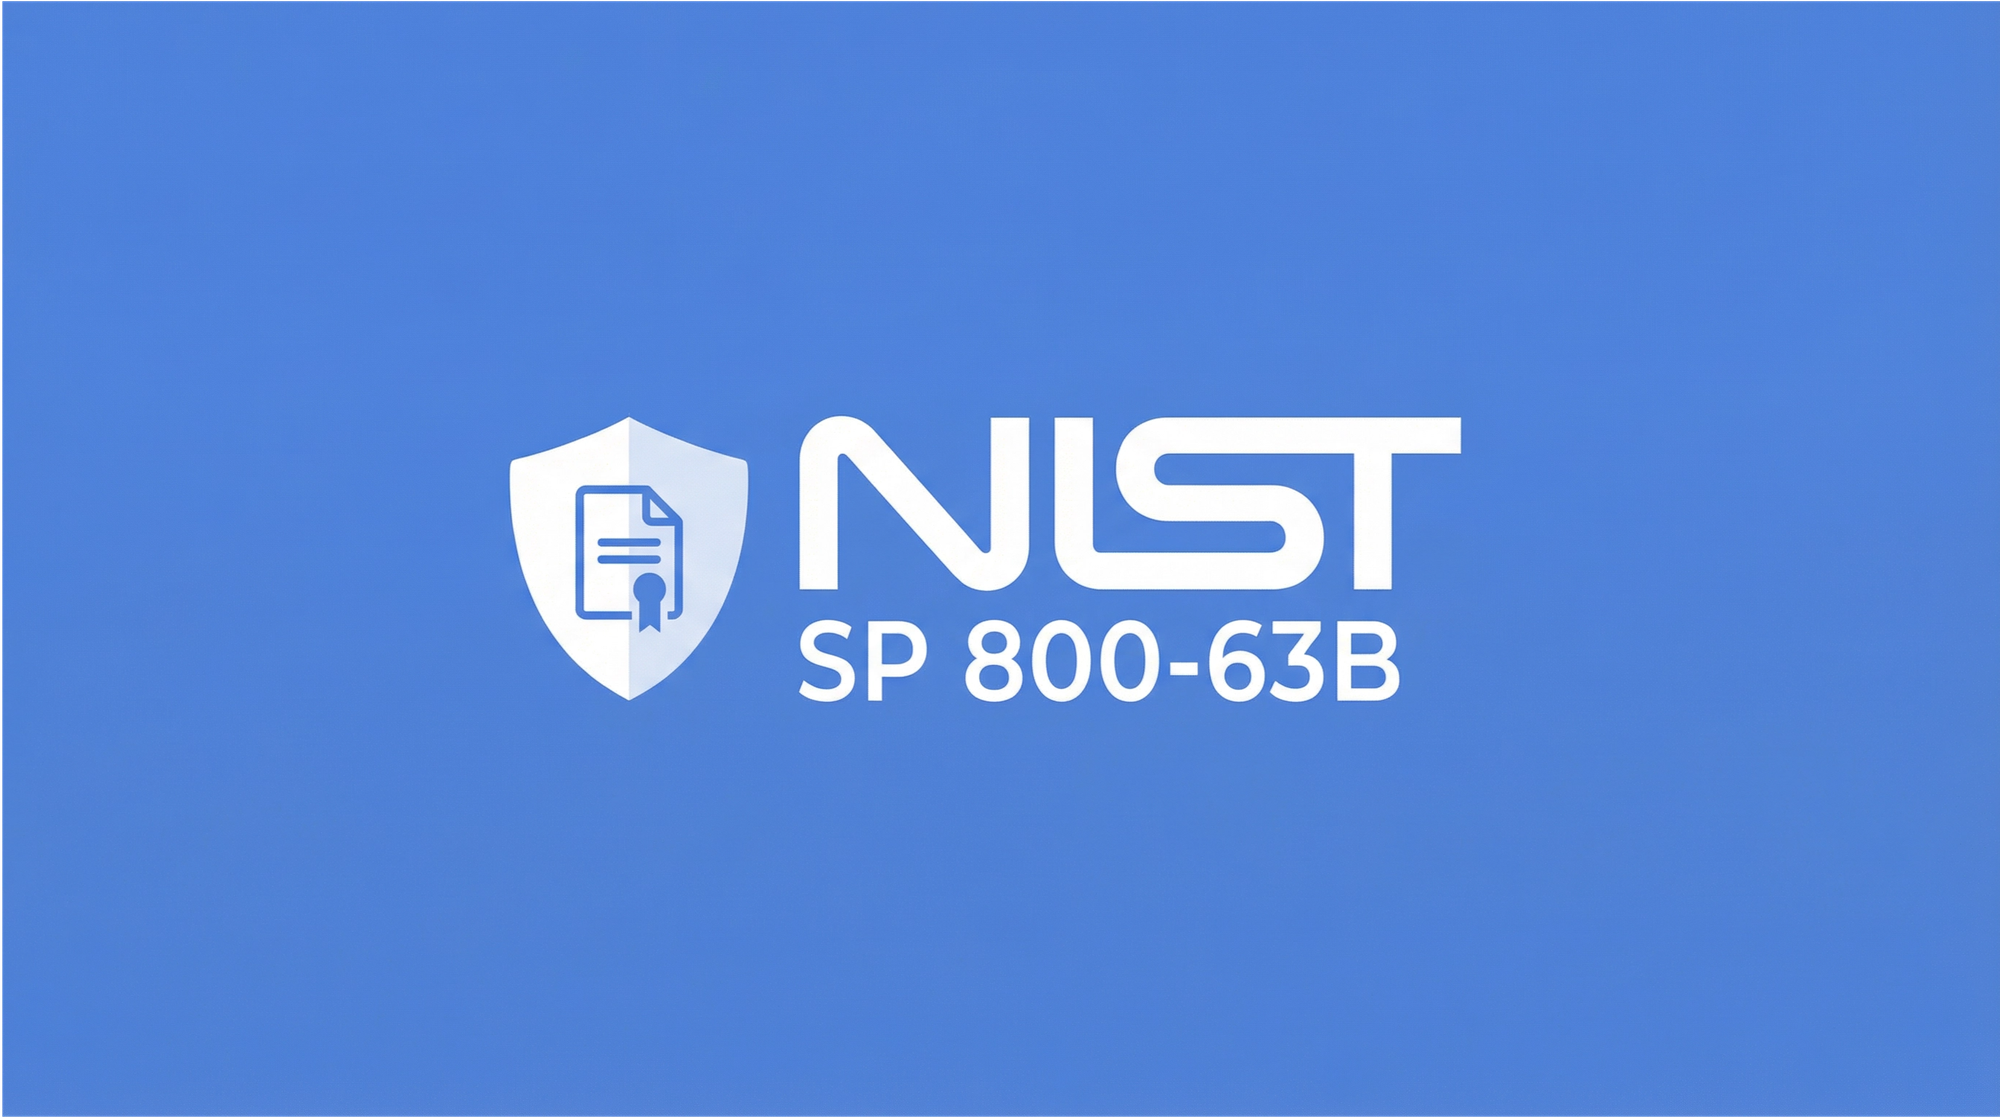
NIST veröffentlichte die vierte Revision von SP 800-63B im August 2025. Es ist das bedeutendste Update der bundesweiten Passwortrichtlinien seit fast einem Jahrzehnt, und die meisten Organisationen — sowie die meisten konkurrierenden Leitfäden — zitieren immer noch die älteren Rev. 3-Standards. Wenn Ihre Passwortrichtlinie vor August 2025 verfasst wurde, ist eine Überprüfung erforderlich. Drei Änderungen definieren diese Revision.
Mindestpasswortlänge auf 15 Zeichen erhöht
Wenn ein Passwort der einzige Authentifikator ist, fordert NIST nun ein Minimum von 15 Zeichen — gegenüber 8 in Rev. 3. Systeme müssen Passwörter von mindestens 64 Zeichen unterstützen und alle druckbaren ASCII-Zeichen, Leerzeichen und Unicode akzeptieren. Ein 15-Zeichen langes Zufallspasswort trägt etwa 98 Bit Entropie und liegt damit weit außerhalb der Reichweite aktueller Brute-Force-Hardware.
Kompositionsregeln eliminiert („shall not"-Formulierung)
Rev. 4 verwendet explizite „shall not"-Formulierungen: Organisationen dürfen keine willkürlichen Kompositionsanforderungen wie obligatorische Symbole, Zahlen oder Großbuchstaben auferlegen. Die Forschung hinter dieser Änderung ist eindeutig — erzwungene Komplexitätsregeln erzeugen vorhersehbare Muster. Benutzer reagieren auf „muss ein Symbol enthalten", indem sie ein Ausrufezeichen anhängen. Die resultierenden Passwörter sind schwächer als eine längere, zufällige Passphrase ohne Kompositionsbeschränkungen.
Ablauf nur bei Kompromittierung
Regelmäßig erzwungene Passwortänderungen — alle 60 oder 90 Tage — werden explizit abgelehnt. Passwörter sollten nur geändert werden, wenn es Hinweise auf eine Kompromittierung gibt. Dies ist eine bedeutende betriebliche Umstellung: Es erfordert kontinuierliches Anmeldedaten-Monitoring als Ersatz für das kalenderbasierte Rotationsmodell.
| Alte Praxis (Rev. 3) | Neue Anforderung (Rev. 4) | |
|---|---|---|
| Passwortlänge | Mindestens 8 Zeichen | Mindestens 15 Zeichen (einziger Authentifikator) |
| Kompositionsregeln | Erforderlich (Großbuchstaben, Symbole, Zahlen) | Verboten — „shall not" auferlegen |
| Passwortablauf | Alle 60–90 Tage | Nur bei Nachweis einer Kompromittierung |
| Unicode und Leerzeichen | Oft blockiert | Müssen akzeptiert werden |
12 Best Practices für Passwortverwaltung in Unternehmen
Passwortverwaltung in Unternehmen erfordert einen mehrschichtigen Ansatz. Keine einzelne Kontrolle ist ausreichend — die folgenden Praktiken funktionieren zusammen als System. Jede adressiert einen spezifischen Fehlermodus; das Überspringen einer einzelnen schafft eine Lücke, die Angreifer finden werden.
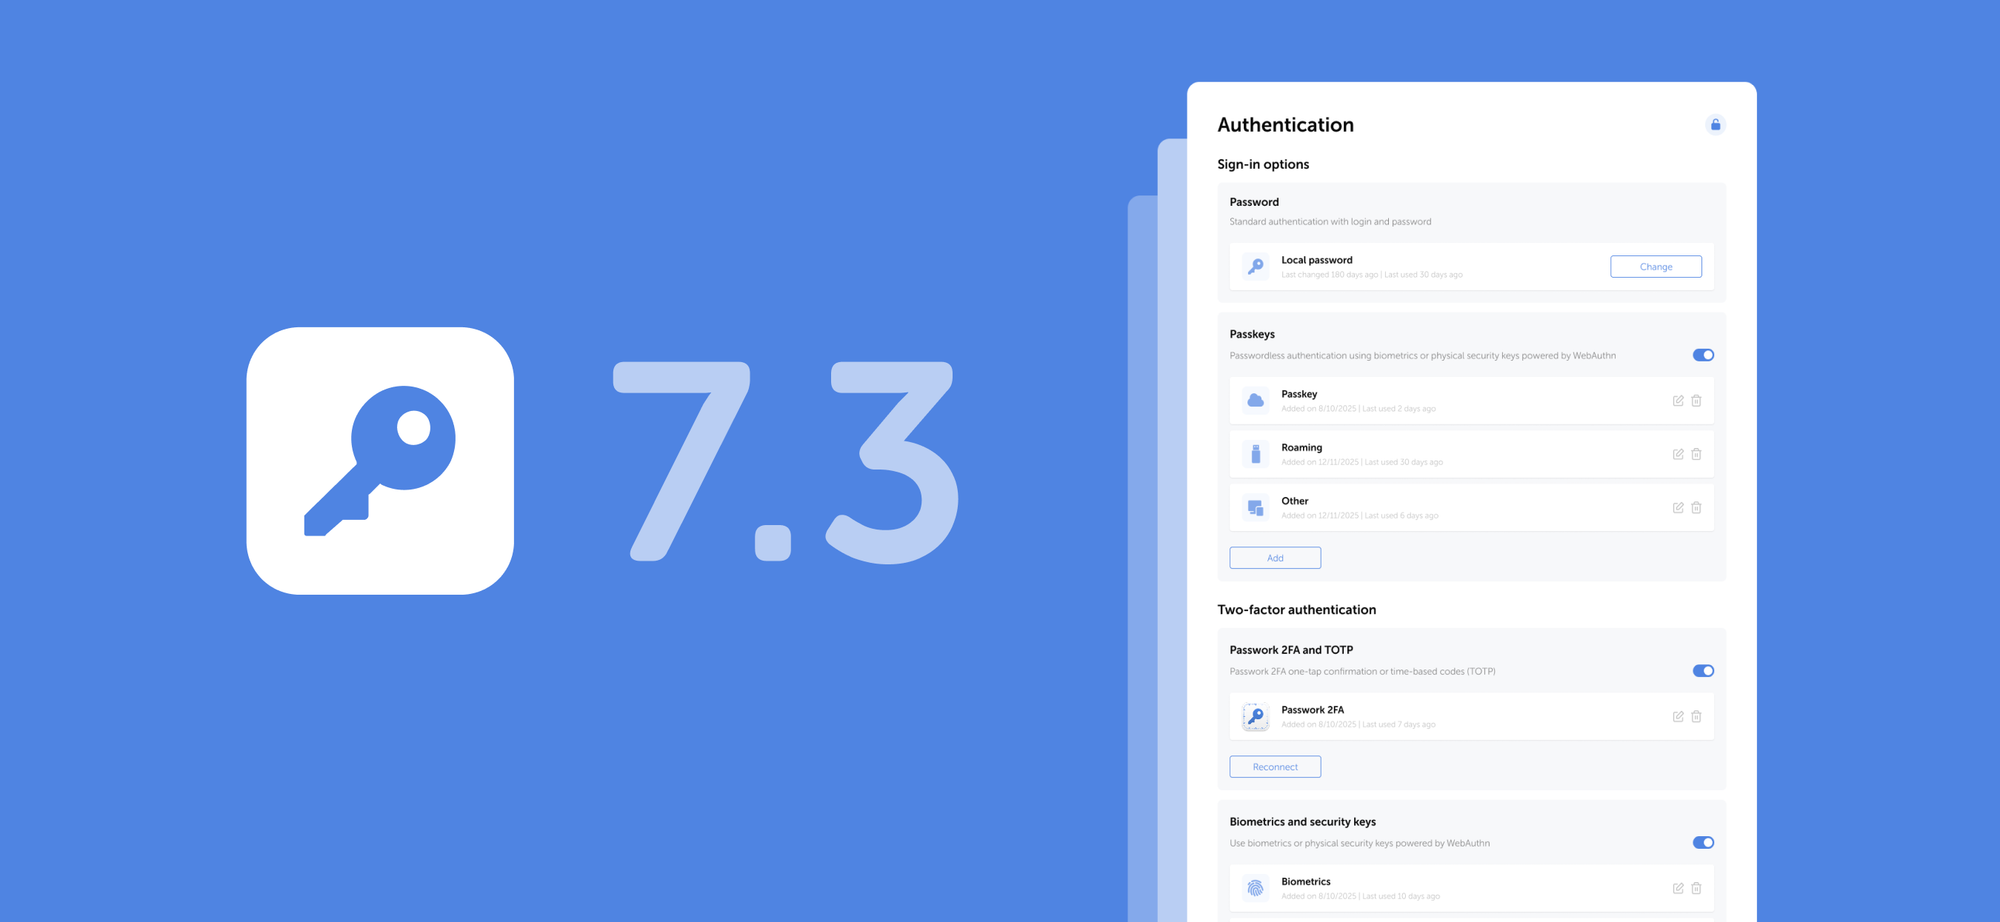
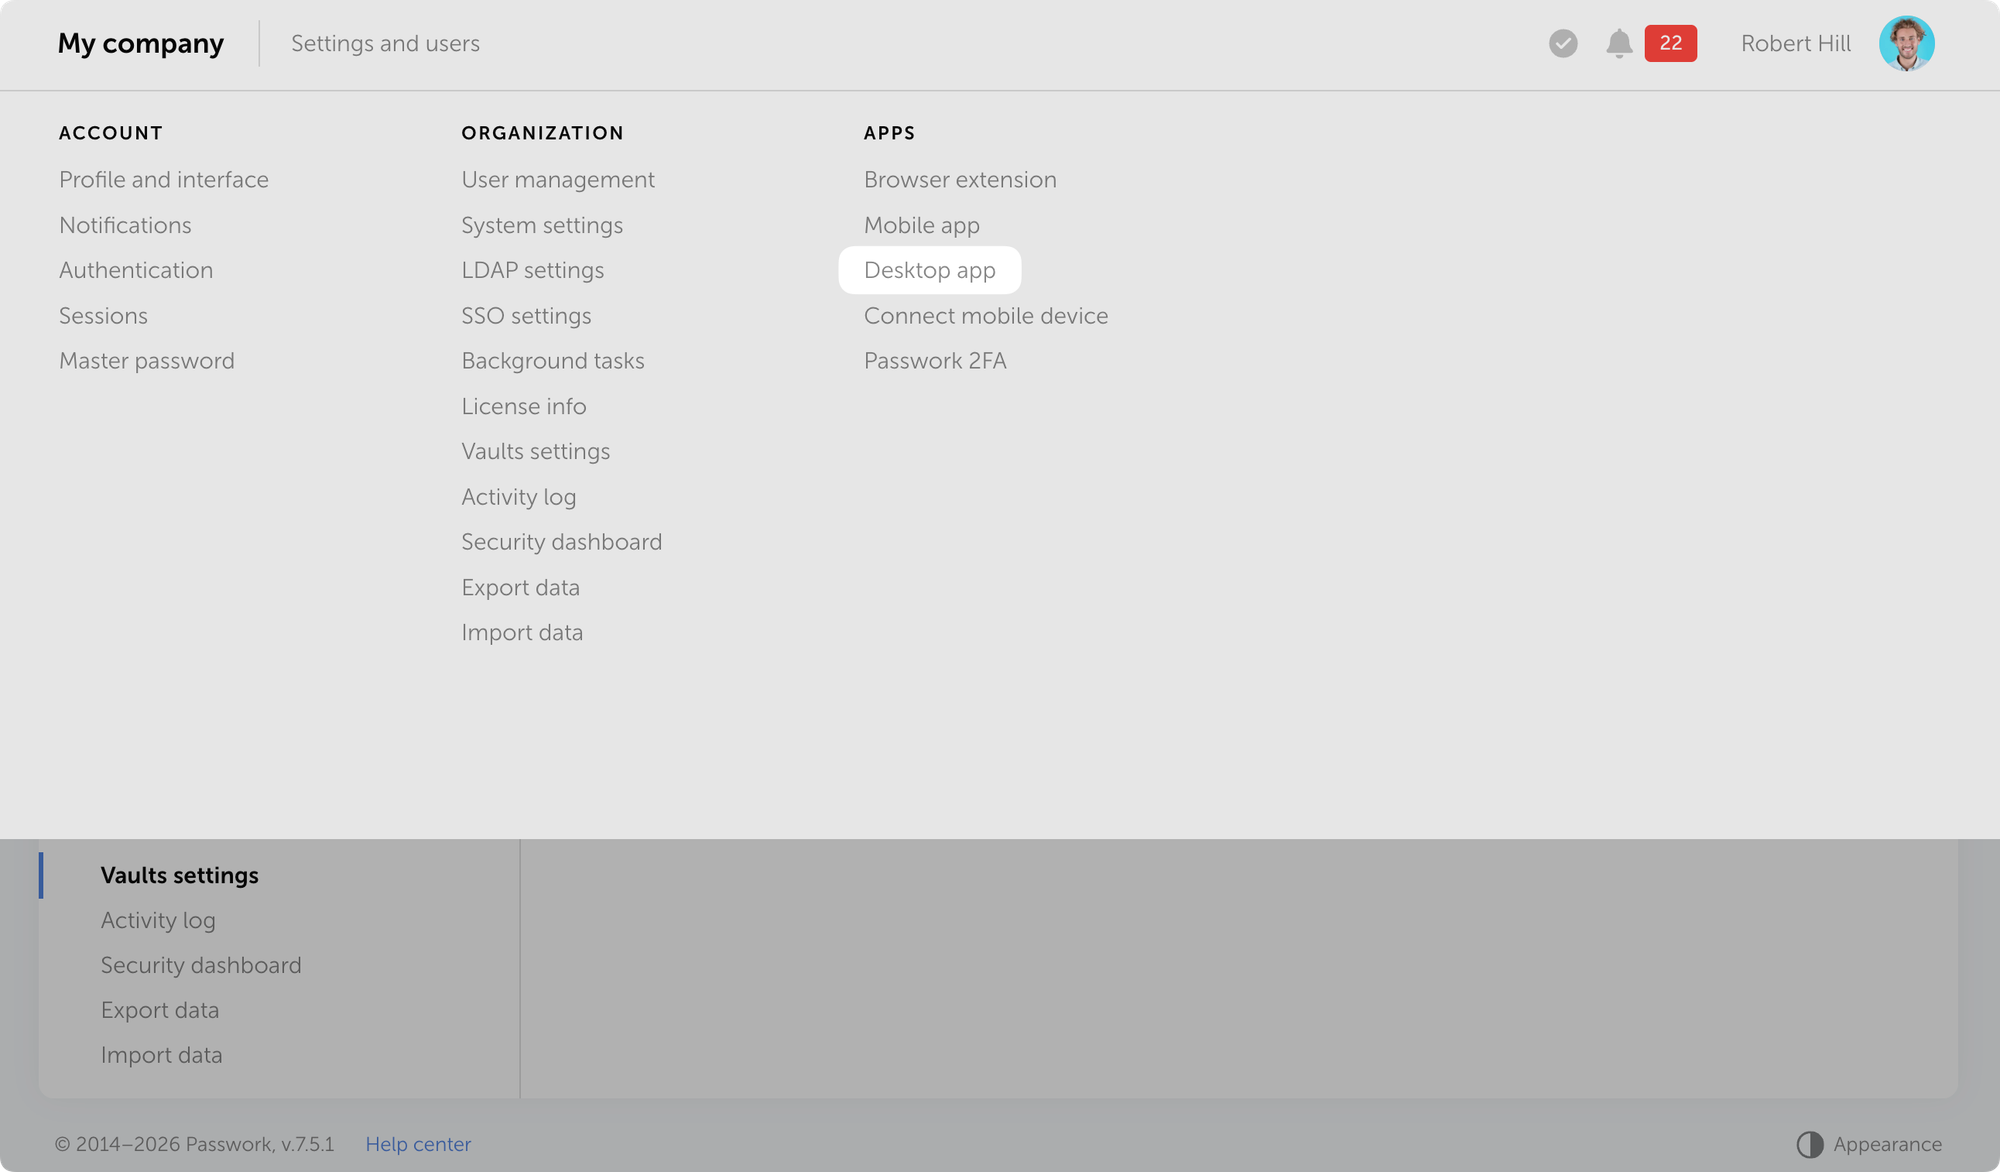
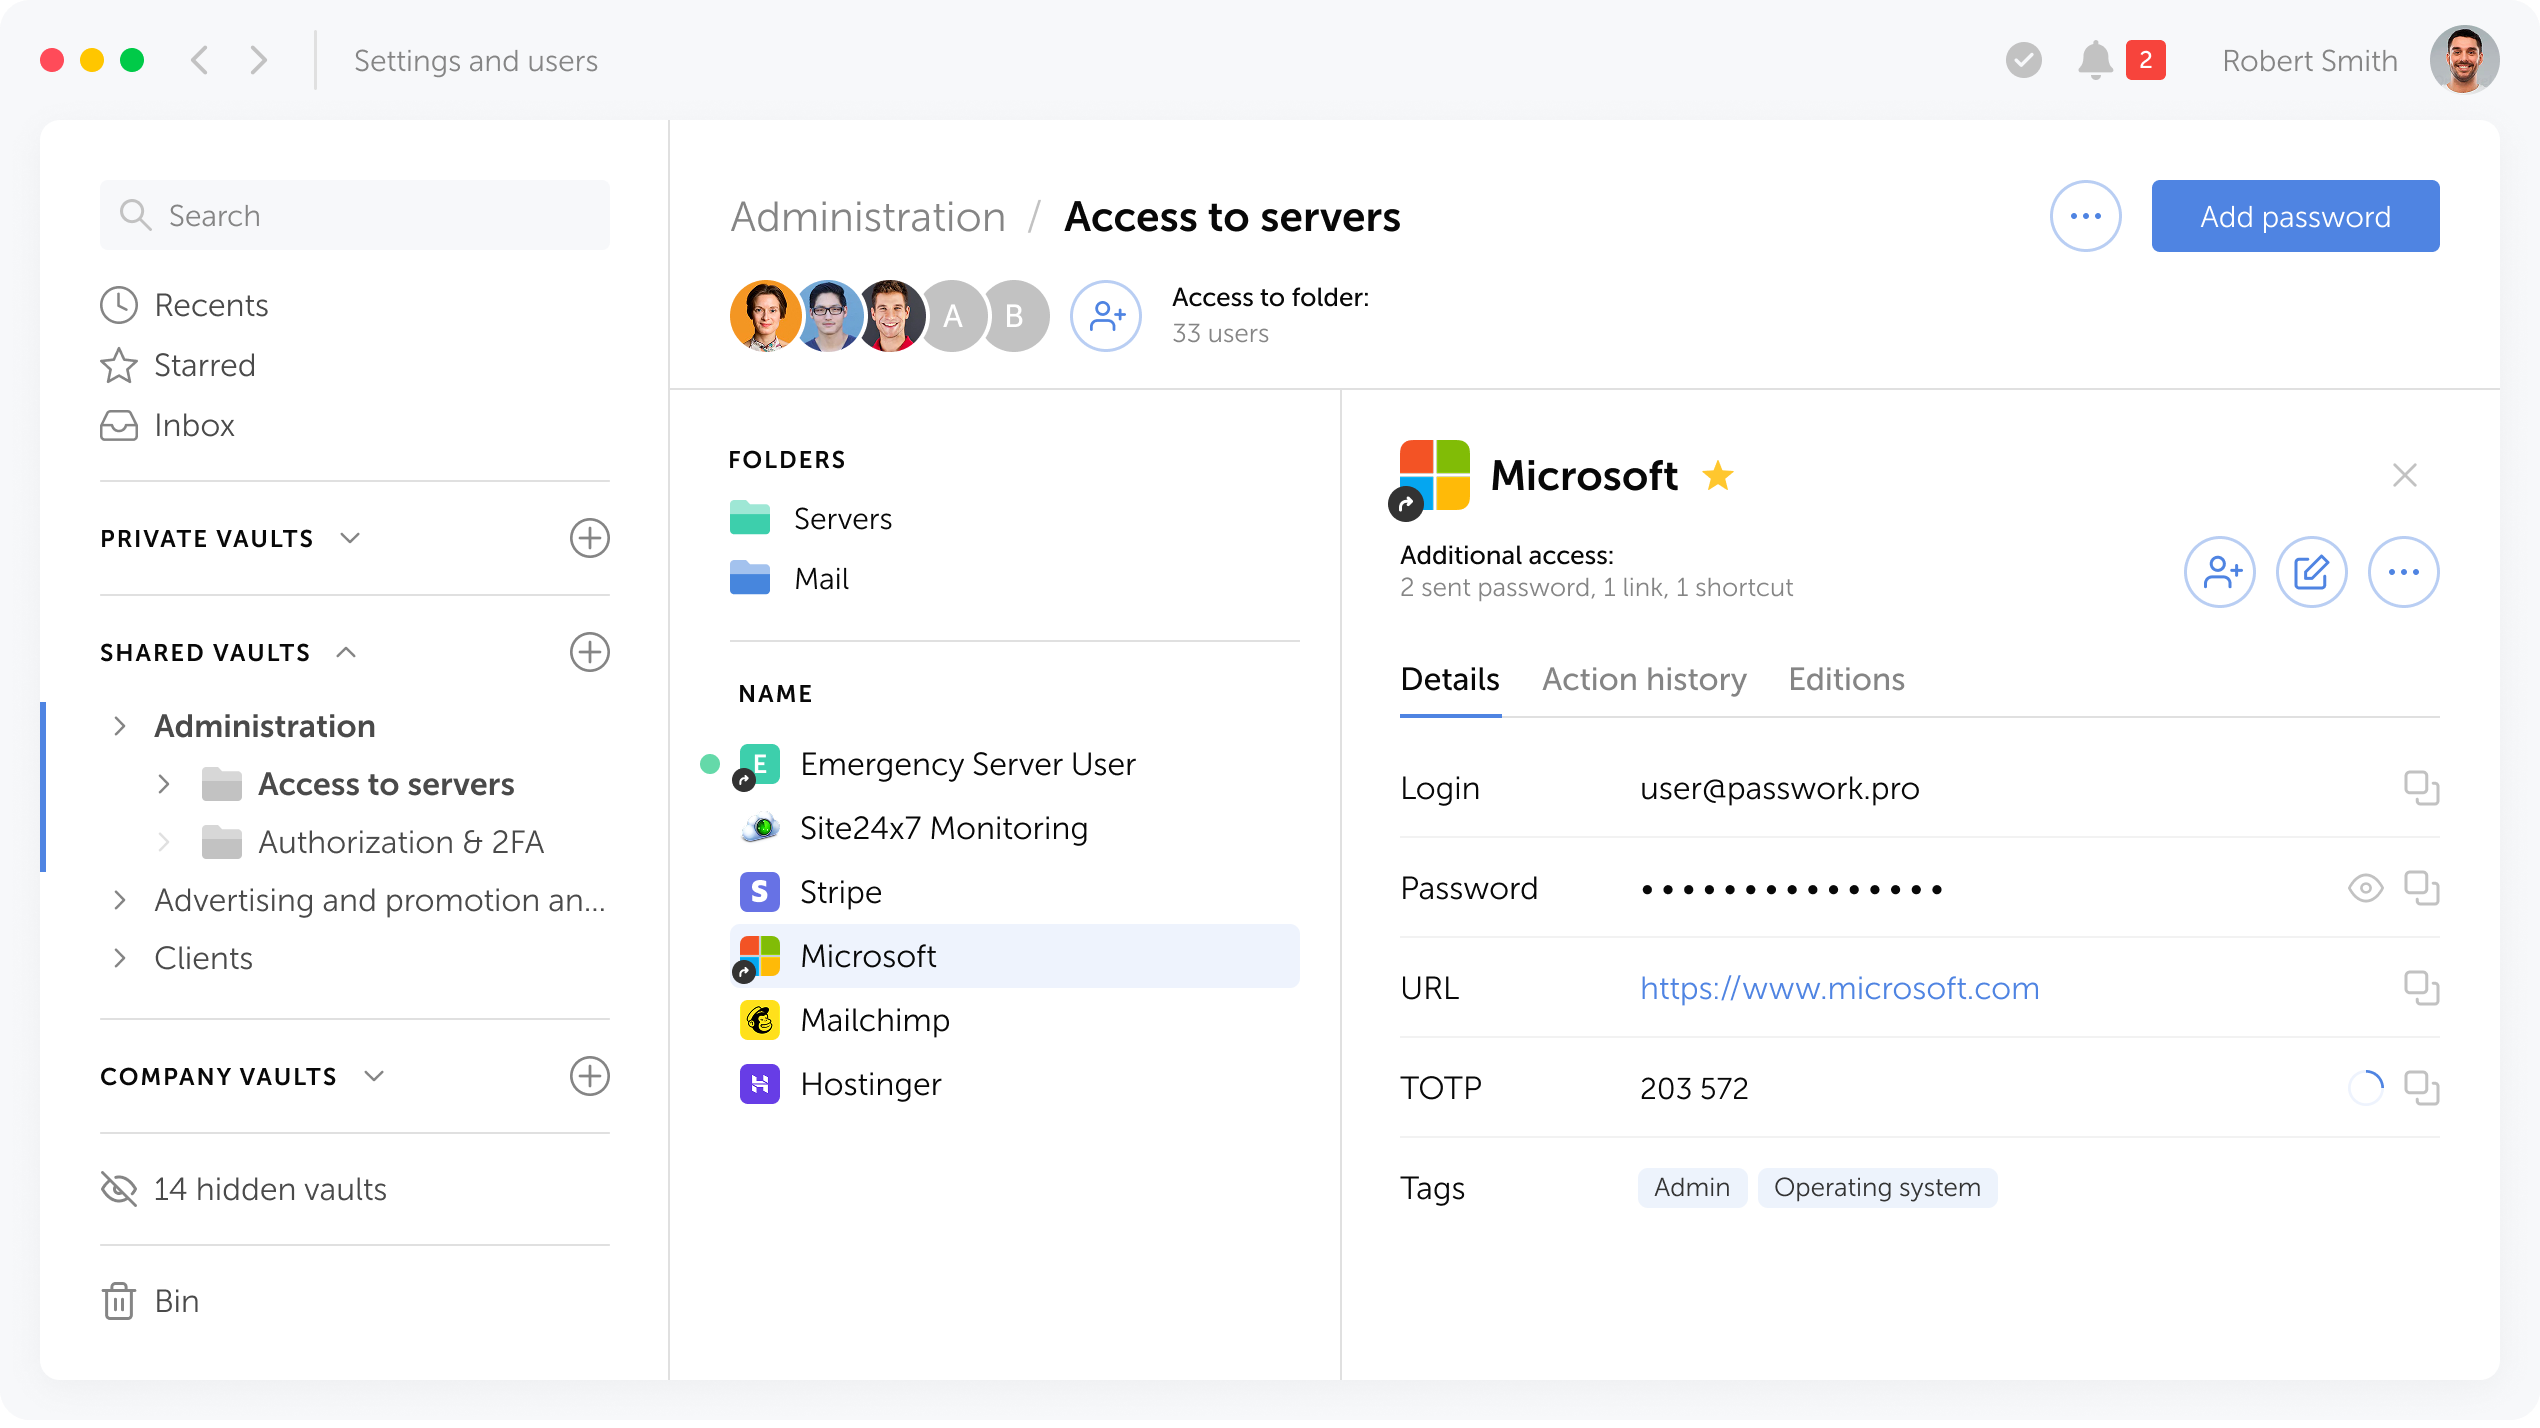
1. Implementieren Sie einen zentralen Passwort-Tresor für Unternehmen
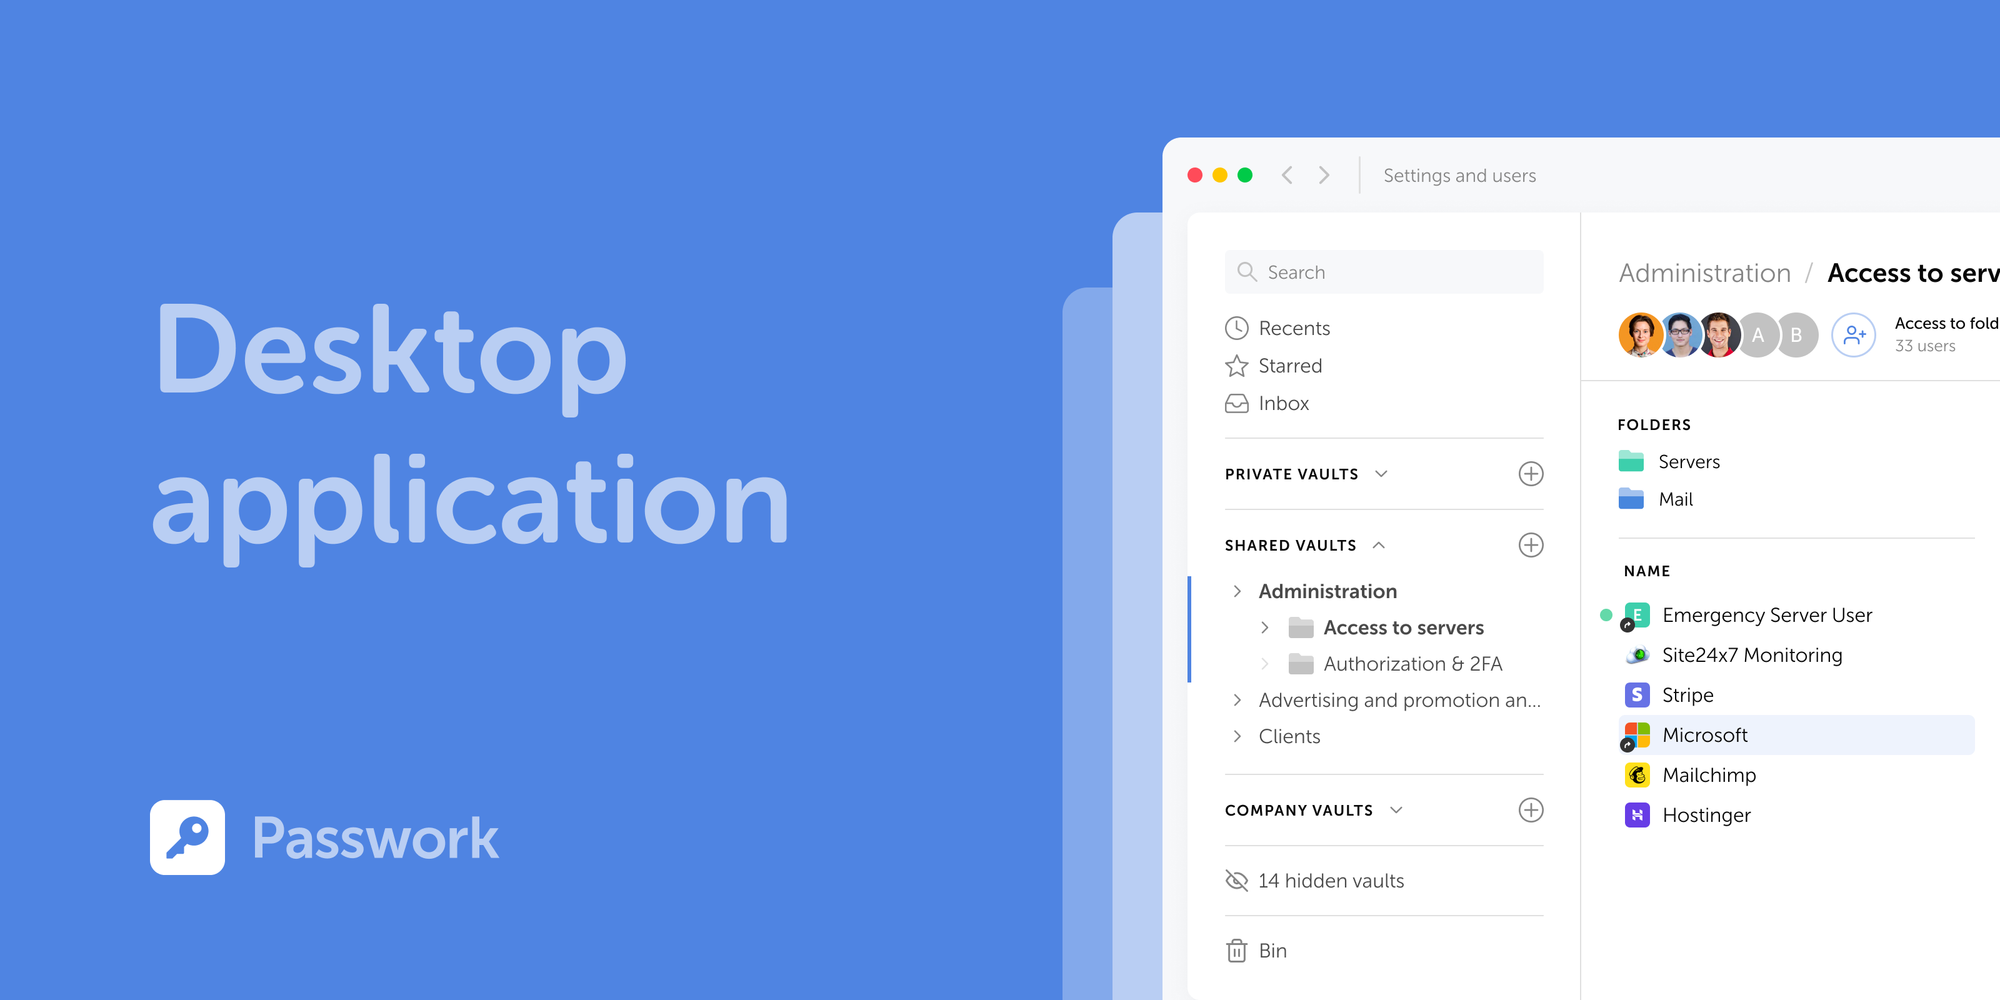
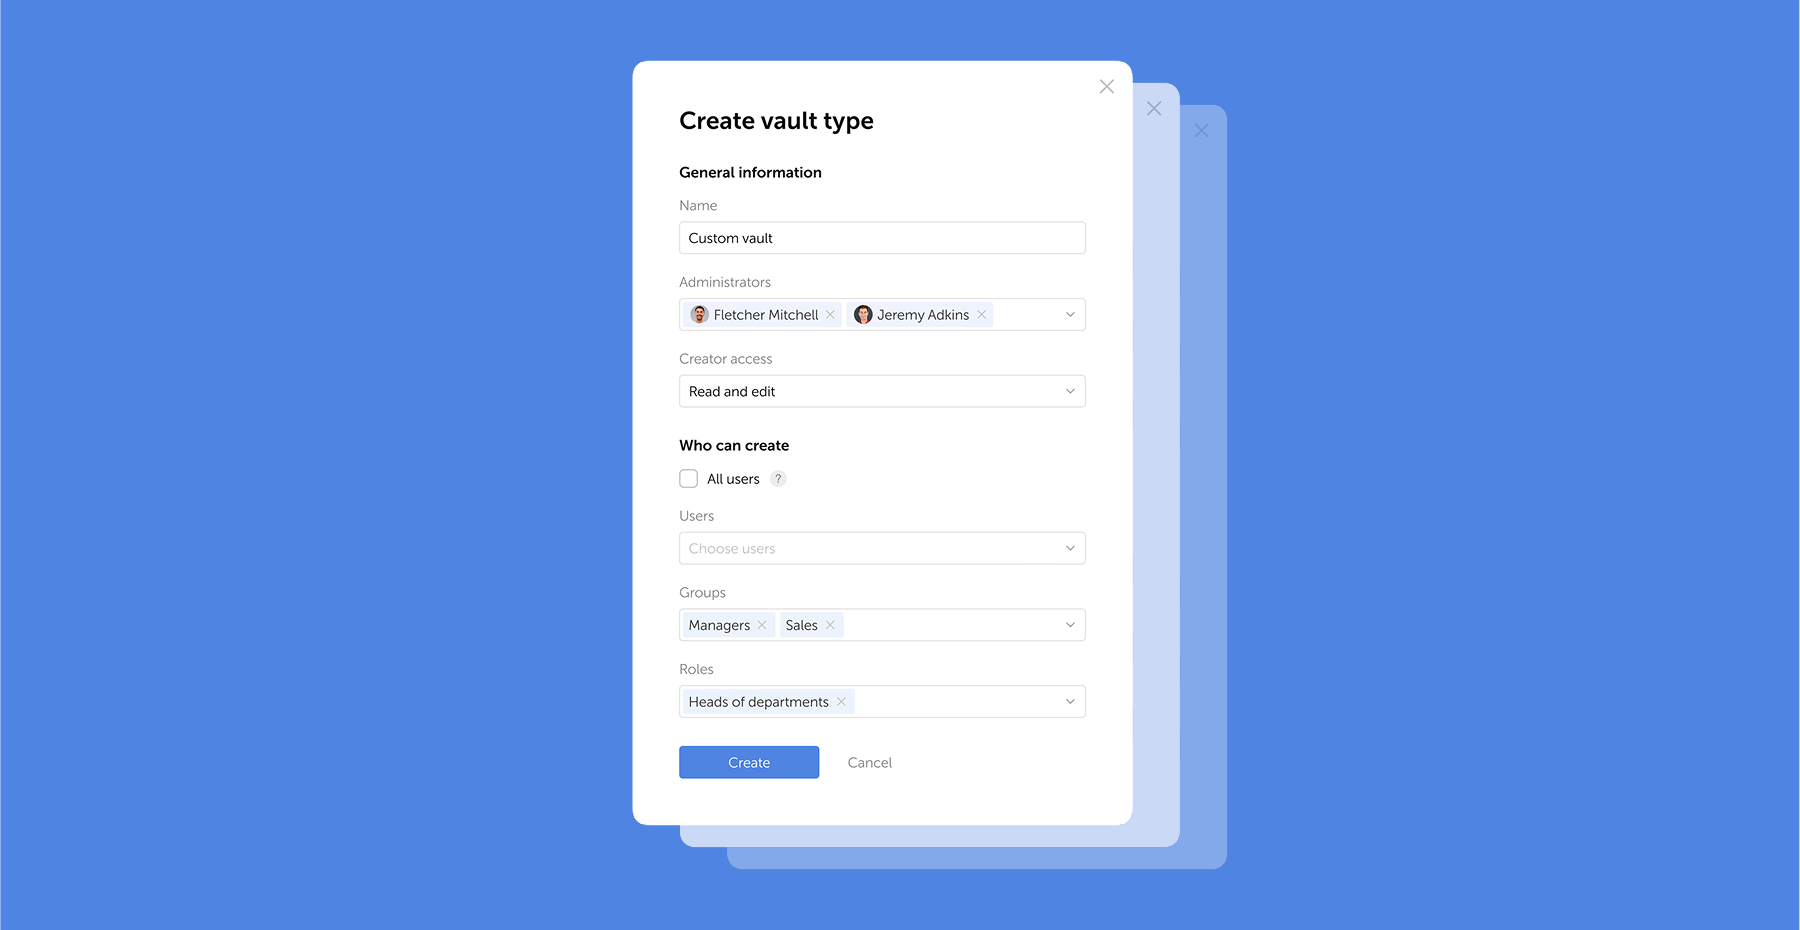
Die erste strukturelle Anforderung ist die zentrale Speicherung von Anmeldedaten. Ein Passwort-Tresor für Unternehmen bietet rollenbasierte Zugriffskontrolle, Audit-fähige Protokolle, automatisierte Rotationsfunktionen im Falle einer Kompromittierung und Governance, die browserbasierte Tools schlicht nicht bieten können.
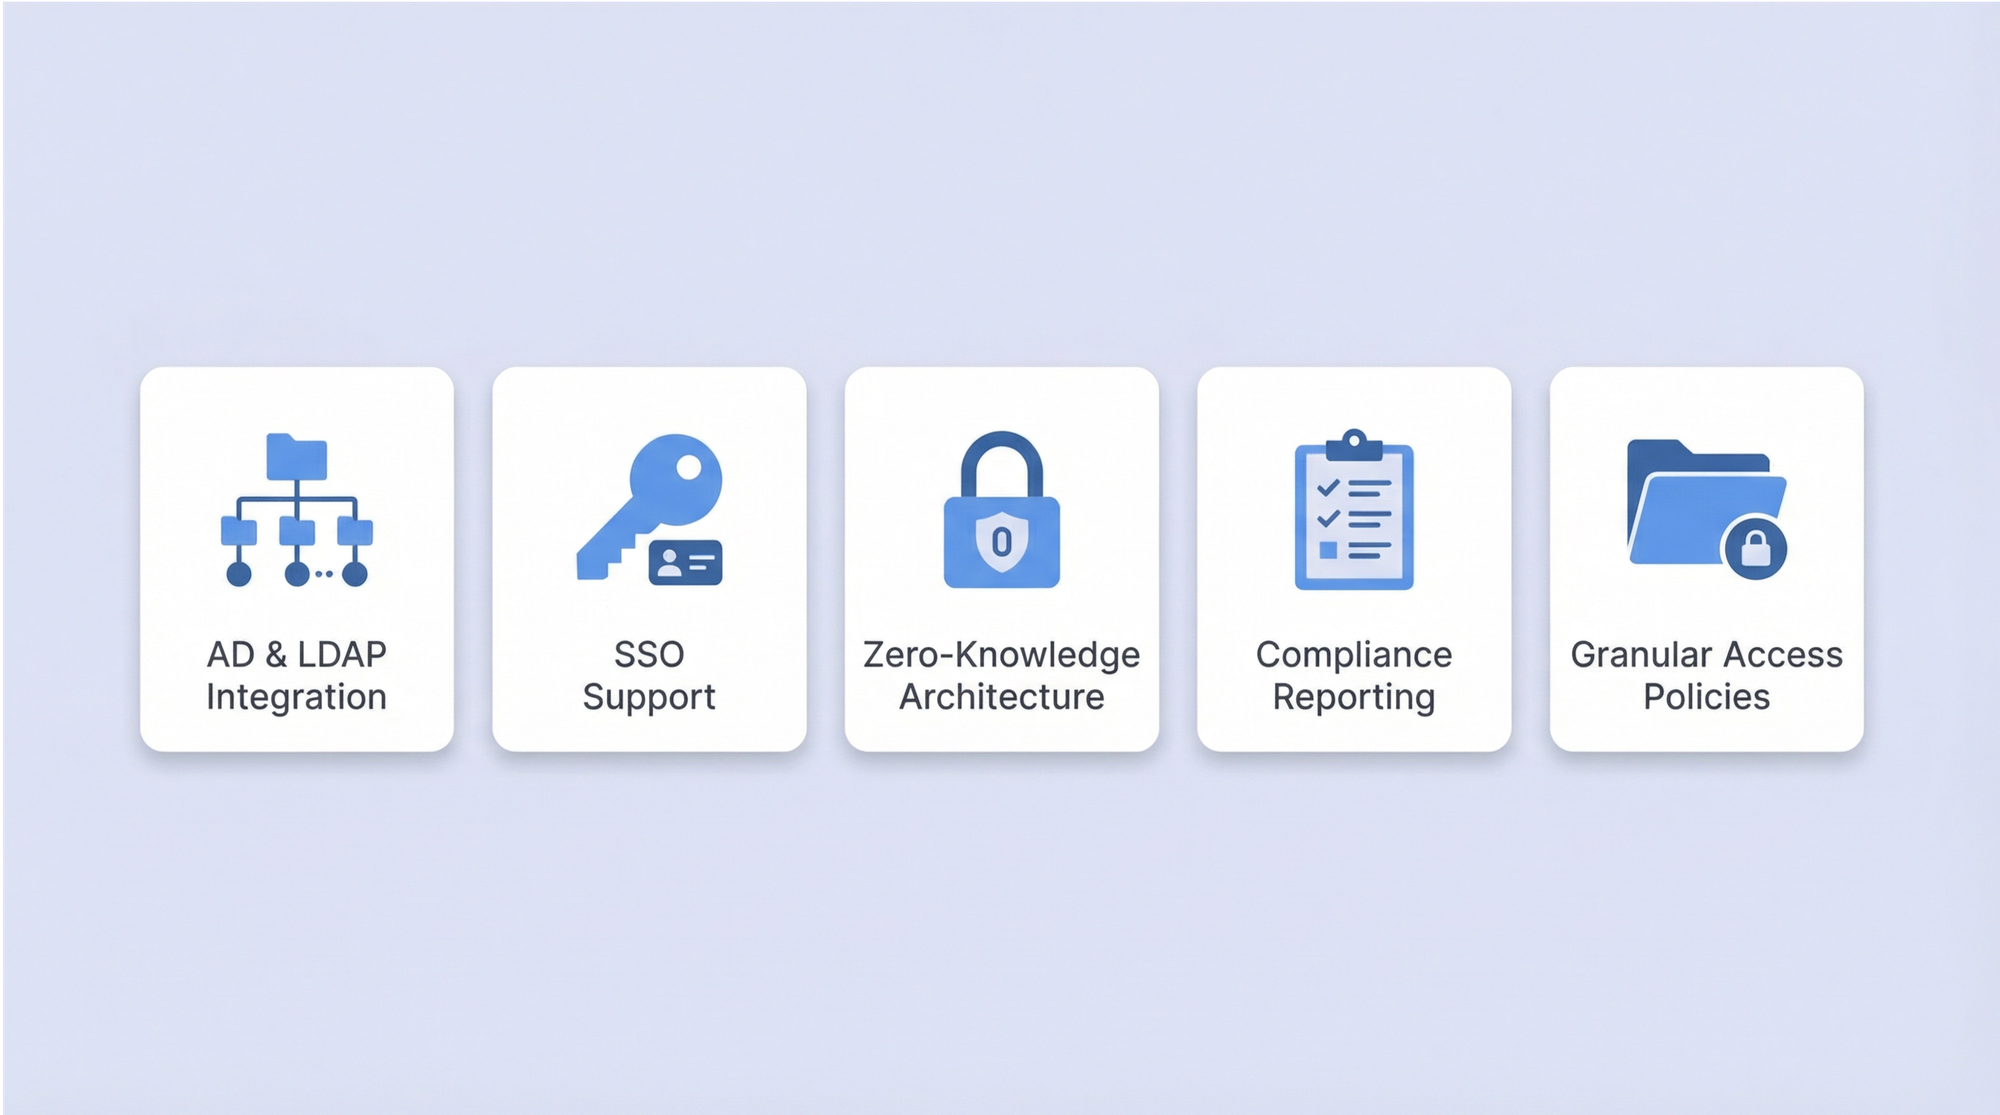
Bei der Bewertung von Lösungen priorisieren Sie: Active Directory- und LDAP-Integration, SSO-Unterstützung, Zero-Knowledge-Architektur, Compliance-Berichterstattung und die Möglichkeit, granulare Zugriffsrichtlinien auf Ordner- oder Anmeldedatenebene durchzusetzen.
Das Ziel ist eine einzige autoritative Quelle für alle organisatorischen Anmeldedaten — eine, die auditiert, berichtet und zentral widerrufen werden kann. Ein Tool wie Passwork ist speziell für diesen Anwendungsfall konzipiert und gibt IT-Teams vollständige Transparenz darüber, wer auf was zugreift, mit vollständigen Audit-Trails und integriertem RBAC.
2. Setzen Sie eine Mindestpasswortlänge von 15 Zeichen durch (NIST 2025)
Richten Sie Ihre Passwortlängenrichtlinie an NIST SP 800-63B Rev. 4 aus. Ein Minimum von 15 Zeichen ist jetzt die bundesweite Baseline für reine Passwort-Authentifizierung, und die Begründung ist mathematisch: Jedes zusätzliche Zeichen erhöht den Suchraum für Brute-Force-Angriffe exponentiell.
KI-gestützte Cracking-Tools haben kürzere Passwörter unhaltbar gemacht. Länge ist die kosteneffektivste verfügbare Verteidigung — sie erfordert keine zusätzliche Infrastruktur, nur ein Richtlinien-Update und Benutzerkommunikation.
correct-horse-battery-staple ist sowohl einprägsam als auch stark. Gemäß NIST Rev. 4 gibt es keinen Grund, Symbole oder Groß-/Kleinschreibung zu verlangen — und gute Gründe, dies nicht zu tun.3. Machen Sie Multi-Faktor-Authentifizierung für alle Systeme zur Pflicht
Multi-Faktor-Authentifizierung (MFA) ist die wirksamste Einzelkontrolle gegen anmeldedatenbasierte Angriffe. Ein gestohlenes Passwort ist nutzlos, wenn der Angreifer den zweiten Faktor nicht bestehen kann. Die MFA-Adoption in der Belegschaft erreichte 2025 70 % (Okta Secure Sign-In Trends Report 2025) — was bedeutet, dass fast 30 % der Benutzer sie noch nicht haben. In dieser Lücke passieren Verstöße.
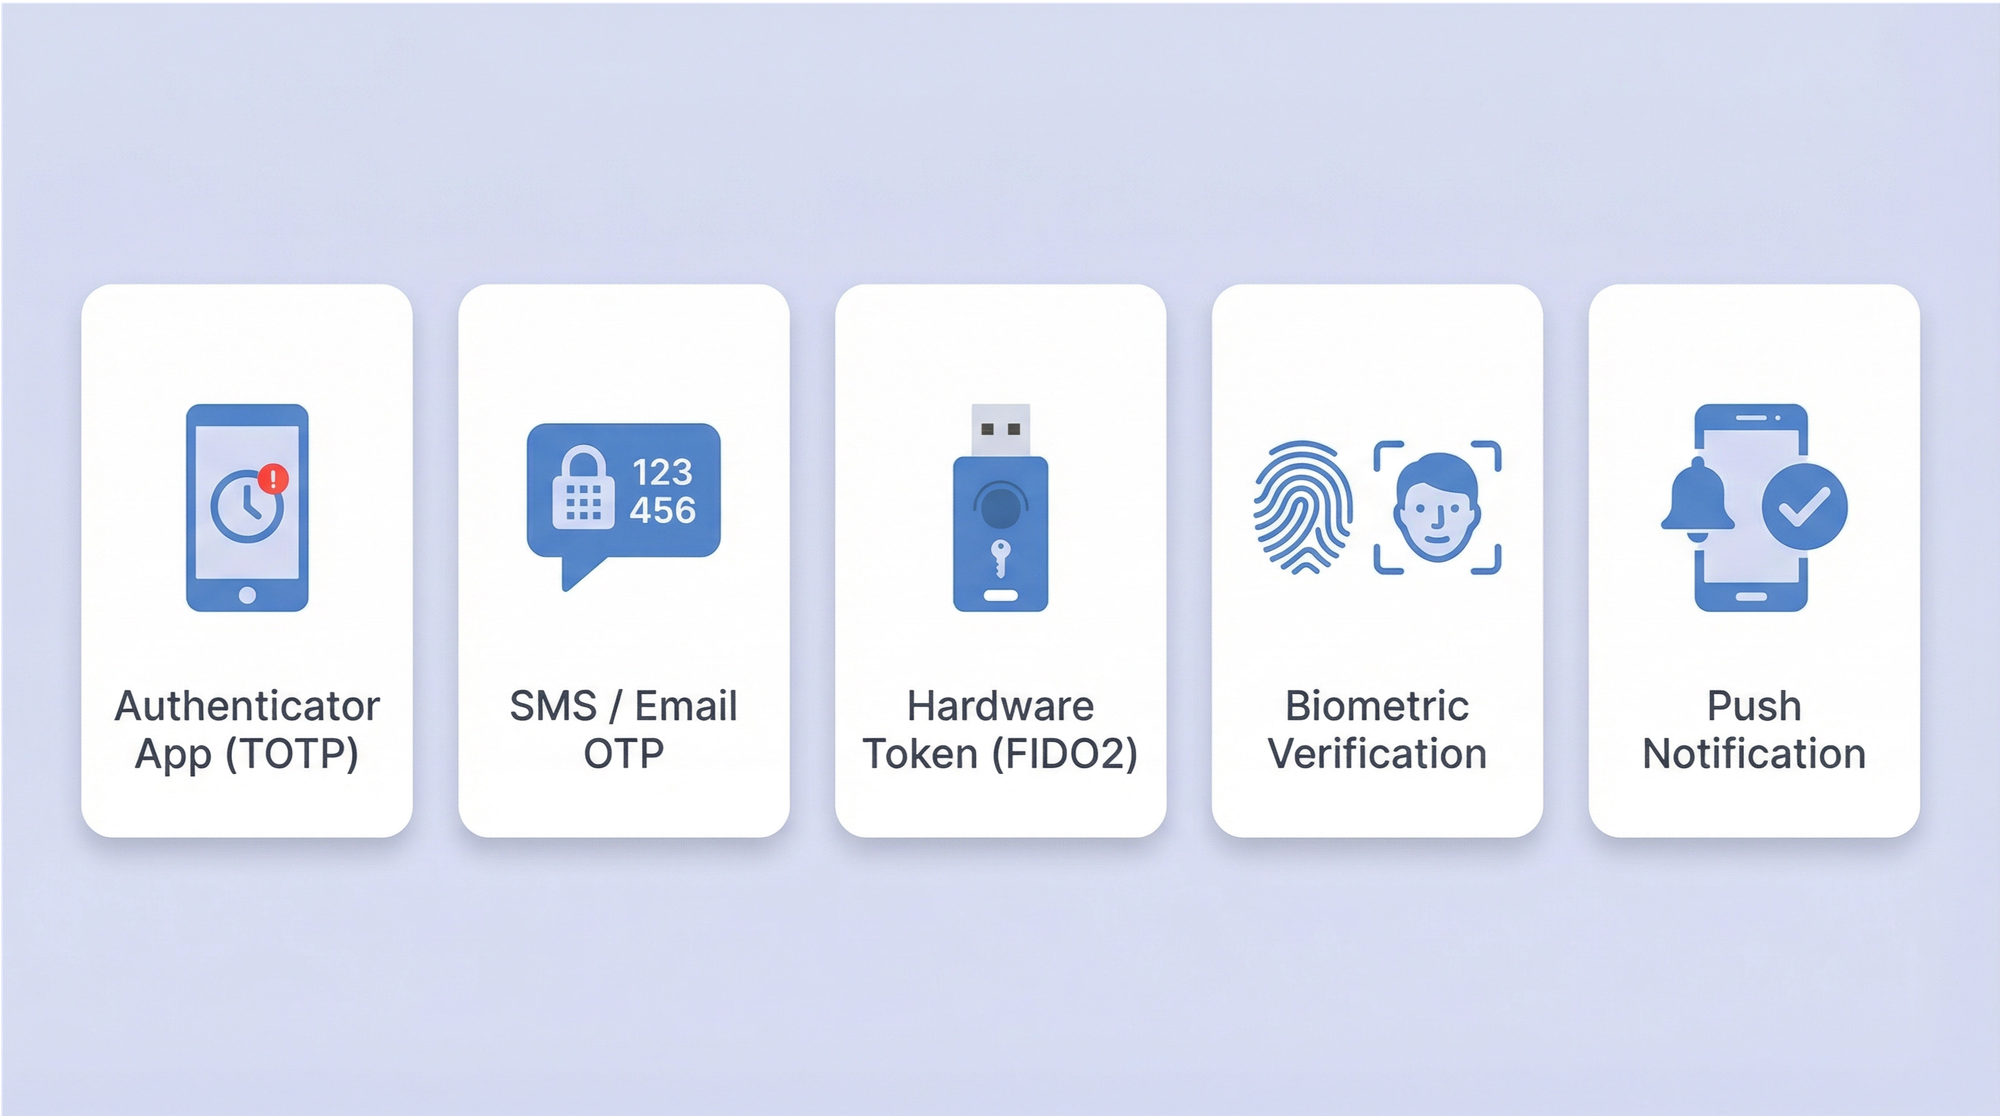
Nicht alle MFA ist gleichwertig. SMS-basierte Einmalpasswörter sind anfällig für SIM-Swapping und SS7-Angriffe. Phishing-resistente MFA — FIDO2/WebAuthn-Hardware-Sicherheitsschlüssel oder Passkey-basierte Authentifizierung — bietet wesentlich stärkeren Schutz.
Priorisieren Sie MFA für privilegierte Konten, Remote-Zugriff und jedes System, das sensible Daten verarbeitet. Erweitern Sie sie im Laufe der Zeit auf alle Systeme, wobei Sie einen risikobasierten Rollout verwenden, um die Change-Management-Last zu bewältigen.
4. Setzen Sie Single Sign-On ein, um Passwort-Wildwuchs zu reduzieren
Single Sign-On (SSO) reduziert die Anzahl der einzelnen Anmeldedaten, die Mitarbeiter verwalten müssen. Weniger Passwörter bedeuten weniger Wiederverwendung, weniger schwache Entscheidungen und eine kleinere Angriffsfläche für anmeldedatenbasierte Angriffe. Es zentralisiert auch die Authentifizierungs-Governance — was die Durchsetzung starker Richtlinien und den Widerruf von Zugriff beim Offboarding vereinfacht.
SSO ist kein Ersatz für MFA; es ist eine Ergänzung. Kombinieren Sie SSO mit Phishing-resistenter MFA, um den vollen Nutzen zu erzielen: zentralisierte Authentifizierung mit starkem Zwei-Faktor-Schutz. Für Organisationen, die Azure AD / Entra ID oder ähnliche Identitätsanbieter verwenden, wird die SSO-Integration mit SAML oder OAuth in der Regel von modernen SaaS-Anwendungen gut unterstützt.
5. Verbieten Sie Passwortwiederverwendung und setzen Sie Verlaufsrichtlinien durch
78 % der Benutzer verwenden Passwörter über mehrere Konten hinweg wieder. Passwortwiederverwendung ist der primäre Enabler für Credential-Stuffing-Angriffe: Angreifer nehmen Anmeldedaten aus einem Datenleck und testen sie systematisch bei anderen Diensten.
Setzen Sie eine Passwortverlaufsrichtlinie durch, die mindestens 10–24 vorherige Passwörter erfordert, bevor eine Anmeldedaten wiederverwendet werden kann. Das Ändern von Password1 zu Password2 ist kein neues Passwort — die Richtliniendurchsetzung sollte triviale Variationen berücksichtigen.
6. Eliminieren Sie willkürliche Passwortablaufrichtlinien
Erzwungene 60- oder 90-Tage-Rotationen sind kontraproduktiv. Benutzer reagieren vorhersehbar: Sie nehmen triviale Änderungen vor (eine Zahl anhängen, den ersten Buchstaben großschreiben), schreiben Passwörter auf Haftnotizen oder wechseln durch einen kleinen Satz auswendig gelernter Anmeldedaten. NIST Rev. 4 lehnt diese Praxis explizit ab.
Das Ersatzmodell ist der kompromittierungsgesteuerte Ablauf: Passwörter werden nur geändert, wenn es Hinweise auf eine Kompromittierung gibt, ausgelöst durch kontinuierliches Anmeldedaten-Monitoring.
7. Wenden Sie strengere Kontrollen auf privilegierte Konten an
Privilegierte Konten — Domain-Administratoren, Datenbankadministratoren, Root-Accounts, Cloud-Infrastruktur-Accounts — sind die wertvollsten Ziele in jeder Unternehmensumgebung. 72 % der Führungskräfte in den USA berichten, in den letzten 18 Monaten Ziel mindestens einer Cyberattacke gewesen zu sein. Privilegierte Anmeldedaten sind das primäre Ziel bei den meisten gezielten Angriffen.
Privileged Access Management (PAM)-Kontrollen für diese Konten sollten umfassen: Speicherung in einem dedizierten PAM-Tresor mit Credential-Injection (Benutzer sehen niemals das Rohpasswort), automatisierte Rotation nach jeder Verwendung für die sensibelsten Systeme, vollständige Sitzungsaufzeichnung und Genehmigungsworkflows, die vor Zugriffserteilung eine Begründung erfordern.
8. Verwalten Sie nicht-menschliche Identitäten und Service-Account-Passwörter
Dies ist der am meisten vernachlässigte Bereich in der Passwortverwaltung von Unternehmen. Service-Accounts, API-Schlüssel, RPA-Bot-Anmeldedaten, CI/CD-Pipeline-Secrets und Anwendung-zu-Anwendung-Authentifizierungs-Tokens übersteigen in den meisten Unternehmensumgebungen inzwischen die Anzahl der menschlichen Identitäten. Diese Anmeldedaten sind typischerweise statisch, langlebig, weit verbreitet und in Konfigurationsdateien oder Quellcode gespeichert — was sie zu bevorzugten Zielen macht.
Best Practices für nicht-menschliche Identitäten (NHIs): Verwenden Sie einen Secrets Manager, um NHI-Anmeldedaten automatisch zu speichern und zu rotieren; implementieren Sie Just-in-Time-Provisionierung für Service-Accounts; eliminieren Sie hartcodierte Anmeldedaten aus dem Quellcode durch automatisiertes Scanning; auditieren Sie alle NHI-Anmeldedaten vierteljährlich; und wenden Sie das Least-Privilege-Prinzip an — Service-Accounts sollten nur Zugriff auf die spezifischen Ressourcen haben, die sie benötigen, nicht mehr.
Hartcodierte Anmeldedaten im Quellcode sind ein dauerhaftes und ernstes Risiko. Automatisierte Scanning-Tools, die in CI/CD-Pipelines integriert sind, können diese abfangen, bevor sie in die Produktion gelangen. Dies ist in einem ausgereiften Sicherheitsprogramm nicht optional.
Die meisten Organisationen betreiben am Ende zwei separate Tools: einen Passwort-Manager für Mitarbeiter und einen Secrets Manager für DevOps- und Engineering-Teams. Passwork deckt beides innerhalb einer einzigen Plattform ab.
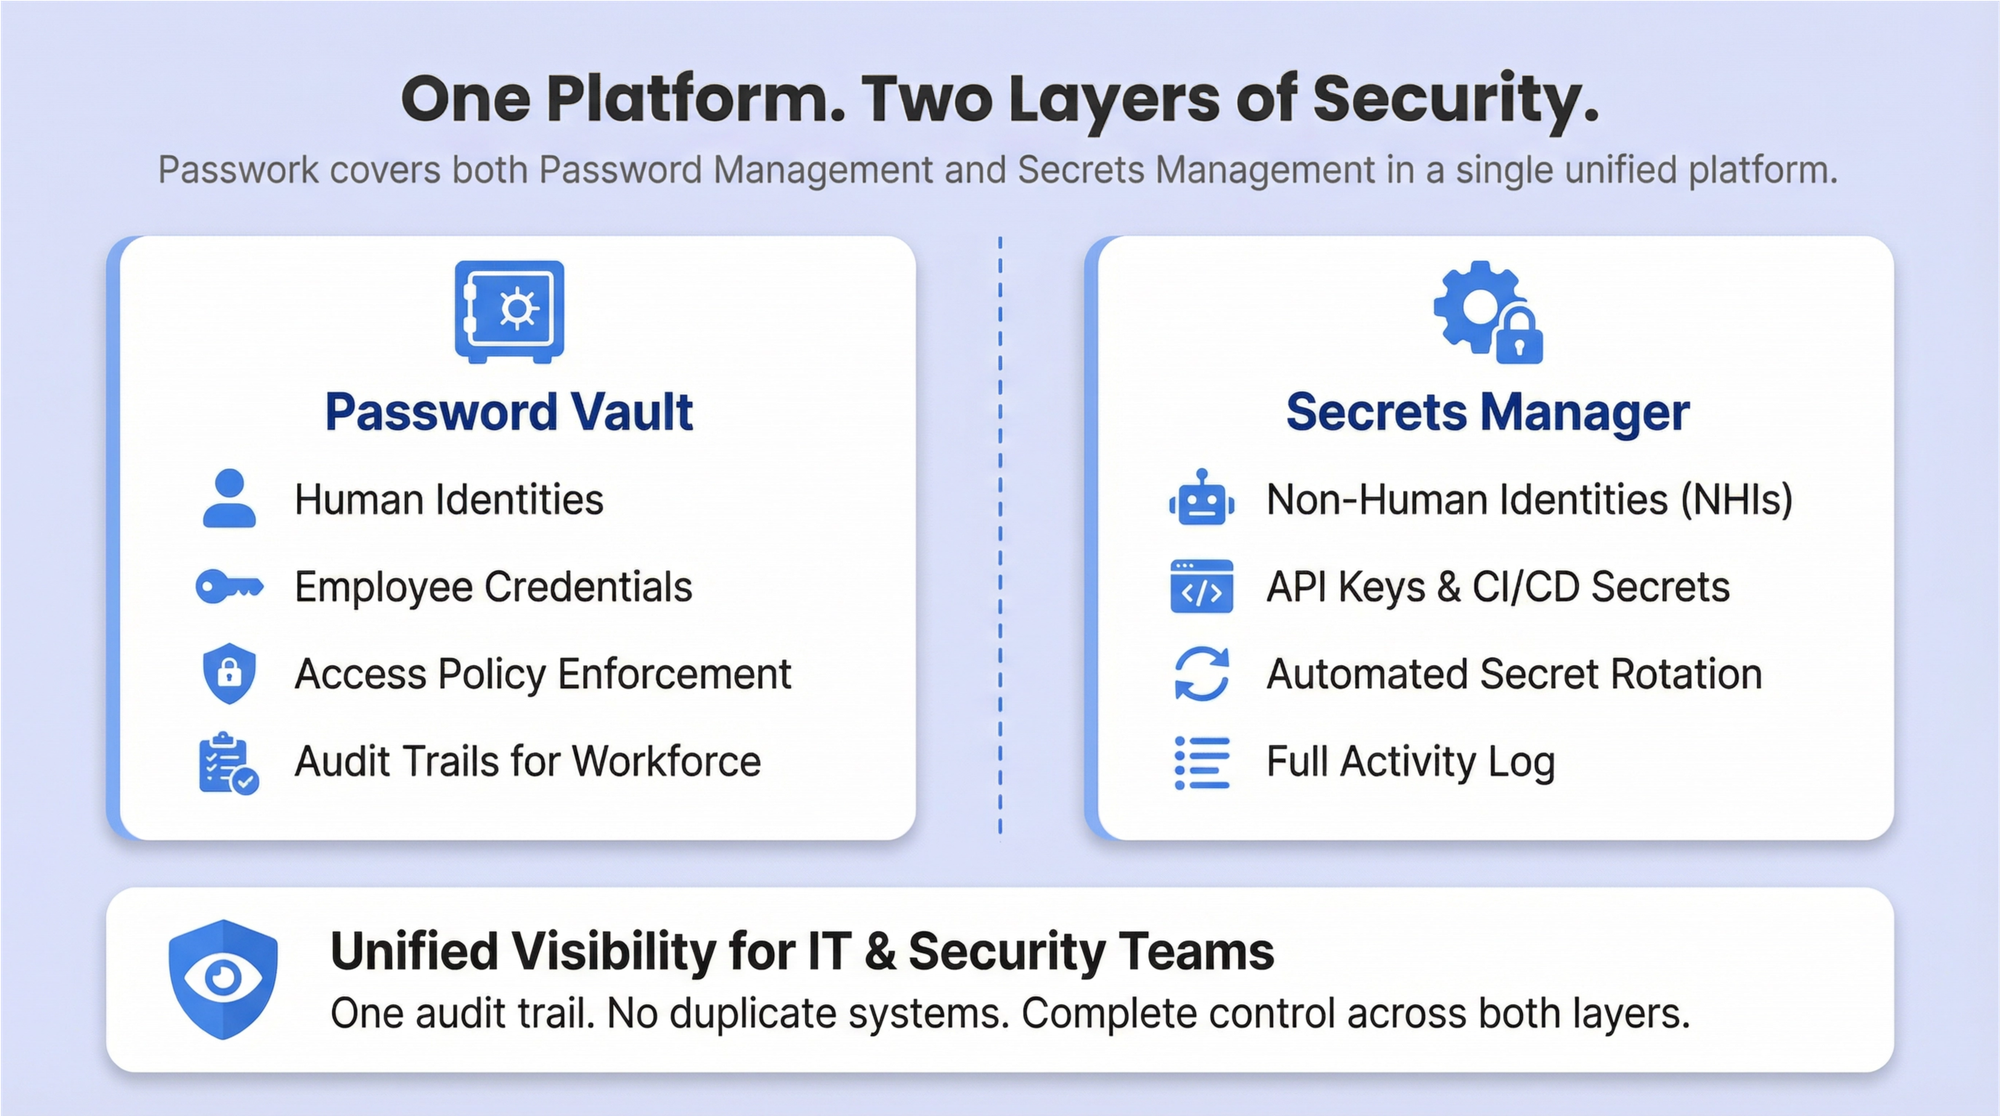
Der Passwort-Tresor verwaltet menschliche Identitäten — Speicherung von Anmeldedaten, Durchsetzung von Zugriffsrichtlinien und Bereitstellung von Audit-Trails für die allgemeine Belegschaft. Der Secrets Manager verwaltet NHIs — API-Schlüssel, Service-Account-Anmeldedaten, CI/CD-Pipeline-Secrets und Zertifikate — mit automatisierter Rotation, Zugriffskontrolle und einem vollständigen Aktivitätsprotokoll. IT- und Sicherheitsteams erhalten einheitliche Transparenz über beide Ebenen, ohne zwei separate Systeme zu verwalten oder zwei separate Audit-Trails abzugleichen.
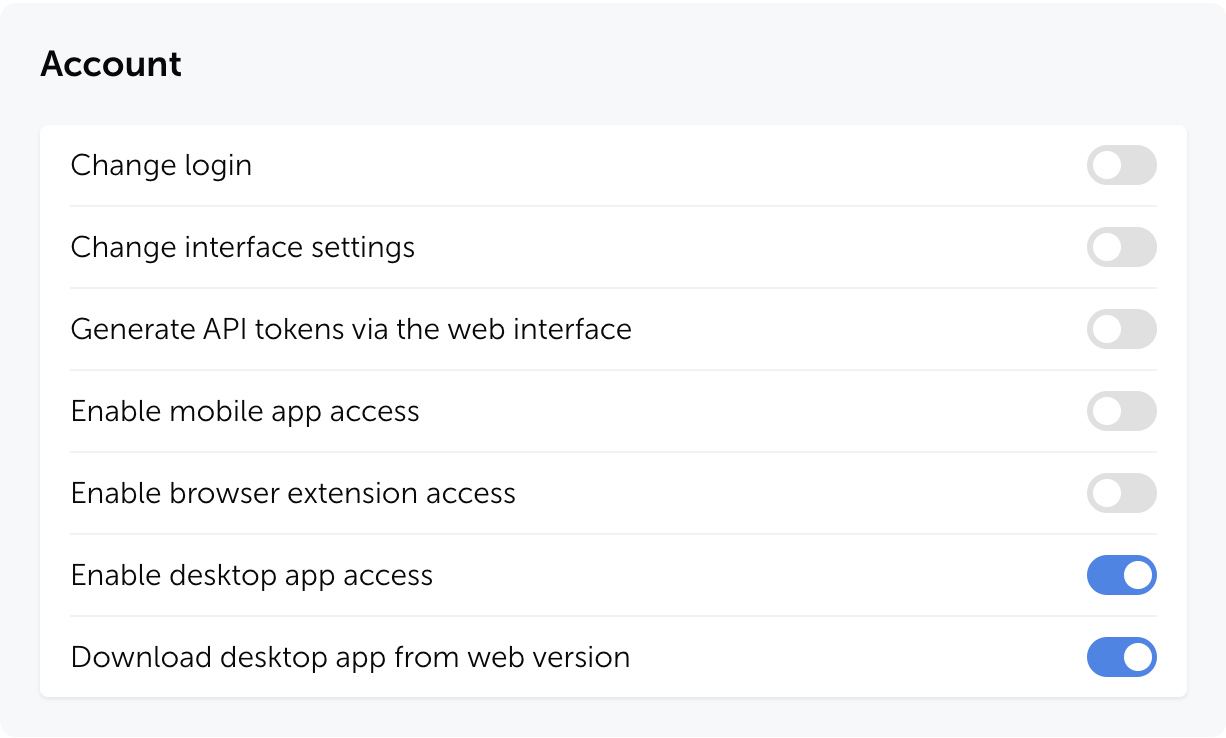
9. Setzen Sie das Prinzip der geringsten Rechte durch
Jeder Benutzer — ob menschlich oder nicht-menschlich — sollte den minimalen Zugriff haben, der zur Erfüllung seiner Funktion erforderlich ist. Das Least-Privilege-Prinzip begrenzt die laterale Bewegung, wenn Anmeldedaten kompromittiert werden: Ein Angreifer, der die Anmeldedaten eines Entwicklers erlangt, sollte nicht in der Lage sein, Produktionsdatenbanken oder Domain-Controller zu erreichen.
Implementieren Sie rollenbasierte Zugriffskontrolle (RBAC) und überprüfen Sie Zugriffsrechte vierteljährlich. Zugriffsakkumulation über die Zeit — bei der Benutzer Berechtigungen aus früheren Rollen behalten — ist ein häufiger Befund bei Sicherheitsaudits. Just-in-Time-Zugriffsbereitstellung eliminiert stehende Privilegien für sensible Systeme vollständig und erfordert, dass Benutzer zeitlich begrenzten Zugriff anfordern, der automatisch widerrufen wird, wenn das Zeitfenster abläuft.
In Passwork wird der Zugriff auf Tresore und Ordner pro Benutzer oder Gruppe konfiguriert — jede Person sieht nur die Anmeldedaten, die ihre Rolle erfordert. Administratoren können Berechtigungen auf Tresor-, Ordner- oder einzelner Passwortebene feinabstimmen und den Zugriff für ganze Teams über Gruppen verwalten, anstatt Rechte einzeln pro Konto anzupassen. Wenn ein Benutzer die Rolle wechselt, wird der Zugriff an einer Stelle aktualisiert — keine verbleibenden Berechtigungen zurückgelassen.
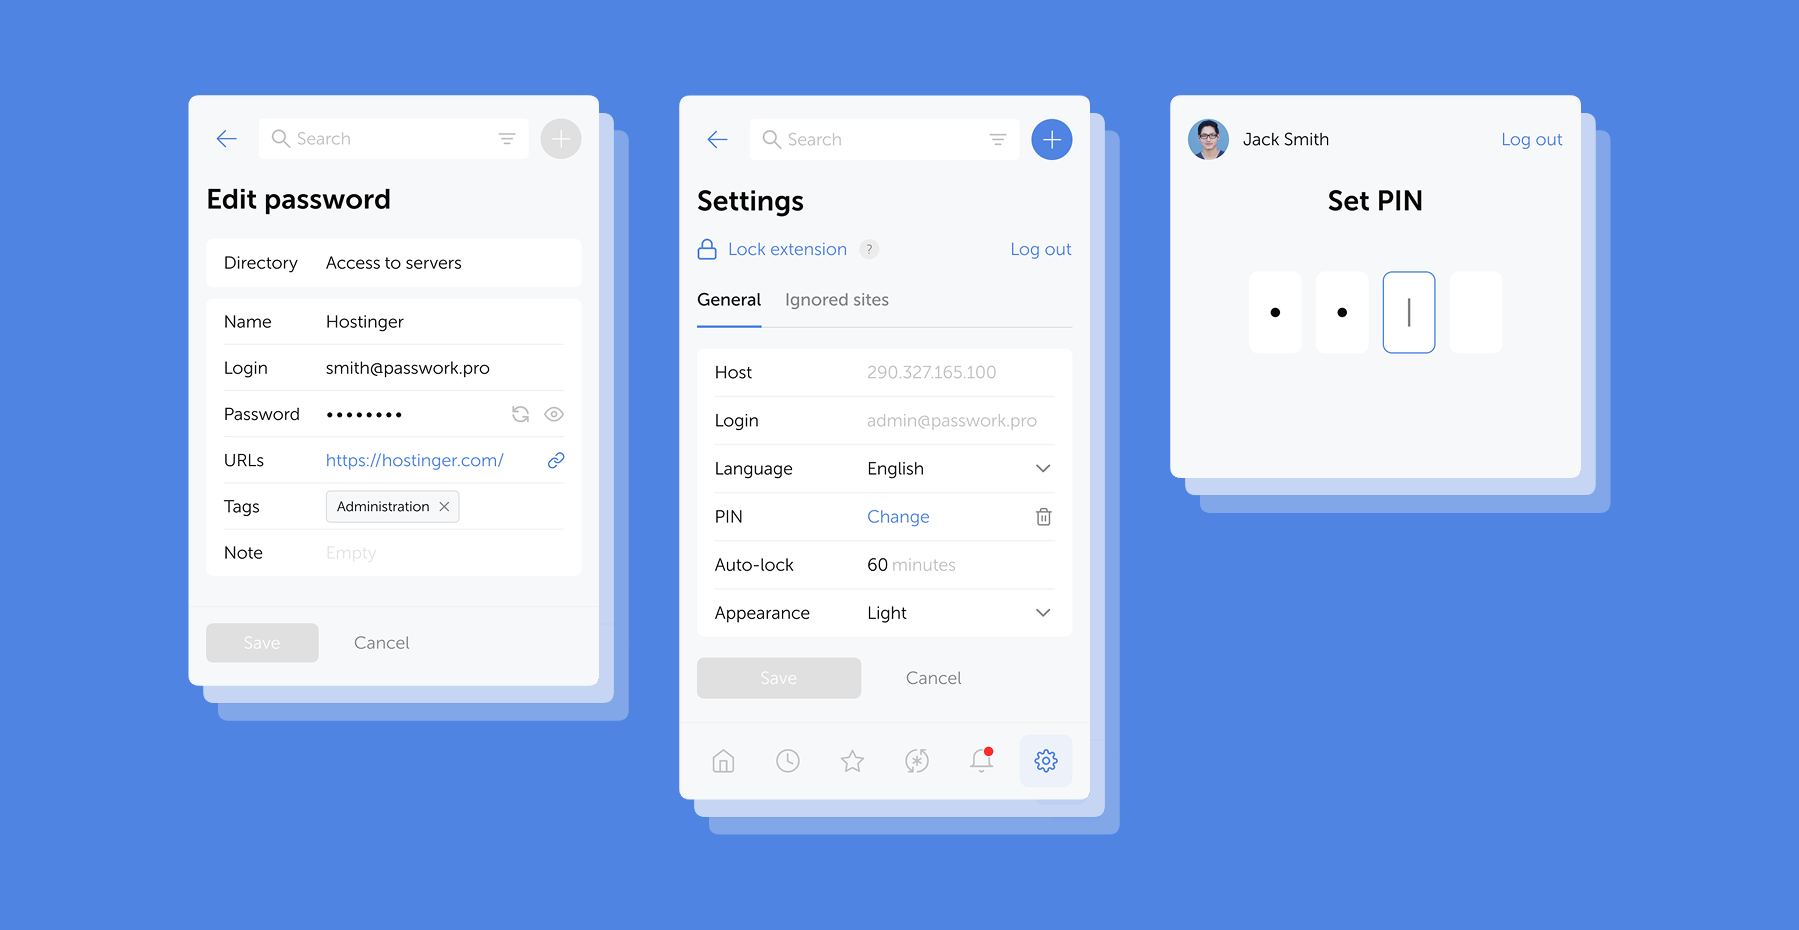
10. Etablieren Sie eine klare Passwortrichtlinie und kommunizieren Sie diese
Ein Passwortrichtliniendokument, das auf einem gemeinsamen Laufwerk liegt und einmal beim Onboarding überprüft wird, ist keine Richtlinie — es ist eine Formalität. Wirksame Richtlinien werden wiederholt kommuniziert, klar erklärt und wo immer möglich technisch durchgesetzt.
Die Richtlinie sollte abdecken: Mindestlänge (15+ Zeichen), Ermutigung zu Passphrasen, verbotene Muster (persönliche Informationen, Wörterbuchbegriffe, Firmenname, sequentielle Zeichenfolgen), MFA-Anforderungen, Passwort-Manager-Pflicht, Verbot der Weitergabe von Anmeldedaten und Verfahren zur Vorfallmeldung. Erklären Sie die Begründung hinter jeder Anforderung.
Benutzer, die verstehen, warum eine Regel existiert, befolgen sie eher — und melden eher Anomalien, wenn sie diese bemerken.
11. Sichern Sie den Onboarding- und Offboarding-Prozess
Das Onboarding neuer Mitarbeiter ist eine beständige Schwachstelle. Temporäre Anmeldedaten, die per Klartext-E-Mail zugestellt werden, Standardpasswörter, die Benutzer nie ändern, und Konten, die mit übermäßigem Zugriff bereitgestellt werden, „um später angepasst zu werden", sind alles gängige Fehlermuster. Temporäre Passwörter sollten über einen sicheren Kanal zugestellt werden, und Systeme sollten beim ersten Login eine Änderung erzwingen.
Offboarding ist ebenso kritisch und zeitkritischer. Alle Konten müssen innerhalb von Stunden nach dem Ausscheiden eines Mitarbeiters deaktiviert oder gelöscht werden — nicht Tage, nicht „wenn die IT dazu kommt". Gemeinsam genutzte Anmeldedaten, auf die der ausscheidende Mitarbeiter Zugriff hatte, müssen sofort rotiert werden. Versäumnisse hier sind eine dokumentierte Ursache für Insider-Bedrohungsvorfälle, einschließlich Fällen, in denen ehemalige Mitarbeiter monatelang nach ihrem Ausscheiden weiterhin Zugriff behielten.
12. Richten Sie Passwortpraktiken an relevanten Compliance-Frameworks aus
Verschiedene Branchen stehen vor unterschiedlichen regulatorischen Anforderungen, und Passwortrichtlinien werden in den meisten wichtigen Frameworks explizit behandelt — oder implizit gefordert. Die Compliance-Mapping-Tabelle im nächsten Abschnitt bietet eine strukturierte Referenz. Mindestens sollten Organisationen identifizieren, welche Frameworks für ihre Umgebung gelten, und überprüfen, ob ihre Passwortrichtlinie die strengste anwendbare Anforderung erfüllt.
Compliance-Ausrichtung ist nicht nur eine rechtliche Verpflichtung. Frameworks wie PCI DSS v4.0, HIPAA und ISO 27001:2022 repräsentieren akkumuliertes Branchenwissen darüber, welche Kontrollen tatsächlich Risiken reduzieren. Sie als Mindeststandard und nicht als Obergrenze zu behandeln, ist ein vernünftiger Ausgangspunkt.
Compliance-Mapping: Passwortanforderungen nach Framework
| Framework | Mindestlänge | MFA erforderlich | Ablauf | Audit-Logs |
|---|---|---|---|---|
| NIST SP 800-63B Rev. 4 (2025) | 15 Zeichen (einziger Authentifikator) | Empfohlen (AAL2+) | Nur bei Kompromittierung | Empfohlen |
| PCI DSS v4.0 | 12 Zeichen (erhöht von 7) | Erforderlich für CDE-Zugriff | Alle 90 Tage (oder risikobasiert) | Erforderlich |
| HIPAA | Nicht spezifiziert (angemessen) | Empfohlen | Regelmäßige Überprüfung | Erforderlich |
| ISO 27001:2022 | Nicht spezifiziert (risikobasiert) | Empfohlen | Risikobasiert | Erforderlich |
| SOC 2 Type II | Nicht spezifiziert (angemessen) | Empfohlen | Risikobasiert | Erforderlich |
| GDPR | Nicht spezifiziert (angemessen) | Empfohlen | Risikobasiert | Erforderlich |
Passwortverwaltung in Unternehmen vs. Privileged Access Management: Wichtige Unterschiede
Viele Organisationen verwenden „Passwort-Manager" und „PAM" synonym. Sie sind verwandt, aber unterschiedlich, und ihre Verwechslung führt zu Lücken in der Abdeckung.
Enterprise Password Management (EPM) adressiert die allgemeine Belegschaft: Speicherung von Anmeldedaten, Durchsetzung von Richtlinien, Aktivierung von Self-Service-Passwortzurücksetzung (SSPR) und Bereitstellung von Audit-Trails für alle organisatorischen Konten. Privileged Access Management (PAM) adressiert eine spezifische, hochriskante Teilmenge: administrative Konten, Service-Accounts und alle Anmeldedaten, die die Systemintegrität oder Datenvertraulichkeit in großem Maßstab beeinflussen können.
| Dimension | Enterprise Password Management (EPM) | Privileged Access Management (PAM) |
|---|---|---|
| Umfang | Alle Mitarbeiter, alle Konten | Privilegierte Benutzer, Admin-Konten, Service-Accounts |
| Primärer Anwendungsfall | Speicherung von Anmeldedaten, Richtliniendurchsetzung, SSPR | Credential Vaulting, Sitzungsaufzeichnung, Just-in-Time-Zugriff |
| Sichtbarkeit der Anmeldedaten | Benutzer kennen ihre Passwörter | Anmeldedaten werden injiziert — Benutzer sehen nie Rohpasswörter |
| Sitzungsaufzeichnung | Typischerweise nicht enthalten | Kernfunktion |
| Rotation | Benutzerverwaltet oder richtliniengesteuert | Automatisiert, einschließlich Rotation nach Nutzung |
| Compliance-Fokus | Allgemeine Passworthygiene | Regulatorische Audit-Trails, Monitoring privilegierter Aktivitäten |
Ausgereifte Unternehmen benötigen beides. EPM verwaltet die 95 % der Konten, die regulären Mitarbeitern gehören; PAM verwaltet die 5 %, die die Organisation zum Absturz bringen können, wenn sie kompromittiert werden. Sie sind komplementäre Kontrollen, keine konkurrierenden Produkte.
Fazit
Best Practices für Passwortverwaltung in Unternehmen 2026 erfordern ein mehrschichtiges Programm — kein Richtliniendokument. Die Kombination aus einem zentralen Anmeldedaten-Tresor, NIST SP 800-63B Rev. 4-konformen Richtlinien, Phishing-resistenter MFA, kontinuierlichem Anmeldedaten-Monitoring und dedizierten Kontrollen für privilegierte Konten und nicht-menschliche Identitäten repräsentiert den aktuellen Stand der Praxis für Organisationen, die Anmeldedatensicherheit ernst nehmen.
Die KI-Bedrohung ist real und beschleunigt sich. Wenn 85,6 % der gängigen Passwörter in unter 10 Sekunden geknackt werden können, gibt es keinen Spielraum für schwache Richtlinien. Die 16 Milliarden Passwörter, die 2025 geleakt wurden, befinden sich bereits in Angreifer-Wortlisten — und Credential-Stuffing-Tools werden sie automatisch, in großem Maßstab und ohne menschliches Eingreifen gegen Ihre Systeme testen.
Die Organisationen, die Passwortverwaltung als lebendiges Programm behandeln — überprüft anhand neuer Bedrohungsdaten, aktualisiert bei Standardänderungen, durchgesetzt durch Tooling statt Vertrauen — sind wesentlich besser gegen anmeldedatenbasierte Angriffe positioniert als diejenigen, die sich auf Richtlinien verlassen, die vor der Ära des KI-Crackings geschrieben wurden.
Beginnen Sie hier: Auditieren Sie Ihre aktuellen Passwortrichtlinien gegen NIST SP 800-63B Rev. 4. Identifizieren Sie Lücken bei Längenanforderungen, Blocklist-Screening, Ablaufrichtlinien und Kontrollen für privilegierte Konten. Priorisieren Sie die 15 Praktiken in diesem Leitfaden basierend auf dem Risikoprofil Ihrer Organisation und den Compliance-Anforderungen — und behandeln Sie das Ergebnis als Programm, nicht als Projekt.
Wenn Sie nach Infrastruktur suchen, um dieses Programm durchzusetzen, ist Passwork ein Self-hosted Passwort-Manager, der genau für diese Umgebung konzipiert wurde. Er gibt IT-Teams einen zentralen verschlüsselten Tresor, granulare rollenbasierte Zugriffskontrolle, ein Security-Dashboard, das schwache und potenziell kompromittierte Anmeldedaten markiert, und ein vollständiges Aktivitätsprotokoll für Audits — alles läuft auf Ihren eigenen Servern, unter Ihrer Kontrolle. Das Tooling wird das Programm nicht ersetzen, aber es wird das Programm durchsetzbar machen.
Übertragen Sie Ihre verbleibende Abonnementlaufzeit und erhalten Sie 20 % Rabatt auf Ihre erste Verlängerung.
Häufig gestellte Fragen

Was ist die von NIST empfohlene Passwortrichtlinie für Unternehmen im Jahr 2025?
NIST SP 800-63B Rev. 4, veröffentlicht im August 2025, fordert ein Minimum von 15 Zeichen, wenn ein Passwort der einzige Authentifikator ist. Organisationen dürfen keine willkürlichen Kompositionsregeln auferlegen (obligatorische Symbole, Großbuchstaben, Zahlen). Alle neuen oder geänderten Passwörter müssen gegen eine Blocklist bekannter kompromittierter Anmeldedaten geprüft werden. Passwörter sollten nur bei Hinweisen auf eine Kompromittierung geändert werden — nicht nach einem festen Zeitplan. Systeme müssen Unicode-Zeichen und Leerzeichen akzeptieren und Passwörter von mindestens 64 Zeichen unterstützen.
Wie oft sollten Unternehmenspasswörter geändert werden?
Gemäß NIST Rev. 4: nur wenn es Hinweise auf eine Kompromittierung gibt. Routinemäßige erzwungene 60- oder 90-Tage-Rotationen werden explizit abgelehnt, da sie vorhersehbare, schwächere Passwörter erzeugen, ohne die Sicherheit zu verbessern. Dieses Modell erfordert kontinuierliches Anmeldedaten-Monitoring, um operativ tragfähig zu sein — ohne es haben Organisationen keinen Mechanismus, um Kompromittierungen zu erkennen und gezielte Zurücksetzungen auszulösen. Ausnahme: Privilegierte Konten und Service-Account-Anmeldedaten sollten weiterhin nach einem definierten Zeitplan rotiert werden, oder nach jeder Verwendung für die sensibelsten Systeme.
Was ist der Unterschied zwischen einem Enterprise Password Manager und PAM?
Enterprise Password Management (EPM) umfasst alle Mitarbeiter und alle Konten — Speicherung von Anmeldedaten, Richtliniendurchsetzung, Audit-Trails und Self-Service-Zurücksetzung. Privileged Access Management (PAM) umfasst eine spezifische Teilmenge: administrative und Service-Konten, mit zusätzlichen Kontrollen einschließlich Sitzungsaufzeichnung, Credential-Injection (Benutzer sehen nie Rohpasswörter), Just-in-Time-Zugriff und automatisierter Rotation. Beide werden in einem ausgereiften Sicherheitsprogramm benötigt. EPM verwaltet die allgemeine Belegschaft; PAM verwaltet die Konten, die katastrophalen Schaden verursachen können, wenn sie kompromittiert werden.
Wie verwaltet man Service-Account-Passwörter in einem Unternehmen?
Verwenden Sie einen dedizierten Secrets Manager oder PAM-Tresor für alle Service-Account-Anmeldedaten. Implementieren Sie automatisierte Rotation nach einem definierten Zeitplan — oder dynamisch unter Verwendung von kurzlebigen Anmeldedaten, die pro Sitzung generiert und nie wiederverwendet werden. Scannen Sie allen Quellcode und alle Konfigurationsdateien auf hartcodierte Anmeldedaten mit automatisierten Tools, die in die CI/CD-Pipeline integriert sind. Wenden Sie Least-Privilege-Prinzipien an: Service-Accounts sollten nur Zugriff auf die spezifischen Ressourcen haben, die sie benötigen. Auditieren Sie alle Service-Account-Zugriffe vierteljährlich und dekommissionieren Sie nicht mehr verwendete Konten.
Wie ergänzt MFA die Passwortverwaltung in Unternehmen?
MFA adressiert die grundlegende Einschränkung von Passwörtern: Sie können gestohlen, erraten oder geknackt werden, ohne dass der Angreifer jemals das Zielsystem berührt. Selbst ein starkes, einzigartiges Passwort bietet keinen Schutz, sobald es in den Händen eines Angreifers ist. MFA stellt sicher, dass gestohlene Anmeldedaten nicht für den Zugriff ausreichen — der Angreifer benötigt auch den zweiten Faktor, der typischerweise gerätegebunden und zeitlich begrenzt ist. Die Kombination aus einer starken Passwortrichtlinie (durchgesetzt durch EPM) und Phishing-resistenter MFA (FIDO2/WebAuthn) schließt die Lücke, die jede einzelne Kontrolle für sich offen lässt.
Was sind die Compliance-Anforderungen für Passwortverwaltung in Unternehmen?
Die Anforderungen variieren je nach Framework. PCI DSS v4.0 schreibt 12-Zeichen-Mindestlängen und MFA für den Zugriff auf die Karteninhaberdaten-Umgebung vor. HIPAA erfordert „angemessene und sachgemäße" Schutzmaßnahmen mit Audit-Kontrollen. ISO 27001:2022 und SOC 2 Type II erfordern beide risikobasierte Zugriffskontrollen und Audit-Logs. Die DSGVO erfordert „angemessene technische Maßnahmen" zum Schutz personenbezogener Daten. NIST SP 800-63B Rev. 4 ist am spezifischsten: 15-Zeichen-Mindestlängen, obligatorisches Blocklist-Screening, keine Kompositionsregeln und kompromittierungsgesteuerter Ablauf. Siehe die obige Compliance-Mapping-Tabelle für einen strukturierten Vergleich. Konsultieren Sie einen qualifizierten Compliance-Fachmann für Ihre spezifische regulatorische Situation.
Wie erstellt man eine Unternehmens-Passwortrichtlinie?
Beginnen Sie mit den anwendbaren Compliance-Frameworks für Ihre Branche und kartieren Sie deren Anforderungen. Legen Sie die NIST SP 800-63B Rev. 4-Richtlinien als technische Baseline darüber. Definieren Sie: Mindestlänge (15+ Zeichen), verbotene Muster, MFA-Anforderungen, Passwort-Manager-Pflicht, Weitergabeverbot, Service-Account-Handhabung und Verfahren zur Vorfallmeldung. Kombinieren Sie das Richtliniendokument mit technischer Durchsetzung — Richtlinien ohne Tooling sind aspirativ, nicht operativ. Kommunizieren Sie die Richtlinie beim Onboarding, in jährlichen Sicherheitsschulungen und wann immer sie sich ändert. Erklären Sie die Begründung hinter jeder Anforderung; Benutzer, die das Warum verstehen, werden eher compliant sein.

Best Practices für Passwortverwaltung in Unternehmen 2026
Wenn Ihre Passwortrichtlinie noch 90-Tage-Rotationen und acht Zeichen Mindestlänge vorschreibt, ist sie veraltet. Dieser Leitfaden behandelt Best Practices für die Passwortverwaltung in Unternehmen 2026: Richtlinien, privilegierte Konten, nicht-menschliche Identitäten, MFA und Compliance.